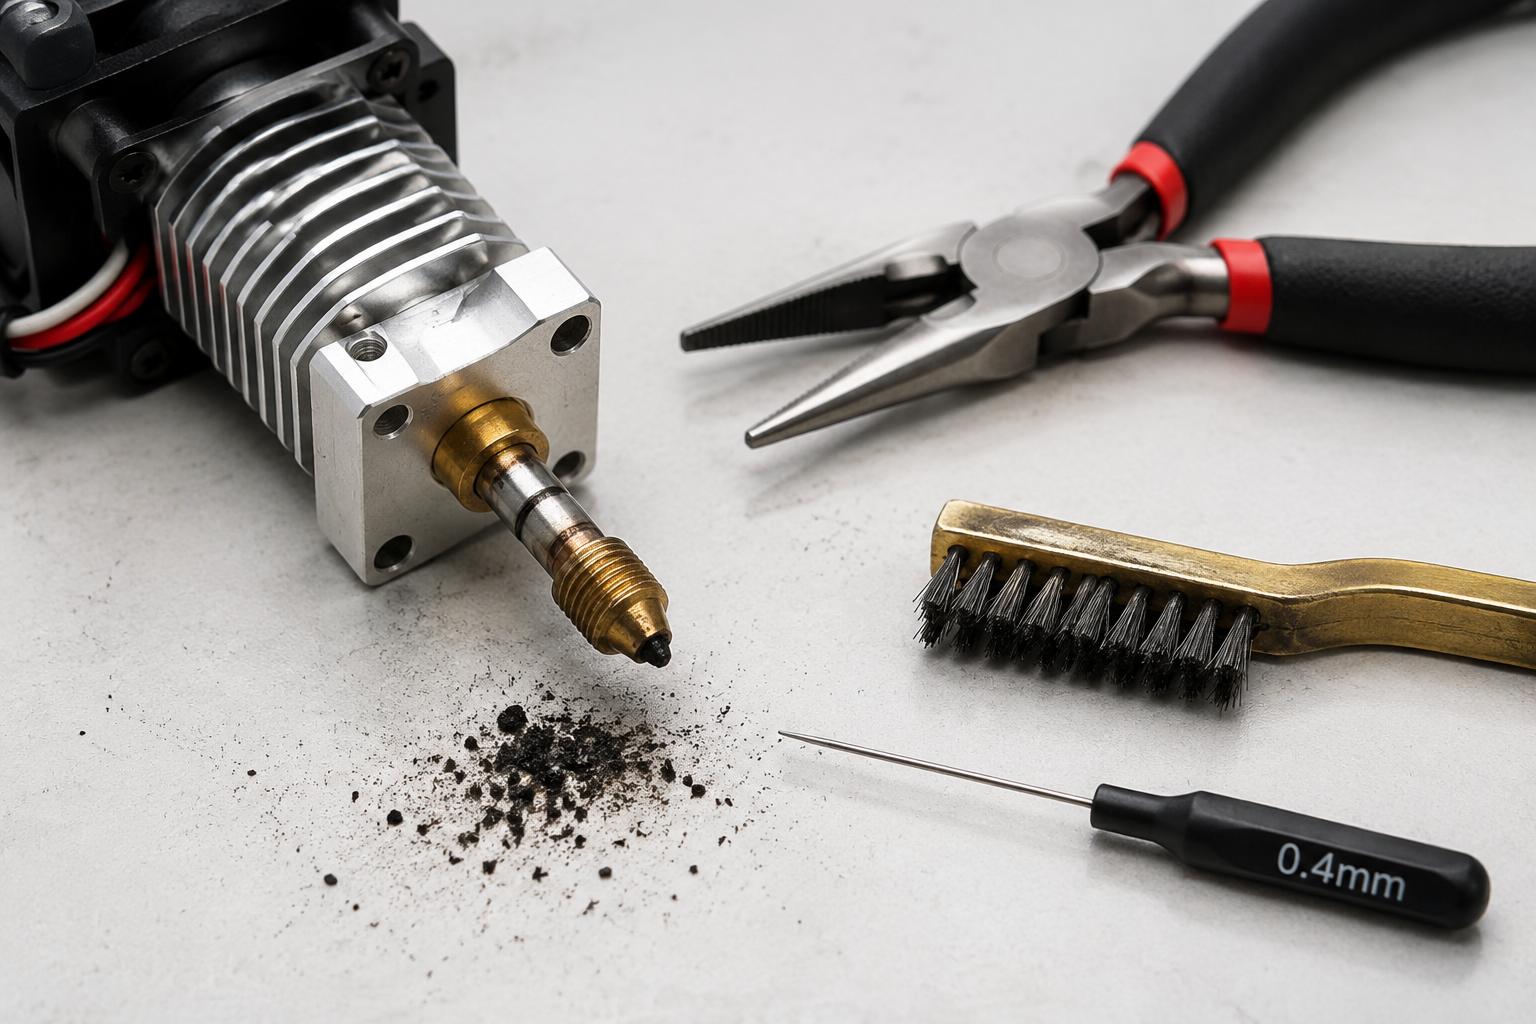
If your FDM printer suddenly stops extruding, leaves gaps, or makes grinding sounds, the issue is likely a clogged nozzle or worn PTFE tube. This guide shows you how to diagnose the root cause, what parts need replacing, and why a simple maintenance kit can restore print quality without a full overhaul.
What’s Happening — Symptoms in Detail
Your printer was running fine. Then, mid-print, the filament stopped coming out.
What you experience:
- The extruder motor clicks or skips steps — a repetitive tick-tick-tick sound.
- No filament emerges from the nozzle, even though the extruder gear is turning.
- You see a thin, wispy strand of plastic that breaks immediately.
- The printed part has gaps, under-extrusion, or a rough top surface.
- The nozzle may ooze filament when hot, but doesn’t push it out under pressure.
When it happens:
- Suddenly during a print — most common. The jam forms as debris builds up.
- After a filament change — especially if you switched from PLA to PETG without purging.
- On the first layer — the nozzle drags through the bed, ripping up adhesion.
- After a crash — the nozzle hit the print or bed, bending the heatbreak.
How it progresses:
- Gradual wear: Over time, you notice more stringing, blobs, then intermittent under-extrusion. Finally, a full jam.
- Sudden failure: A piece of filament breaks inside the hotend, or a foreign particle blocks the nozzle orifice.
Error codes on screen:
Most 3D printers don’t show specific codes, but the LCD may display “MINTEMP” if the thermistor is damaged, or “Extruder too cold” if the heater cartridge fails. If you see those, your hotend has a wiring issue alongside the clog.
How to Diagnose the Problem Step by Step
Tools needed:
- Allen wrenches (2.0mm, 2.5mm)
- Needle-nose pliers
- Nozzle cleaning needle (0.4mm)
- Small brass brush
- Calipers (digital preferred)
Quick check for beginners:
Check the filament path.
- Remove the filament from the extruder. Feed a new piece by hand while the hotend is at printing temperature.
- Normal: The filament comes out smoothly in a steady stream.
- Abnormal: It drips, curls, or doesn’t come out at all = partial or full clog.
Listen to the extruder motor.
- While the printer attempts to extrude, put your ear near the motor.
- Normal: A consistent whirring sound.
- Abnormal: Rapid clicking or grinding — the gear is slipping on the filament.
Detailed check for advanced users:
Perform a cold pull.
- Heat the nozzle to printing temperature, then set the hotend to 90°C (for PLA) or 120°C (for PETG).
- Pull the filament hard out of the nozzle. The end should have a cone shape with the full nozzle diameter.
- Normal: Clean cone, no black debris.
- Abnormal: Jagged tip, discolored, or broken off inside = carbonized plastic or PTFE tube gap.
Disassemble the hotend (if comfortable).
- Remove the nozzle, heatbreak, and PTFE tube.
- Normal: Inside the nozzle is clear and shiny.
- Abnormal: You find a dark, hardened plug, or the PTFE tube end is singed black.
Measure extruder steps (E-steps).
- Mark the filament 120mm above the extruder. Command 100mm extrusion. Measure the actual amount.
- Normal: 100 ± 2mm.
- Abnormal: Less than 90mm = clog or gear slip. More than 110mm = over-extrusion causing jams.
Why This Happens — Root Cause
The primary failure is thermal degradation of the filament inside the nozzle or heatbreak.
How it happens:
- The hotend heats plastic to its melting point. If the heatbreak (the thin metal tube between the heat block and heatsink) isn’t cooled properly, heat creeps up. The filament softens too early, expands, and jams against the cold side.
- PTFE tube (in Bowden-style printers like the Ender 3, anyCreality models) acts as a liner inside the heatbreak. Over time, the tube end chars and shrinks, creating a gap where molten plastic collects — that gap causes a block.
- Nozzle wear — brass nozzles get eroded by abrasive filaments (e.g., glow-in-the-dark, carbon fiber). The orifice enlarges, causing inconsistent extrusion, or a burr forms that catches filament.
Conditions that accelerate failure:
- High printing temperatures (above 250°C) degrade PTFE tubes and create carbon deposits.
- Retraction settings too high (over 6mm on Bowden) suck heat into the heatbreak, causing jams.
- Dusty filament — particles accumulate in the nozzle and solidify.
- Sudden cold pull without proper temperature — leaves broken filament inside.
Specific part numbers:
- Nozzle: MK8 standard 0.4mm brass (M6 thread)
- PTFE tube: 4mm OD, 2mm ID, length varies by printer (e.g., Ender 3: 40cm)
- Heatbreak: Standard aluminum or titanium for Creality CR-10 / Ender 3.
Models with known issues:
- Creality Ender 3 / Ender 3 Pro / Ender 3 V2 — stock PTFE tube inside heatbreak causes blockages after hundreds of hours.
- Prusa i3 MK3S+ — heatbreak cooling fan failure leads to jams.
- Anycubic Kobra — nozzle seating improperly causes leaks and clogs.
- Bambu Lab X1 Carbon — high-speed printing with low retraction can cause heat creep; the silicone sock must be intact to insulate.
Can You Fix It Yourself?
Difficulty: 2 out of 5
- No soldering, no firmware changes. Just mechanical disassembly and reassembly.
Time required:
- 30 minutes for a thorough clean and nozzle replacement.
- 1 hour if you also replace the PTFE tube and heatbreak.
Skill level needed:
- Basic: Use a screwdriver and Allen keys.
- Comfortable: Understand that brass is soft — don’t overtighten.
Risks:
- Burning yourself — the hotend operates at 200-260°C. Let it cool to room temperature before touching.
- Overtightening the nozzle — can crack the heat block. Use a torque of about 3 N·m (finger-tight plus 1/8 turn).
- Cross-threading the heatbreak — screw it in by hand first, then use a wrench.
- Damaging the thermistor or heater cartridge wires — be gentle when removing the silicone sock.
Tools required:
- Allen wrenches: 2.0mm and 2.5mm for the heatsink fan and hotend mount screws.
- Adjustable wrench or 7mm socket for nozzle removal.
- PTFE tube cutter (or sharp blade) if replacing the Bowden tube.
- Needle-nose pliers for pulling out stuck filament.
- Brass brush for cleaning the heat block.
- Replacement parts: Nozzle, PTFE tube, heatbreak (optional), and a small tube of thermal paste (for the heatbreak threads on all-metal hotends).
Cost Breakdown — DIY vs Professional
DIY cost (using available parts):
- Nozzle replacement: Use the 1Set High Precision 3D Printer Nozzle ($4.16). This pack includes multiple nozzles (typically 0.2, 0.4, 0.6mm) so you can switch sizes.
- Full maintenance kit: The 3D Printer Maintenance Kit 65ml Lubricant ($5.06) includes PTFE tube, nozzle cleaning needles, and grease (for linear rods). This is a complete refresh.
- Optional cleaning tool: The Centauri Carbon Nozzle Cleaner Kit 3D ($2.15) has a brass brush and cleaning rods — useful if you want to salvage the existing nozzle.
Total DIY cost: $4 to $7, plus maybe $2 for a replacement PTFE tube if not included in the kit.
Professional repair shop rates:
- Bench fee: $30–$50 just to look at it.
- Hotend cleaning and nozzle swap: $60–$80.
- Full hotend replacement: $100–$150.
When to skip DIY:
- If you don’t have a working printer to print a fan shroud or tool holder — you can still do this manually.
- If you’ve already stripped a nozzle thread — then you need a new heat block (another $10–$15 part).
- If you’re not comfortable handling small parts near a hotend — but this is considered entry-level repair.
Bottom line: DIY is 10x cheaper than professional service, and the parts cost less than a coffee.
Repair Process Overview
Step 1: Remove filament and cool down.
- Heat the hotend to 180°C (PLA) or 220°C (PETG). Use the Filament Unload command.
- Once the filament is out, let the hotend cool to room temperature. Unplug the printer from power.
Step 2: Disassemble the hotend.
- Remove the silicone sock carefully — it’s fragile.
- Unscrew the nozzle with a 7mm socket or adjustable wrench. Hold the heat block with another wrench to avoid twisting the heatbreak.
- Remove the PTFE tube from the top of the heatbreak. Pull it straight out. If stuck, heat the hotend slightly (100°C).
- Unscrew the heatbreak from the heatsink (use a 10mm wrench).
Step 3: Clean all parts.
- Wipe the heat block with a brass brush while hot (reheat to 100°C).
- Clean the inside of the heatbreak with a 0.4mm nozzle needle or a thin wire.
- Inspect the PTFE tube end: if charred, cut 5mm off with a sharp blade.
Step 4: Reassemble with new parts.
- Screw the new nozzle into the heat block until finger-tight. Then back it off one full turn.
- Insert the cleaned or new heatbreak into the heatsink. Tighten it.
- Insert the PTFE tube fully into the heatbreak until it bottoms out on the nozzle. Push down firmly.
- Now tighten the nozzle the remaining turn (while holding the heat block) to lock the tube in place.
Step 5: Reinstall the silicone sock and rewire.
- Make sure the thermistor and heater cartridge wires are clear of the fan.
- Plug the printer in.
Common mistakes to avoid:
- Not backing off the nozzle before inserting the PTFE tube — the tube won’t seat and will leak.
- Overtightening the nozzle — cracks the heat block.
- Forgetting to reinstall the silicone sock — heat loss causes under-extrusion.
- Kinking the heater wires — causes short circuit or “MINTEMP” error.
After the Repair — Testing & Verification
How to verify the repair worked:
- Cold pull test: Perform a cold pull (as in diagnosis step 3) with the new nozzle. The cone should be perfect.
- Extrude 50mm of filament at normal printing temperature. The stream should be straight and consistent — no curls or stringing.
- Print a test cube (20x20x20mm). The first layer should adhere without gaps. The top surface should be smooth.
What to watch for in the first few hours:
- Check for leaks: After 10 minutes of printing, inspect around the nozzle and heatbreak for oozing plastic. If you see any, you have a gap — tighten the nozzle while hot (use a wrench, hold the heat block).
- Monitor nozzle temperature: If the temperature fluctuates wildly (+/-5°C), the thermistor may have been bumped. Re-seat it or replace.
- Listen for clicking: Any extruder skipping within the first hour means the heatbreak tube isn’t seated correctly, or the nozzle is too close to the bed.
- Smell: A burning smell indicates the heatblock is too close to the fan or the PTFE tube is touching the nozzle directly — re-check assembly.
If the problem returns:
- Replace the entire hotend assembly ($15–$20 part) — but that’s rare if you did the maintenance properly.
- Calibrate E-steps and flow rate — over-extrusion can cause future clogs even with a clean nozzle.
Parts You’ll Need
Here are the parts that match this repair. Click the link to check the current price on AliExpress.
| Product | Price |
|---|---|
| Centauri Carbon Nozzle Cleaner Kit 3D… | $2.15 |
| 1Set High Precision 3D Printer Nozzle… | $4.16 |
| 3D Printer Maintenance Kit 65ml Lubri… | $5.06 |
Prices and availability are subject to change on AliExpress.