A failing printhead on your Epson L1800 can cause missing colors, horizontal banding, or complete print failure. This guide walks you through the exact symptoms, diagnostic steps, root causes, and repair options, including cost comparisons for DIY vs professional service.
What’s Happening — Symptoms in Detail
Exact symptoms you may see:
Missing colors or no output at all. Some users report that one or more colors disappear entirely from prints. The printer may still feed paper and make noise, but the page comes out blank or with only faint streaks.
Horizontal banding or streaking. Lines of missing ink appear consistently across the page. The banding pattern may match the printhead nozzle layout, often appearing in cyan, magenta, yellow, or black.
Error lights on the printer. The Epson L1800 uses a flashing pattern: an alternating orange and green power light signals a general service error. A red paper light blinking rapidly often points to a carriage or printhead jam.
Garbled or partial test prints. When you run a nozzle check from the driver, some nozzle patterns are completely white instead of filled with ink. The pattern may show only a few dots instead of continuous lines.
Printhead does not move freely. You may hear a grinding or clicking sound when the printer tries to initialize. The carriage might stop suddenly, or the printer reports an “ink pad” error even though the pads are clean.
Progression over time: Clogs often start small — a minor streak that gets worse over a few weeks. Electrical failures, on the other hand, happen suddenly after installing new ink or a power surge. Physical damage (from a crash or dropped object) is immediate and permanent.
This problem appears most often after: long idle periods (ink dries in nozzles), using third-party ink (particle clogs), or after physical shocks (moving the printer while the printhead is parked).
How to Diagnose the Problem Step by Step
Run a Nozzle Check from the Printer Driver.
- Open Epson L1800 printer settings, select “Maintenance” then “Nozzle Check.”
- If the check pattern shows missing segments or blank lines, the printhead is at least partially clogged.
- Normal: all lines are solid and continuous. Abnormal: any white gaps in the pattern.
Perform a Printhead Alignment.
- From the same maintenance menu, run “Printhead Alignment.”
- The printer will print several vertical lines. Normal: lines appear perfectly straight. Abnormal: lines are jagged or have offset gaps.
Listen to the Printer’s Initialization Sequence.
- Turn the printer on. Normal: a smooth whirring sound as the carriage moves side to side, then a soft clicking as it parks.
- Abnormal: grinding, repeated loud clicking, or the carriage stops mid-movement. This suggests a mechanical obstruction or seized printhead.
Check for Error Codes (LED Blink Patterns).
- Power light blinking orange/green alternately = carriage or printhead electrical fault (service required error).
- Paper light blinking red rapidly = paper jam or carriage lock. Clear any jam, then check printhead movement.
Advanced: Measure Resistivity on the Printhead Contacts.
- Tools needed: multimeter set to 200 ohm range, small flathead screwdriver, working gloves.
- Remove the printhead from the carriage and locate the ribbon cable contacts. Normal: resistance between adjacent common pins should be around 100–150 ohms. Abnormal: infinite resistance indicates a blown nozzle driver; near zero ohms indicates a short.
Physical Inspection of the Carriage and Dampers.
- Open the printer cover and manually slide the carriage left and right. Normal: it glides easily. Abnormal: it binds or stops at a specific point.
- Check the dampers (ink supply to the printhead). Normal: dampers are full of ink and flexible. Abnormal: cracked dampers leak ink onto the contacts, causing shorts.
Quick Check for Beginners:
- Turn the printer off, remove the power cord, wait 30 seconds. Plug back in and power on. If the error clears, it may have been a temporary glitch. If the problem returns immediately, proceed with the above steps.
Why This Happens — Root Cause
Why the Epson L1800 printhead fails:
Ink drying and nozzle clogging. This is the most common failure. The L1800 uses a micro-electromechanical (MEMS) printhead with thousands of tiny nozzles (0.02 mm diameter). When the printer sits unused for more than two weeks, water in the pigment-based ink evaporates from the nozzles, leaving solid pigment particles that block the opening. Once dried, even strong cleaning cycles often fail to clear the obstruction.
Electrical burn-out of nozzle driver chips. Each nozzle is controlled by a tiny transistor on the printhead flex circuit. A static discharge (ESD) from dry environment or a voltage spike during power-on can punch through the gate oxide, permanently disabling individual nozzle channels. This results in missing colors that cannot be recovered by cleaning.
Physical crash damage. If the carriage hits an obstruction (e.g., a paper jam or a dropped foreign object), the printhead may be forced off its alignment posts, cracking the ceramic nozzle plate. Once cracked, the printhead leaks air and ink simultaneously, causing massive streaking.
Contaminated ink supply. Third-party ink or mixed ink types (dye + pigment) can cause particle agglomeration inside the dampers. These particles are large enough to stick in the printhead’s microscopic chambers, leading to permanent clogs.
Worn dampers. The L1800 dampers (particularly the magenta and yellow) have a thin membrane that flexes to regulate ink flow. Over time (2+ years), the membrane degrades and cracks, allowing air into the ink line. Air bubbles in the printhead cause intermittent missing colors.
Age-related degradation. After about 3,000–5,000 pages, the printhead’s piezoelectric crystals can fatigue, reducing the force of each ink ejection. This results in faded colors even when all nozzles fire.
Conditions that accelerate failure:
- Using the printer in dusty or high-humidity areas (dust clogs nozzles).
- Frequent power cycling (stress on the driver transistors).
- Running the printer until the ink pad is full (ink overflow can leak into the printhead contacts).
Can You Fix It Yourself?
Difficulty Level: 4 out of 5 (Advanced)
- Requires careful handling of small, delicate components.
- Risk of bending the flex cable or misaligning the printhead.
Time Required: 60–90 minutes for a first-time repair.
- Removal and cleaning: 20 minutes.
- Printhead replacement and reassembly: 40 minutes.
- Alignment and verification: 15 minutes.
Skill Level Needed:
- Basic: disassemble printer covers, use a screwdriver.
- Advanced: using a multimeter, handling ESD-sensitive parts, removing ribbon cables.
- No soldering required unless you attempt to repair the flex cable (not recommended).
Risks:
- Damaging the flat ribbon cable that connects to the mainboard (cable is fragile, replacements cost ~$15).
- Stripping the carriage rail screws (use correct size Phillips #00).
- Causing a short by touching the printhead contacts with bare fingers (oil from skin disrupts conductivity).
- Installing the new printhead incorrectly (e.g., not seating fully) leads to immediate failure.
Tools Required:
- Small Phillips screwdriver (size #00) and a flathead screwdriver.
- Multimeter (for advanced step).
- ESD wrist strap (recommended to prevent static damage).
- Tweezers for handling small springs and cables.
- Clean, lint-free cloth and isopropyl alcohol (for cleaning contacts).
- Flashlight to inspect the carriage path.
Cost Breakdown — DIY vs Professional
DIY vs Professional Repair – Real Cost Comparison
DIY Printhead Replacement:
- Printhead assembly (Epson L1800 OEM): $80–$120 (most common price ~$95).
- Dampers (optional replacement):
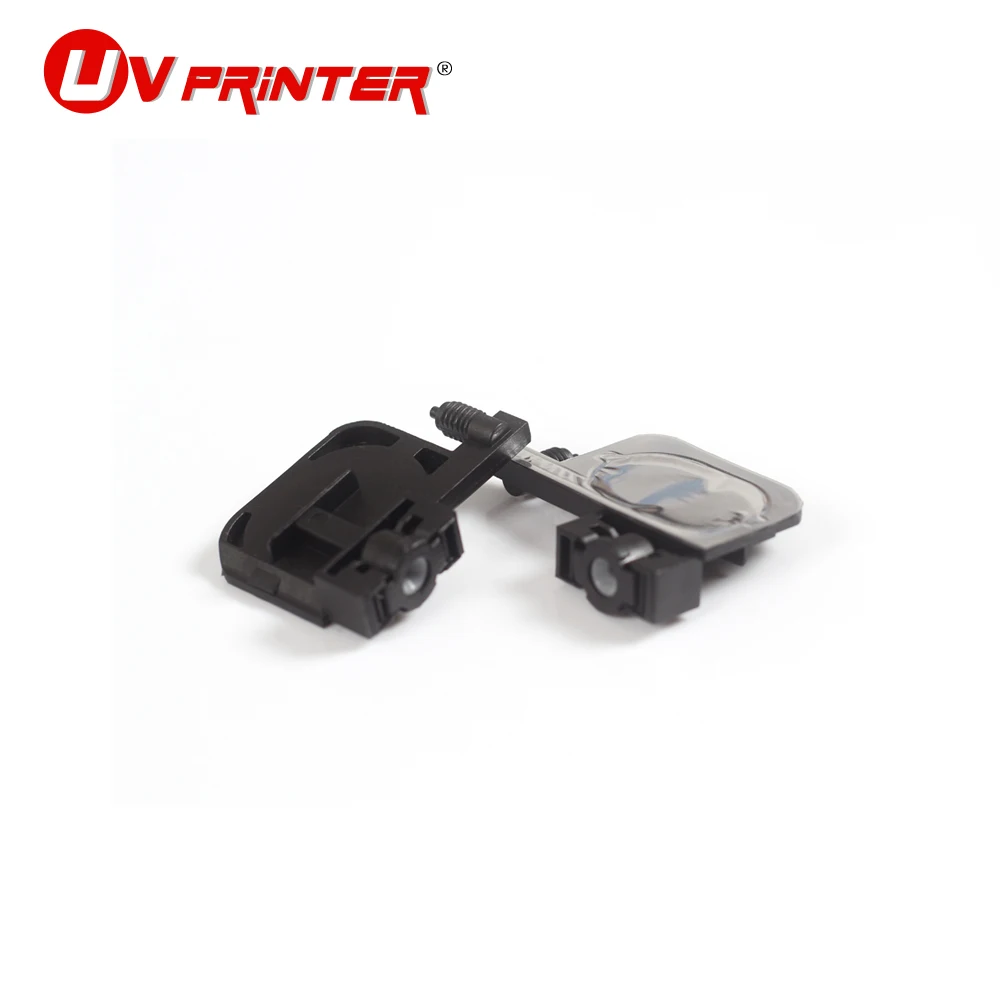
- UV printer ink bag damper: $1.00 (can be used as a spare, not direct fit).
- Printhead Ink Damper Epson L800/L801: $3.00 (compatible with L1800).
- L1800 Damper Printer Spare Print Head Damper: $1.18 (specific to L1800, recommend replacing all six while the printhead is out).
- Ink refill (if you lost ink during replacement): $15–$25 for a full set.
- Total DIY cost: ~$100–$140 plus your time.
Professional Repair Shop:
- Diagnostic fee: $30–$50 (often waived if you approve the repair).
- Printhead replacement labor: $70–$120.
- Parts markup: same printhead may cost $100–$150 from a shop.
- Total professional cost: $200–$300.
When to skip DIY:
- If you cannot find the correct printhead part number (C13T671100 for L1800) – wrong model won’t fit.
- If you have already attempted cleaning and the error lights persist (electrical failure is likely, requires experienced diagnosis).
- If the printer is out of warranty and you are not comfortable with delicate electronics. Professional repair is safer, though more expensive.
Repair Process Overview
Major Steps for Replacing the Epson L1800 Printhead
Power off and unplug the printer. Remove all paper, ink tanks, and the maintenance tank (if accessible).
Remove the printer covers. Use a Phillips #00 screwdriver to take off the top cover (4 screws), then the front cover (2 screws under the exit tray). Unclip the cable guides.
Free the carriage. Gently slide the carriage to the center. Disconnect the two flat ribbon cables leading to the printhead. Note which cable goes to which side (they are often labeled).
Remove the dampers. Each damper is held by a metal clip. Squeeze the clip with tweezers and pull the damper up. Keep dampers in order – do not mix them up.
Remove the old printhead. Unscrew the two screws that hold the printhead to the carriage (they are spring-loaded). Lift the printhead straight up. Be careful not to bend the flex cable.
Install the new printhead. Set it into the carriage slots, align the holes, and press down firmly. Reinstall the two screws. Do not overtighten – just snug.
Reattach dampers. Push each damper onto the printhead’s ink nipples until you hear a click. Ensure all six are fully seated.
Reconnect the ribbon cables. Line up the copper contacts with the slots and press down until the latch clicks. Double-check that the cables are not twisted.
Reassemble the covers in reverse order.
Prime the ink lines. Reinstall the ink tanks. Run a “Printhead Cleaning” cycle from the driver twice to fill the new printhead with ink.
Common mistakes:
- Forgetting to plug in the ribbon cables before fully reassembling – you’ll have to take it apart again.
- Using excessive force on the dampers – they crack easily.
- Not aligning the printhead’s notch with the carriage keyway – causes misalignment and ink leaks.
- Skipping the priming step – the printhead will run dry and overheat.
After the Repair — Testing & Verification
How to verify the repair worked:
Run a nozzle check pattern immediately. All colors should appear solid and continuous. If one or more nozzles are still missing, run one more cleaning cycle (not more – excessive cleaning wastes ink).
Perform a printhead alignment. Print the alignment page and select the best pattern for each color. This ensures the new printhead is seated correctly.
Print a full-coverage test image (like a photo of a gradient). Look for:
- Color consistency (no sudden shifts).
- Absence of horizontal lines.
- Uniform gloss (if using glossy paper).
Watch for error lights during the first 10 prints. The printer may display a flashing orange/green error if the printhead is not recognized. If that happens, power cycle the printer. If it persists, the ribbon cable may not be fully seated.
Monitor ink usage. If the printer suddenly uses more ink than usual, the dampers may be leaking (air ingress) – check for ink stains on the carriage.
In the first few hours:
- Keep the printer plugged in and powered on for 30 minutes to allow the printhead to park correctly.
- Run a print every day for the first week to ensure the nozzles stay wet.
- If you replaced dampers, expect a small amount of initial priming ink loss – that is normal.
Parts You’ll Need
Here are the parts that match this repair. Click the link to check the current price on AliExpress.
| Product | Price |
|---|---|
| UV printer ink bag damper, used as an… | $1.00 |
| Printhead Ink Damper Epson L800/L801/… | $3.00 |
| L1800 Damper Printer Spare Print Head… | $1.18 |
Prices and availability are subject to change on AliExpress.