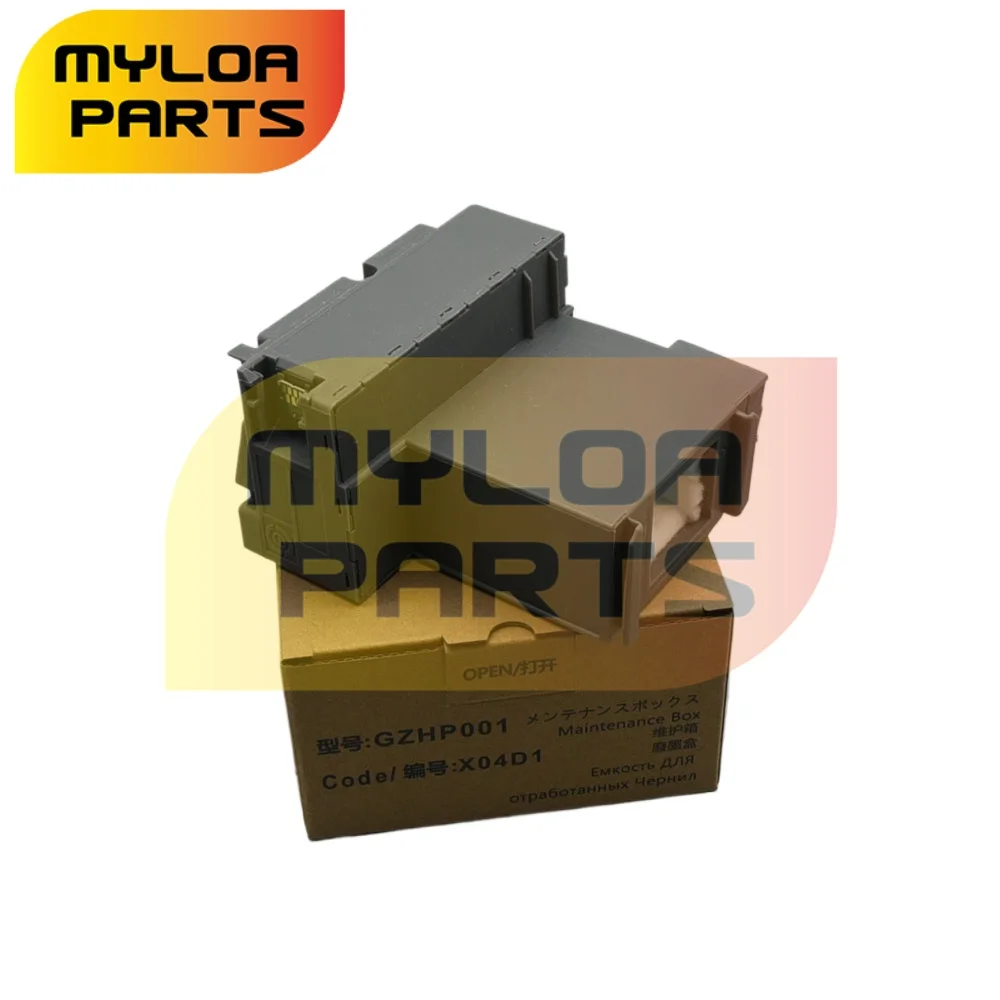
Is your Epson printer showing an error like ‘Maintenance box full’ or ‘Ink pad is at the end of its service life’? This guide explains exactly why the T04D100 waste ink box fills up, how to diagnose the error, and whether you can replace it yourself. Includes part numbers, costs, and a full repair walkthrough.
What’s Happening — Symptoms in Detail
Your printer refuses to print. You see a blinking orange light or an error code on the screen like 0xE0, Error: Ink pad full, or Maintenance box full – replace ink box. Some users report a continuous buzzing sound during startup as the printer tries to clean the printhead but aborts the cycle. The error appears suddenly after a job or after a power cycle.
Scenarios vary:
- On startup: The LCD shows the error immediately, blocking any operation.
- During printing: Mid-job the printer stops and displays the error, leaving the paper stuck.
- After a firmware update: The counter resets incorrectly and triggers a false full error on a box that actually isn’t saturated.
Progression: The problem does not get worse over time – it is a binary failure. Once the maintenance box chip reaches its page/cleaning cycle limit, the printer locks down. If you ignore the error and power cycle repeatedly, the printer may allow a few more prints, then lock again permanently. The waste ink sponge inside the box can also become physically saturated (soaked) and leak into the printer if the box overflows – this causes ink stains inside the case and further damage.
Models affected: Epson WorkForce Pro WF-7210, WF-7710, WF-7720, WF-7110, and EcoTank ET-16500, ET-16650, ET-7760, and similar. All use the T04D100 (or C13T04D100) maintenance box.
How to Diagnose the Problem Step by Step
Quick Check – Identify the Error Code Look at the printer’s LCD panel. Press the
i(info) button if available. Write down the exact error code. Normal: the printer reports ‘Ready’ or ‘Printing’. Abnormal: permanent error message such as0xE0orInk pad is at the end of its service life.Check the Maintenance Box Indicator (if visible) On some models (e.g., WF-7710) there is a small clear window on the top of the maintenance box. Normal: you see a dry white/grey sponge. Abnormal: the sponge is dark black with liquid ink – the box is physically full. If the chip says it’s full but the sponge is dry, the chip triggered early (still need replacement).
Weigh the Maintenance Box (Advanced) Tools needed: a digital scale (accurate to 1 gram) and a Phillips #1 screwdriver. Remove the box (see Repair Process below) and weigh it. Normal (new): about 30–35 grams. Abnormal: weight above 45 grams indicates the sponge is saturated. A weight of 50+ grams may already be leaking.
Check for Leaks Inside the Printer Look beneath the maintenance box compartment. Use a flashlight. Normal: dry plastic, no ink puddles. Abnormal: black ink residue or wet spots – the box has overflowed and is threatening the printer’s electronics.
Reset the Error Temporarily (Diagnostic Only) If you suspect the error is false (e.g., after a firmware glitch), power off the printer, hold the Stop/Reset button while powering on, and release after 10 seconds. This may clear the error temporarily. If printing resumes, the box chip was near its limit – replacement is still needed because the count will return.
Why This Happens — Root Cause
The T04D100 maintenance box contains a sponge pad that absorbs waste ink purged from the printhead during cleaning cycles and borderless printing. Inside the box is a small chip (EEPROM) that counts the number of cleaning cycles and total pages printed. When the count reaches a preset limit (typically 15,000–20,000 pages for the T04D100), the chip signals the printer to display the error and stop operation – even if the sponge still has capacity.
Why does the error happen?
- Normal wear: Every cleaning cycle adds waste ink. High-volume users hit the limit faster.
- Frequent cleaning: If the printhead clogs often (e.g., using third-party ink), the printer performs more intense cleanings that fill the box quickly.
- Dust and environment: Dusty rooms cause more printhead clogs, triggering extra cleaning cycles.
- Firmware errors: Rarely, the chip count corrupts and triggers the error early – but replacement is still required because the chip cannot be reset.
The physical sponge can also become fully saturated before the chip count runs out if you print many borderless photos or use the printer for heavy graphics. Once the sponge is full, waste ink drips into the printer base, causing ink leaks that can short-circuit PCBs.
Can You Fix It Yourself?
Difficulty: 1 out of 5 – simple, no disassembly of the printer mechanism required. Time needed: 5–10 minutes (including chip reset). Skill level: Basic – just need to use a screwdriver and handle the box carefully. No soldering or electronics knowledge. Risks:
- Spillage: The old box may be full of liquid ink – remove gently and seal it in a plastic bag.
- Static damage: Avoid touching the chip contacts; hold the box by its edges.
- Skipping the reset: If you don’t reset the printer’s maintenance counter, the error will return immediately after installing the new box. Tools required:
- Phillips #1 screwdriver (small)
- Needle-nose pliers (optional, for stubborn screws)
- Digital scale (optional, for diagnosis)
- Paper towels / gloves (for handling spilled ink)
- New T04D100 maintenance box
Cost Breakdown — DIY vs Professional
DIY Cost Overview:
- New T04D100 maintenance box from the available parts list:
- Part #1: $1.74 (exact OEM-compatible)
- Part #2: $0.77 (budget option, may have lower chip count)
- Part #3: $4.95 (retail packaging, often includes reset instructions)
- Total DIY cost: $0.77 – $4.95 plus shipping (if any). Labor: free.
Professional Repair Cost:
- Typical service shop labor: $30–$60 for diagnosis + replacement.
- Part markup: $10–$20 for the same box.
- Total: $40–$80.
When to skip DIY:
- If your printer is still under warranty – contact Epson for a free replacement.
- If you discovered major ink leaks inside the printer (wet PCBs) – a professional should assess damage.
- If you cannot find a correct reset procedure for your model (some WF models require a special utility) – a shop can do it for you.
Repair Process Overview
Power off and unplug the printer. Wait 2 minutes for internal capacitors to discharge.
Open the scanner unit (lift the document cover) – on WorkForce Pro models, you need to raise the scanner assembly by pressing the release tabs on both sides.
Locate the maintenance box. It is usually on the right side of the printer, under a small plastic cover. On EcoTank ET-16500, the box is behind a door near the waste ink tube.
Remove any retaining screws (typically 1–2 Phillips #1 screws). Gently pull the old box out. Do not tilt it – keep it upright to avoid spills.
Disconnect the cable if the box has a ribbon cable (the T04D100 has a small connector on top). Squeeze the latch and pull straight up.
Place the old box in a sealed plastic bag immediately.
Insert the new T04D100 box – push it into the slot until the cable (if any) clicks. If no cable, just seat the box firmly.
Replace the cover and screws.
Reset the maintenance counter – this is essential. On most Epson WF models:
- Plug in and power on.
- Press the Home button (house icon) → Settings → Maintenance → Waste Ink Pad Counter → Reset.
- If the menu is missing, download the Epson Adjustment Program from a trusted source (e.g., WIC Reset) and run it on a PC via USB.
Common mistakes:
- Forgetting to reset the counter – the error stays.
- Damaging the chip connector by pulling at an angle – the new box won’t be recognized.
- Installing a box that is already used (check chip seal) – avoid counterfeit/bare chips.
After the Repair — Testing & Verification
- Immediately after reset, run a nozzle check (printer menu → Settings → Maintenance → Nozzle Check). Normal: all lines print clearly. Abnormal: missing lines indicate a clog unrelated to the box – you may need a printhead cleaning.
- Print a single test page (e.g., a PDF of text). Watch for error messages – if the error returns, you may have a defective new box or the reset didn’t stick. Try repeating the reset procedure.
- Inspect the printer base after the first 24 hours. Check for any ink drips around the maintenance box area – if you see wet ink, the new box may not be seated correctly, or there is residual ink from the old overflow.
- Monitor the first 50 prints. If the printer starts a prolonged cleaning cycle right away, it means the reset counter was not fully cleared – you may need to run a full system initialization (via printer menu).
Parts You’ll Need
Here are the parts that match this repair. Click the link to check the current price on AliExpress.
| Product | Price |
|---|---|
| 1X T04D100 T04D1 Maintenance Box Wast… | $1.74 |
| T04D1 EWMB2 C13T04D100 T04D100 Ink Ma… | $0.77 |
| C13T04D100 T04D100 T04D1 EWMB2 Ink Ma… | $4.95 |
Prices and availability are subject to change on AliExpress.