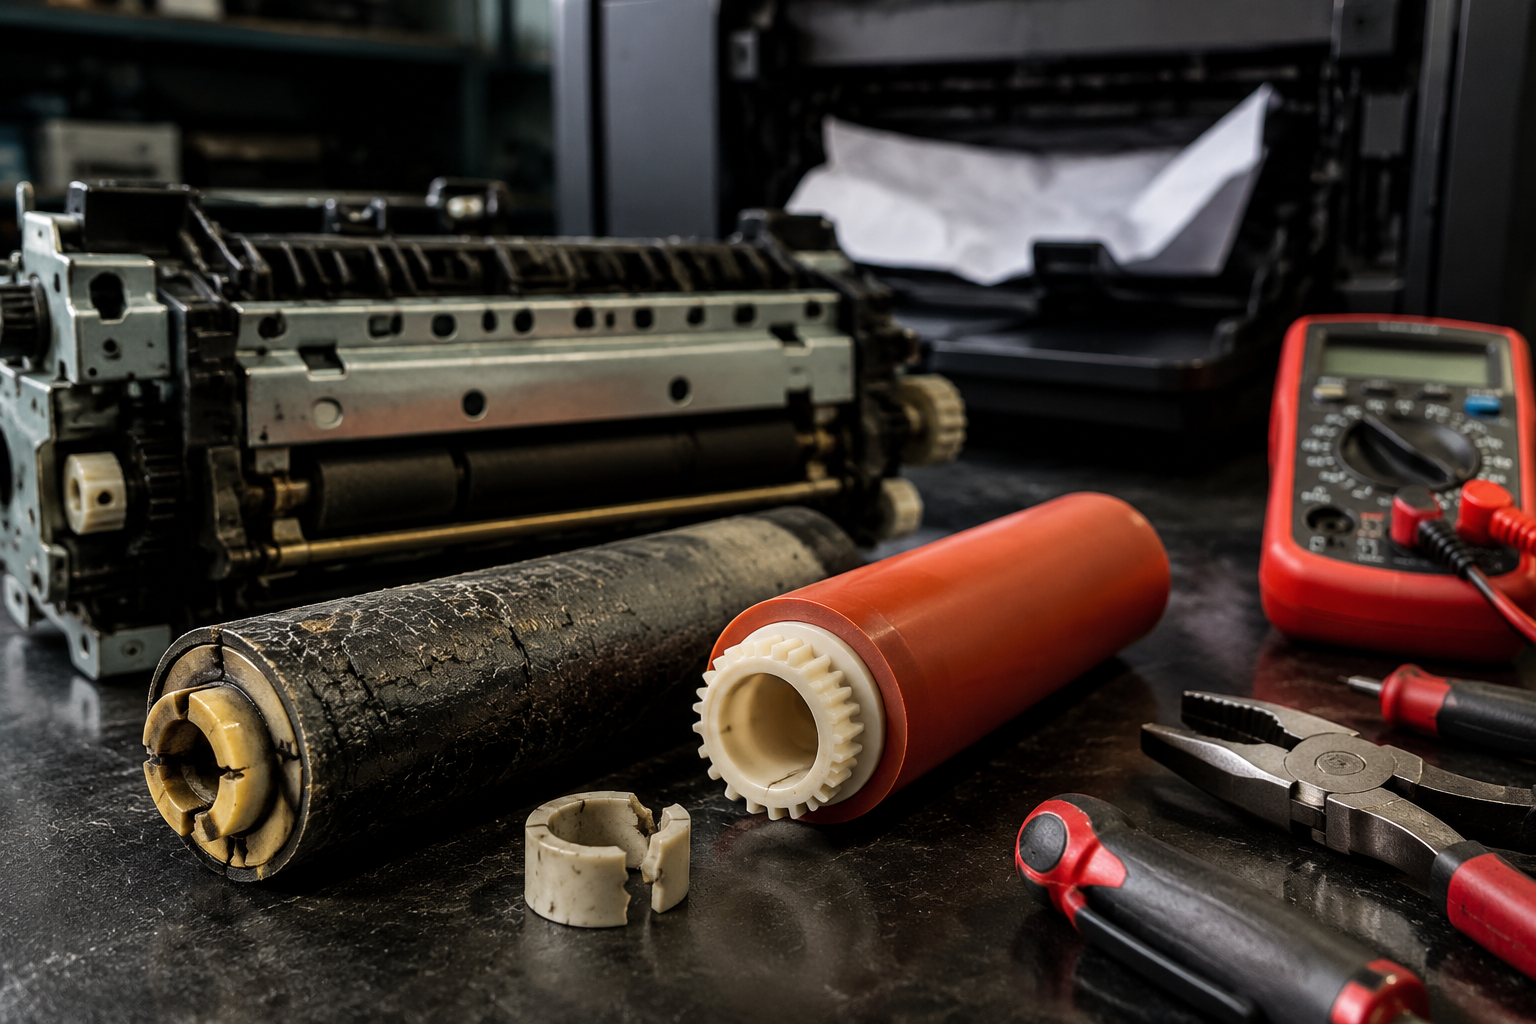
Your printer is jamming producing wrinkled prints or showing error codes like SC552 or SC554? The fuser pressure roller is likely worn or seized. This guide walks you through symptoms, diagnosis, root causes, cost comparison, and repair process so you can fix it yourself fast.
What’s Happening — Symptoms in Detail
Symptoms You’ll Experience
Paper jams – The paper stops inside the fuser area, often with a crumpled or accordion-folded leading edge. Some users report the jam occurs only on heavier paper or after printing several pages.
Wrinkled or distorted prints – Output comes out with wrinkles, creases, or a wavy texture, especially on one side. The image may appear smeared or have ghost lines in the direction of paper travel.
Error codes on the display – Common codes include SC552 (fuser pressure roller thermistor error) or SC554 (fuser pressure roller thermopile error). On Ricoh models, you might see SC542 or SC543. These indicate the roller isn’t heating properly or the temperature sensor reading is abnormal.
Grinding or squeaking noises – A worn bearing or bushing causes the roller to drag. The sound may be intermittent at first, becoming constant as the failure progresses.
Timing of failure:
- Occurs during a print job (mid-print crash)
- Happens on startup when the fuser tries to rotate and jambs
- Gets worse over time (occasional jams become every page)
- Sudden failure after a paper jam removal where the roller was forced
Visual inspection clues:
- The roller surface may have flat spots, cuts, or shiny glazed areas
- The roller may not rotate freely when turned by hand (seized bearings)
- The roller’s rubber coating may be peeling or cracked
When Does It Happen?
- During warm-up (fuser rotates to check temperature)
- After printing many pages in a single job (heat buildup)
- Immediately after clearing a jam (paper pieces may be stuck)
- On first print after a long idle period (roller may be cold and stiff)
Progression Pattern
- Slow decline: Smearing and occasional jams worsen over weeks
- Sudden stop: A seized bushing stops the roller entirely; printer shuts down with error
How to Diagnose the Problem Step by Step
Visual Inspection – Remove the fuser unit (see your service manual for model-specific steps).
- Normal: The pressure roller surface is smooth, uniformly colored, and free of cuts or glazing. The roller spins freely with light finger pressure.
- Abnormal: You see flat spots, cracks, peeling rubber, or a shiny glazed band. The roller is stiff or does not turn at all.
Spin test – With the fuser removed, manually rotate the pressure roller by its gear.
- Normal: It rotates smoothly with slight resistance (from the spring pressure). No grinding or clicking sounds.
- Abnormal: The roller is hard to turn, makes a scraping noise, or only rotates a few degrees before stopping.
Bushing and gear check – Inspect the bushings on each end of the pressure roller.
- Normal: The bushing has no cracks, wear, or signs of melted plastic. The gear teeth are sharp and intact.
- Abnormal: The bushing is cracked, worn oval-shaped, or melted. Gear teeth are missing or rounded.
Thermistor/thermopile test – Use a multimeter to check the sensor resistance.
- Tool: Digital multimeter set to ohms (Ω).
- Normal: At room temperature, the thermistor reads around 100kΩ to 200kΩ (check your model’s spec).
- Abnormal: Open circuit (infinite resistance) or short circuit (0Ω). The sensor may also be physically damaged or covered in melted toner.
Alignment check – With the fuser reassembled (but out of the printer), rotate the drive gear slowly.
- Normal: The pressure roller moves evenly with no wobble.
- Abnormal: The roller wobbles side-to-side, indicating a bent shaft or worn bearings.
Quick check for beginners:
- Remove any paper jam pieces from the fuser area.
- Look inside the fuser exit with a flashlight. If you see black rubber chunks or shiny glaze, the pressure roller is failing.
Advanced check – Remove the pressure roller completely and measure its outer diameter with calipers.
- Tool: Digital calipers.
- Normal: Diameter should match spec (e.g., 30mm for many Ricoh models).
- Abnormal: Diameter is less than spec due to wear (1-2mm difference causes paper feed issues).
Why This Happens — Root Cause
Why the Pressure Roller Fails
Mechanical Wear and Tear
- The pressure roller is constantly under spring tension against the heat roller. Over thousands of prints, the rubber coating compresses and loses its resilience.
- Bushing failure is the most common root cause. The plastic or metal bushings that support the roller shaft wear out from friction and high temperature. Once the bushing wears oval-shaped, the roller can’t stay aligned, causing paper jams and uneven pressure.
Heat Degradation
- Fuser temperatures reach 180-200°C (356-392°F). Repeated thermal cycling causes the rubber to harden, crack, or glaze. Glazing creates a shiny surface that sticks to toner and causes double images.
- The bushings (often made of PTFE or high-temp nylon) can melt or deform if the fuser overheats due to a failing thermostat or thermistor.
Contamination
- Toner buildup: If the fuser is not cleaned regularly, toner melts onto the pressure roller surface, creating bumps that cause jams.
- Paper dust and debris: Accumulates on bushings and gears, accelerating wear.
Crash Damage
- Forcibly removing a jammed paper can bend the roller shaft or crack the bushings. The damage may not be visible immediately but worsens over time.
Specific Known Issues by Model
- Richo MP 2554/3054: The lower pressure roller bushings (part #402666 / 402667) wear out around 200k prints. Error code SC552 often appears.
- Brother HL-L2360D: Pressure roller gear (part #PR110) shears off teeth due to sudden stop during jam. Replaces along with bushings.
- HP LaserJet P2055: The pressure roller’s aluminum core cracks at the shaft ends from heat stress.
Conditions That Accelerate Failure
- Frequent high-volume printing (thermal stress)
- Using non-genuine toner with lower melting point (more toner residue)
- Running the printer in dusty environments
- Not performing periodic fuser cleaning
- Ignoring minor jams and continuing to print
Can You Fix It Yourself?
Difficulty level: 3 out of 5 (3 = moderate). Removing and reinstalling the fuser assembly requires basic mechanical skills, but disassembling the fuser unit to replace the roller is more involved.
Time required: 45 to 90 minutes total. First-timers may take up to 2 hours.
Skill level needed: No soldering required. You need comfort with using a screwdriver and pliers. Some models require removing E-clips or circlips – a small ring of coiled wire that holds the shaft. This can be fiddly but doable with a small flathead screwdriver.
Risks:
- Bending the fuser heat roller: If you drop it or apply too much force while removing the pressure roller, you can damage the expensive heat roller.
- Damaging thermistors: The fine glass bead thermistors are fragile. One slip and you’ll need to replace them too.
- Incorrect reassembly: Misaligning springs or gears can cause new jams or noises.
- Electrical hazard: Even unplugged, the fuser lamp retains heat; let it cool 10 minutes before handling.
Tools required:
- Phillips screwdriver (#2 tip)
- Flathead screwdriver (small, for prying clips)
- Needle-nose pliers (for springs and clips)
- Multimeter (if testing thermistor)
- Calipers (optional, for measuring roller diameter)
- Work gloves (to avoid oil on roller surface)
- Clean lint-free cloth (for cleaning bushings and roller)
What could go wrong:
- If the new pressure roller is not the exact size, it may not make proper contact with the heat roller.
- Overtightening screws can crack the plastic fuser frame.
- Forgetting to grease the bushings (with high-temp grease) will cause early failure.
- Installing the gear on the wrong side of the roller will cause the drive to skip.
Cost Breakdown — DIY vs Professional
Cost Breakdown for Ricoh MP 2554 Example
DIY Parts Cost
- Fuser pressure roller assembly (including bearing/bushings): $25-$45 (from third-party suppliers)
- Fuser pressure roller bushings (if only bushings worn): from available parts – 1set Fuser Lower Pressure Roller Bush… at $1.06 or Fuser Pressure Roller Bushing Ricoh A… at $1.33
- Lower fuser roller gear (if gear teeth broken): 1PCS Lower fuser roller gear Ricoh MP… at $1.36
- High-temperature grease: $6 (tube)
- Total DIY cost (bushings + gear): Approximately $2.40 - $2.70
- Total DIY cost (full roller assembly): Approximately $25 - $45
Professional Repair Costs
- Service call fee: $75-$120 (just to come out)
- Labor (1 hour): $80-$150
- Parts markup: The roller alone could be $60-$100 from a dealer
- Total professional repair: $200 - $400
When to Skip DIY
- If your printer is still under warranty (contact manufacturer)
- If the fuser frame is cracked or the heat roller is also damaged (consider buying a refurbished fuser unit: $80-$120)
- If you are not comfortable removing E-clips or working with springs inside a metal housing
- If you cannot identify exactly which part is failed – the diagnosis must pinpoint roller, bushing, or gear. If uncertain, professional diagnosis may save money in the long run.
Additional Note
- The bushings and gear listed above are for Ricoh MP series. Always verify compatibility with your exact model. Using the wrong bushing size can cause roller misalignment and immediate failure.
Repair Process Overview
Step-by-Step Repair Overview
Unplug the printer and wait 10 minutes for the fuser to cool completely.
Remove the fuser unit from the printer. Typically this involves opening the rear access door, releasing two latches or screws, and sliding the fuser out. Refer to your printer’s service manual for diagram.
Place the fuser on a clean work surface. Remove all visible springs, clips, and connectors. Take photos as you go – very helpful for reassembly.
Remove the pressure roller:
- Release the tension springs that press the roller against the heat roller.
- Remove the E-clips or circlips on both ends of the roller shaft.
- Slide the bushings off the shaft. If they are stuck, use pliers gently (wrap the shaft with cloth to avoid scratches).
- Lift out the pressure roller. Note the orientation of the drive gear (if present).
Inspect and replace components:
- If only bushings worn: Replace both bushings with new ones (part #1 or #3). Clean the shaft with alcohol and apply a thin layer of high-temp grease.
- If gear broken: Remove old gear from shaft (may require a gear puller) and install new gear (part #2). Ensure the gear engages properly with the drive train.
- If roller itself damaged: Remove old roller, install new pressure roller assembly (including new bushings and gear if included). Most OEM rollers come with bushings installed.
Reassemble in reverse order:
- Install roller into the fuser frame.
- Slide bushings onto shafts and secure with clips.
- Re-attach springs (ensure correct tension – both sides equal).
- Connect any thermistor wires that were disconnected.
Test rotation: Before reinstalling the fuser into the printer, manually turn the drive gear. The pressure roller should rotate smoothly and the springs should push it firmly against the heat roller.
Reinstall fuser unit into printer, close doors, and plug in.
Common Mistakes to Avoid
- Mixing up left and right bushings – some models have different sizes. Mark them before removal.
- Forgetting to grease bushings – dry installation causes friction and early failure.
- Overtightening E-clips – can crack the bushing. Use pliers with care.
- Wrong roller orientation – the drive gear must align with the printer’s drive motor. Check the old roller’s gear position.
- Leaving paper bits inside – clear all jam fragments before reassembly.
- Skipping the thermistor check – if the thermistor is damaged, the printer will still throw error codes after repair.
After the Repair — Testing & Verification
Verification Steps After Repair
- Test print without paper first: Run the printer’s warm-up cycle (no paper loaded) and listen. The pressure roller should rotate without grinding. If you hear scraping, reassembly is incorrect.
- Print a test page: Use the printer’s internal test print. Check for:
- No jams – paper should exit smoothly
- No wrinkles – if you see wrinkles, the roller pressure is uneven (spring tension issue)
- No smearing or ghosting – indicates temperature problem or roller surface issue
- Print multiple pages (10-20) to verify stability. Stagger with different paper weights.
- Check error codes: If any error persists (e.g., SC552), the thermistor or thermopile may be faulty. Re-check sensor resistance.
- Monitor for first 2 hours: Run a 50-page print job. If the printer stops mid-job with a jam, the roller may be misaligned or the gear is skipping.
- Inspect the roller after first few prints: Remove the fuser and look at the pressure roller surface. It should be evenly toned, no buildup. A shiny spot indicates uneven pressure – recheck bushing alignment.
- Listen for new noises: A clicking sound usually means a gear is not properly meshed. A squeal means the bushing needs more grease.
- Check paper path: Ensure no leftover jam pieces were dislodged during repair.
Parts You’ll Need
Here are the parts that match this repair. Click the link to check the current price on AliExpress.
| Product | Price |
|---|---|
| 1set Fuser Lower Pressure Roller Bush… | $1.06 |
| 1PCS Lower fuser roller gear Ricoh MP… | $1.36 |
| Fuser Pressure Roller Bushing Ricoh A… | $1.33 |
Prices and availability are subject to change on AliExpress.