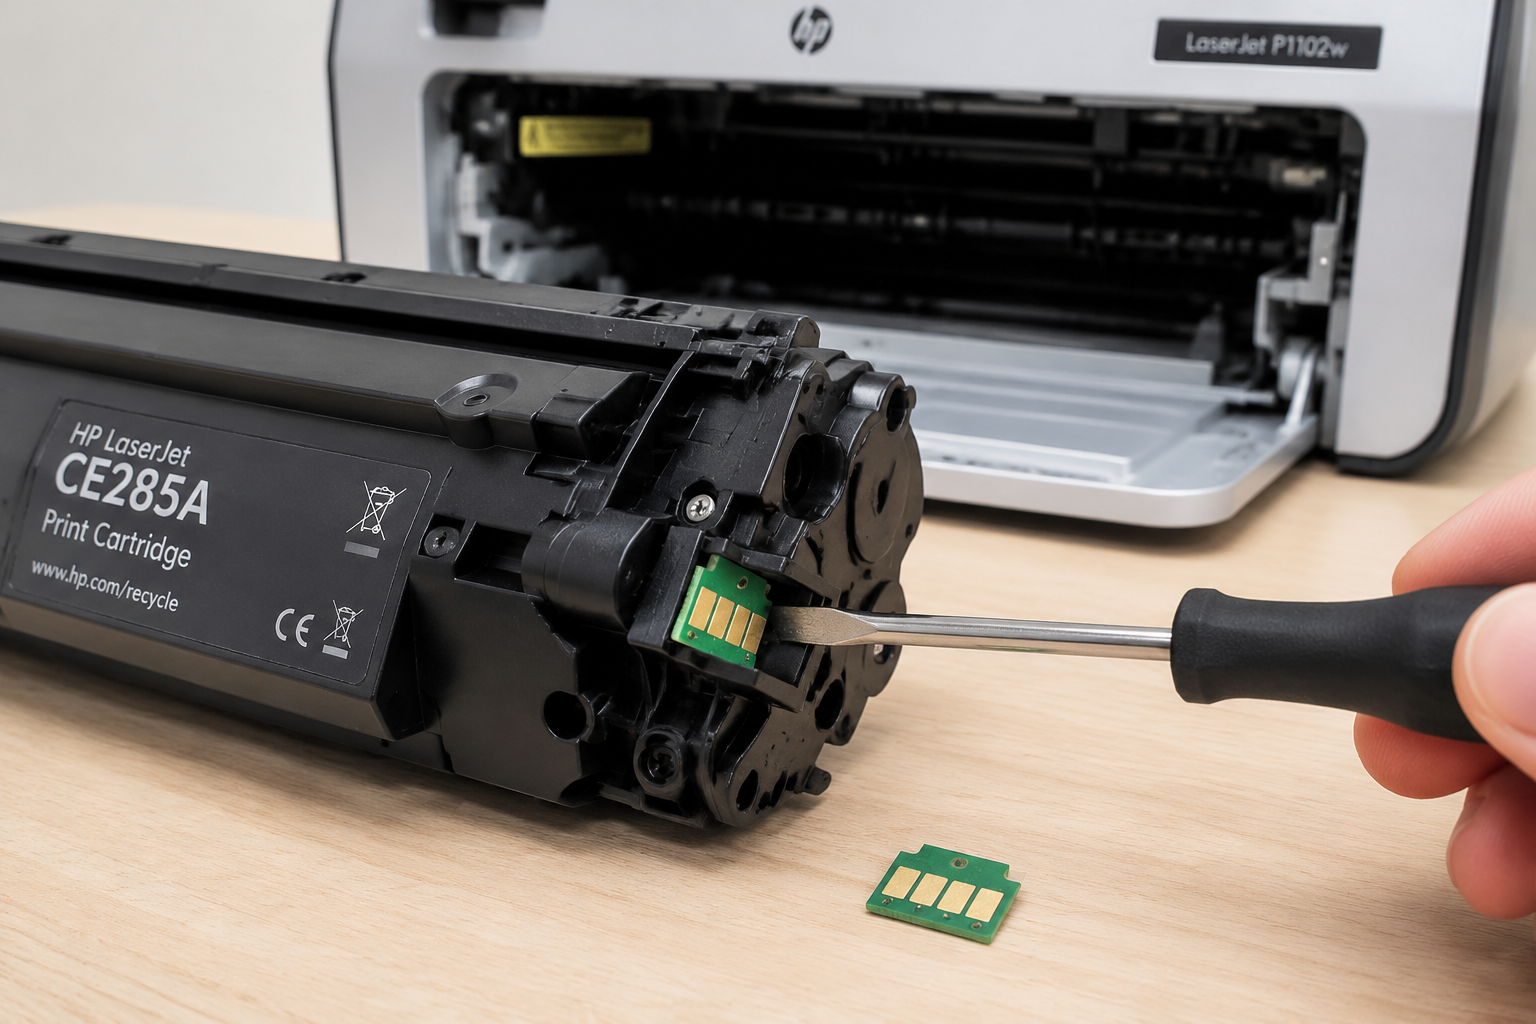
Your HP printer shows ‘Replace Toner’ or ‘Toner Low’ even with a new cartridge? This guide explains exactly what went wrong, how to diagnose it, and how to fix it by replacing the tiny chip on the toner cartridge – a quick and cheap DIY repair that solves most CE285A toner recognition failures.
What’s Happening — Symptoms in Detail
The printer suddenly stops printing mid-job or refuses to start. On the control panel, you see one of these messages:
- ‘Replace Toner’ – even when the cartridge is brand new or visibly full of toner.
- ‘Toner Low’ – with no improvement after shaking the cartridge.
- ‘Error – Supply Error’ – on HP LaserJet Pro P1102w, P1102, M1130, M1210 series.
- Blinking amber light on the printer, often accompanied by a single beep or a series of clicks from the cartridge area.
Some users report the problem appears after a firmware update – the printer suddenly rejects a cartridge that worked before. Others experience it gradually: prints get lighter over a week, then the error appears. In rare cases, the printer makes a grinding noise when trying to rotate the cartridge drum. The error can also disappear temporarily if you remove and reinsert the cartridge, but it returns within a few pages.
The key symptom is the printer believes the toner is empty, even though physical toner remains. This is not a mechanical jam – it’s an electronic lockout caused by the toner chip’s page counter reaching its limit.
How to Diagnose the Problem Step by Step
Check the printer’s reported toner level – Go to the printer’s menu or print a configuration page. If it shows 0% toner but the cartridge feels heavy when shaken, the chip has tripped.
Visual inspection of the cartridge chip – Remove the toner cartridge. On the right side (facing you), locate the small green circuit board with gold contacts. Normal: contacts are clean and flat. Abnormal: scratches, dents, or burnt marks on the chip.
Use a known-good cartridge – If you have another CE285A (even a used one with some toner), swap it in. If the error disappears, the problem is definitely in the original cartridge’s chip. If the error remains, the printer’s mainboard or firmware may have issues.
Quick beginner check – Clean the chip contacts with a dry cloth. If the error clears for a moment, the chip is defective. If it doesn’t, move to step 5.
Advanced check – Multimeter test – Set multimeter to continuity. Probe the three gold pads on the chip. Normal: no continuity between any pads (open circuit). Abnormal: a short (0 ohms) between any two pads indicates a fried chip.
Check for physical toner leakage – Open the cartridge’s drum shutter. If you see loose toner powder anywhere on the chip or on the printer’s electrical contacts, that can cause shorts – but cleaning usually doesn’t fix a chip that has already counted its limit.
Why This Happens — Root Cause
The HP CE285A toner cartridge contains a small EEPROM chip (sometimes called a toner chip or smart chip) that acts as a page counter. Every time the printer feeds paper past the drum, the chip decrements a stored counter. When the counter reaches zero, the chip permanently flags itself as ‘empty’. This is a deliberate engineering design to sell more toner – the physical toner may still be 30% full or more.
Why it fails prematurely:
- Chip age/count limit – The chip is pre-programmed for a specific number of pages (~1200 for standard CE285A). If the printer continues printing after the chip ’expires’, the chip locks itself out.
- Firmware updates – HP occasionally pushes firmware that instructs the printer to reject ‘clone’ or compatible chips, even if they still have toner.
- Electrostatic discharge – Static from clothing or cheap plastic packaging can zap the chip, corrupting its data.
- Physical damage – Dropping the cartridge can crack the chip’s solder joints or bend the gold pins.
- Toner contamination – Leaked toner powder can bridge the chip contacts, causing the printer to misread the chip.
The chip is located on the right side of the cartridge, held by two small plastic clips. It contacts the printer via three spring-loaded pins. The failure is always electrical, not mechanical – the drum and roller are often fine.
Can You Fix It Yourself?
- Difficulty: 1/5 – No soldering, no disassembly of the printer. Just pop off the old chip and snap on a new one.
- Time required: 5–15 minutes, including removal and reinstallation of the toner cartridge.
- Skill level: Beginner. Basic manual dexterity and the ability to match orientation of a small circuit board.
- Tools needed: Only a small flathead screwdriver (2–3 mm tip) or a tweezers to pry off the chip. No power tools, no solder iron.
- Risks:
- Bending the printer’s contact pins – use gentle prying, don’t force.
- Breaking the plastic clips on the cartridge – pry from the edge, not the center.
- Installing the chip upside down – the chip has a corner notch; match it to the notch on the cartridge.
- When to skip this fix: If the cartridge is physically leaking toner or the drum is scored (visible scratches). In those cases, replace the entire cartridge.
Cost Breakdown — DIY vs Professional
DIY with replacement chip only:
- Universal Toner Chip Hp CB435A CB436A… $0.88 (fits CE285A if compatible)
- Compatible CE285A Toner Chip Apply to… $1.00
- Compatible CC388A CE285A CE278A CE505… $1.17
- Total DIY cost: $0.88-$1.17
DIY with a new compatible toner cartridge:
- Generic CE285A full cartridge: $15–$25 (includes chip already installed)
- OEM HP CE285A: $40–$60
Professional repair shop rates:
- Bench fee: $20–$30 just to look at it
- Chip replacement labor: $10–$20 extra
- Cartridge replacement installed: $40–$60 (plus cost of cartridge)
- Total professional repair: $30–$80
When to skip DIY: If your time is worth more than $80, or if you’re uncomfortable handling tiny electronics. Also skip if the printer shows error after replacing the chip – that indicates a mainboard or firmware issue beyond chip DIY.
Repair Process Overview
Power off the printer and unplug it from the wall. Wait 30 seconds for capacitors to discharge.
Open the front cover and remove the toner cartridge. Place it on a clean, static-free surface (a sheet of paper works).
Locate the chip – it’s the small green circuit board on the right side of the cartridge, held by two plastic clips (one top, one bottom).
Pry off the old chip – Insert the flathead screwdriver under the edge of the chip and gently twist. The clips will release. Do not touch the gold contacts with bare fingers.
Prepare the new chip – Check the orientation: the corner notch on the chip should match the notch molded into the cartridge. If there is no notch, align the gold pads to face the printer’s contact pins.
Snap the new chip into place – Align it over the clips and press firmly until you hear two clicks. Ensure it’s flush – no gaps between chip and cartridge plastic.
Reinstall the cartridge – Insert it into the printer and close the cover. Plug in and power on.
Reset the printer – Most HP models will automatically recognize the new chip. If the error persists, unplug the printer for 2 minutes, then plug back in.
Common mistakes:
- Installing the chip backwards – gold pads must face outward (toward the printer).
- Not pressing firmly enough – chip can pop off during printing.
- Using a chip meant for a different model (CC388A chips are similar but some printers reject them). Check compatibility.
After the Repair — Testing & Verification
Immediate verification: Navigate to the printer’s Supplies menu. You should see Toner: OK or a percentage (e.g., 100%). If it still says ‘Replace’, the chip may be defective or incompatible.
Print a test page – On Windows: Control Panel > Devices and Printers > right-click printer > Printer Properties > Print Test Page. On Mac: System Settings > Printers & Scanners > Options & Supplies > Utility > Print Test Page.
Watch for these warning signs in the first 10 prints:
- Streaks or faded areas – indicates drum wear, not chip issue.
- Clicking noise – chip may be loose or interfering with gear.
- Error message returns – the chip may be of low quality or the printer firmware needs downgrading.
Long-term check: If the error returns after 100–200 pages, the chip wasn’t a full-reset type (some chips only work for one cycle). Purchase a ‘resettable’ or ‘universal’ chip next time.
If the problem persists: The printer’s mainboard or DC controller may have a faulty memory. Contact a professional for firmware reset.
Parts You’ll Need
Here are the parts that match this repair. Click the link to check the current price on AliExpress.
| Product | Price |
|---|---|
| Universal Toner Chip Hp CB435A CB436A… | $0.88 |
| Compatible CE285A Toner Chip Apply to… | $1.00 |
| Compatible CC388A CE285A CE278A CE505… | $1.17 |
Prices and availability are subject to change on AliExpress.