Your printer displays a ‘50.1 Fuser Error’ or ‘Check Fuser’ message, paper jams with smudged toner, or you hear a grinding noise. This guide walks you through exact diagnosis steps, explains why the fuser fails, and shows you how to replace the fuser assembly or its gear components. No more guessing – get your printer working again.
What’s Happening — Symptoms in Detail
What You’re Experiencing
Your printer suddenly stopped mid-print, the control panel flashes Error 50.1 (HP) or Fuser Error (Brother/Canon). Some users hear a loud grinding or clicking when paper feeds, while others notice toner smearing or ghost images that wipe off with a finger.
Specific Symptoms
- Paper jams at the fuser exit – the paper is stuck partially out, often wrinkled or with a melted patch.
- Error codes:
- HP: 50.1, 50.2, 50.3, or 50.x
- Brother: “Fuser Failure” or “Check Fuser”
- Canon: “Error 3” or “Fuser Error”
- Smudges: Black streaks or gray marks on the paper that can be rubbed off – the toner isn’t fused.
- Noise: A high-pitched squeal or crunch when the printer warms up or during a print run.
- Burn smell: A faint burnt plastic or ozone smell from the rear vent.
When It Happens
- Startup: Error appears immediately after power-on, before any print job. The printer may click or hum then stop.
- During a print job: The error pops up halfway through a multi-page task. The last page is half-printed and jammed.
- After a paper jam: You cleared a jam, but now the printer won’t reset – the fuser assembly may have been damaged by forcing out paper.
Progression
- Gradual: Toner smudging worsens over hundreds of pages. You start getting occasional jams, then every print fails.
- Sudden: One minute it prints perfectly, the next you get a 50.1 error. This is common when a thermistor or fuse blows unexpectedly.
Do not ignore these signs – continuing to print will stress the gear train and can crack plastic housings, making repair more expensive.
How to Diagnose the Problem Step by Step
Step-by-Step Diagnosis
Quick Check (No Tools Required)
Power cycle the printer: Turn off, wait 10 seconds, turn back on. Does the error clear? If yes, it was a glitch. If it returns immediately, the fuser has a hardware fault.
Feel the rear panel: After power-on, does the rear get warm within 30 seconds? Normal: it becomes lukewarm. Abnormal: cold (no heater power) or scorching hot (thermistor stuck).
Listen for clicks: On startup, you should hear a series of clicks as the fuser gears engage. If you hear a continuous grinding or no sound at all, the gear train is damaged.
Detailed Check (Tools: Multimeter, #2 Phillips screwdriver, flashlight)
Open the printer and locate the fuser assembly – it’s the large metal and plastic unit at the rear, with two rollers visible (upper and lower). Normal: the rollers have a smooth, slightly glossy surface. Abnormal: the upper roller (fuser film) has tears, bubbles, or is flat in one spot. The lower roller (pressure roller) has nicks or shiny glaze.
Check for paper debris: Use a flashlight to inspect between the rollers. Normal: nothing. Abnormal: a torn scrap of paper wrapped around one roller – this causes jams and smudging.
Test the thermistor (small ceramic component touching the fuser roller):
- Set your multimeter to ohms (Ω).
- Disconnect the thermistor connector from the main board (usually a 2-pin white plug).
- Measure across the two pins. Normal: about 100kΩ at room temperature. Abnormal: infinite (open circuit) or zero (short) – thermistor is dead.
Check the fuser lamp (if your model uses a halogen lamp – common in HP LaserJet Pro series):
- Set multimeter to 200Ω range.
- Probe the two lamp terminals (exposed contacts on the side of the fuser). Normal: reading of 5-20Ω. Abnormal: infinite – the lamp filament is open.
Inspect the drive gears: Remove the side cover of the fuser assembly (usually 2-3 screws). Look at the upper fuser roller gear and its mating gear.
- Manually rotate the gear. Normal: smooth rotation with slight resistance. Abnormal: gear teeth are chewed, missing, or the gear spins freely without turning the roller – the bushing is worn out.
Run a fuser test (HP only): Enter Service Mode by holding Cancel + Start while powering on. Navigate to Service Tests > Fuser Test. The printer will cycle the fuser without paper. Normal: it heats up, then cools. Abnormal: it errors out or doesn’t heat.
Why This Happens — Root Cause
Why the Fuser Assembly Fails
The fuser assembly is a high-temperature, high-pressure unit. It operates at 170–200°C and experiences thousands of thermal cycles. Failure occurs due to these specific reasons:
Worn Upper Fuser Roller (Film Sleeve)
- The upper roller is a thin polyimide film coated with PTFE (Teflon). Over time, the coating wears off, causing toner to stick and form clumps. This leads to paper jams and smudges.
- Life expectancy: 50,000–80,000 pages for most models (HP LaserJet P2055, M402, M404). After that, the film develops pinholes or tears.
Failed Thermistor (Temperature Sensor)
- The thermistor sits against the fuser roller to regulate temperature. Carbon buildup from paper dust insulates the sensor, making it read lower than actual temperature. The printer then over-powers the heater, causing overheating and eventual failure.
- Error code link: A failed thermistor almost always triggers 50.1 (HP) or Fuser Error (Brother).
Blown Thermal Fuse
- A safety fuse (usually 192°C rating) sits in series with the heater. If the fuser overheats, the fuse blows permanently. This is a one-time protection. Common cause: a stuck thermistor or a microcontroller failure that leaves the heater on continuously.
- Check: With a multimeter, measure continuity across the fuse. If open, the fuse is blown.
Stripped Drive Gears and Bushings
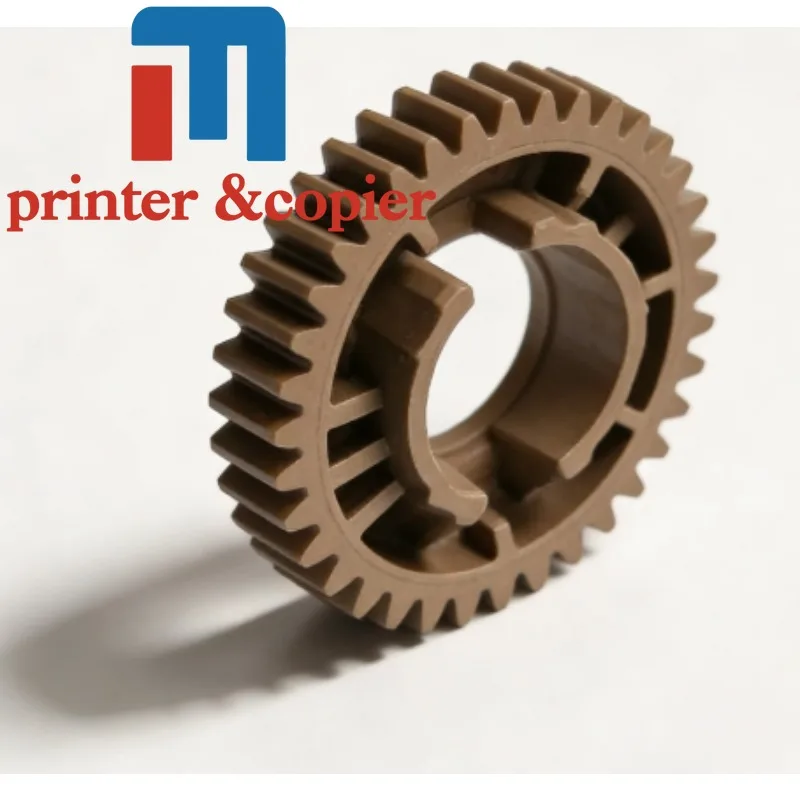
- The upper fuser roller gear and its bushing (our available parts #1 and #2) transmit torque from the main motor. Constant lateral force wears the plastic teeth and the bushing. The gear then wobbles, causing the fuser roller to slip or jam.
- Part #1 (Upper Fuser Roller Gear with Bushing) is a common repair item for HP LaserJet M251, MFP M227, and Pro M404dn. When the gear teeth are worn, you hear a grinding noise during startup or when paper exits.
Conditions That Accelerate Failure
- Dusty environments: Paper dust and toner powder accumulate inside the fuser, insulating thermistors and clogging gear teeth.
- Heavy media: Printing on envelopes, labels, or thick stock puts extra force on the gears and bushing.
- Power surges: A spike can fry the thermistor or blow the fuse.
- Forcing jam removal: Yanking paper out instead of using the release lever bends the fuser frame and cracks gear mounts.
Can You Fix It Yourself?
Can You Fix It?
Difficulty Level: 3 out of 5
- Why: The fuser assembly is a modular unit in most printers, but reaching it requires removing covers and often disconnecting several cables. The risk is damaging ribbon cables or plastic clips.
- Skill Needed: No soldering required. Basic tool use (screwdrivers, pliers) and the ability to follow a service manual. Comfortable with disassembling electronics.
Time Required
- Full fuser assembly replacement: 45–90 minutes from power-off to test print.
- Gear/bushing replacement only: 30–60 minutes (requires more disassembly of the fuser unit itself).
Risks
- Breaking plastic tabs: The fuser is held by fragile clips. Overtorquing or prying can crack the printer chassis.
- Mislaying connector cables: The fuser has high-voltage leads; if you leave one unplugged, the printer may not start or could short.
- Electrostatic discharge (ESD): Touching the fuser lamp or thermistor pins without grounding can damage the main board.
- Burns: The fuser can stay hot for 15 minutes after power-off. Wait or use heat-resistant gloves.
Tools Required
- #2 Phillips screwdriver (magnetic tip ideal)
- Small flathead screwdriver (for prying connectors)
- Multimeter (for testing thermistor, fuse, lamp)
- Needle-nose pliers (for removing small parts)
- Flashlight (to inspect roller surface)
- Isopropyl alcohol and a lint-free cloth (to clean rollers if you’re doing a partial repair)
- Safety glasses (optional but recommended due to toner dust)
Cost Breakdown — DIY vs Professional
DIY vs Professional Repair: Real Costs
DIY Option 1: Replace Gears & Bushings Only
- Part #1: Upper Fuser Roller Gear with Bushing — $1.02
- Part #2: JC66-03080A JC61-03755A Upper Fuser Roller Assembly (includes gear and roller) — $1.13 Note: These parts are for HP models using a removable gear on the upper roller. They are extremely cheap but require partial disassembly of the fuser unit.
- Total parts: $1.02–$1.13
- Shipping: Usually $3–$5 for standard mail.
- Total DIY cost: $5–$7 (including shipping)
DIY Option 2: Replace Full Fuser Assembly
- Typical aftermarket or OEM fuser assembly: $35–$80 depending on model (e.g., HP M404 fuser runs $45–$60).
- Our part #2 is not a full assembly; it’s just the upper roller. For a full assembly, search for your model’s fuser unit (e.g., HP RM1-4911-000CN).
Professional Repair
- Local repair shop: Labor rate $60–$100 per hour. Flat fee for fuser replacement: $80–$150.
- Total: $80–$150 labor + $35–$80 parts = $115–$230.
When to Skip DIY
- Extended warranty: If your printer is still under warranty (or you purchased an extended plan), let the manufacturer fix it for free.
- You don’t have a multimeter: Testing thermistor/fuse is essential for correct diagnosis. Without it, you might replace a good fuser and still have the error.
- Severe physical damage: If the printer was dropped or crushed, internal frames may be bent – DIY replacement won’t align the gears properly.
- High-volume business environment: Downtime costs more than a pro repair. Pay the shop to get printing again within hours.
Verdict: For budget-conscious users with a multimeter and confidence to open the printer, the DIY gear replacement at under $7 is a fantastic fix. Otherwise, invest in a full fuser assembly ($35–$60) and an hour of your time.
Repair Process Overview
Repair Process Overview
Major Steps (for full fuser assembly replacement)
Prepare the printer: Unplug AC power, remove toner cartridge, open rear access door. Wait 15 minutes for the fuser to cool.
Remove rear cover: On HP models, this involves removing two Phillips screws at the lower back and lifting the cover off. On Brother printers, you may need to remove the entire back panel (4 screws).
Disconnect fuser cables: Locate the flat ribbon cable (thermistor) and the two-wire power plug (lamp). Gently pull by the connector body, not the wires. Use a flathead to release locking tabs.
Release the fuser mounting: Usually two or three screws securing the fuser frame to the printer chassis. Also remove any ground wire with a ring terminal.
Slide out the old fuser: Pull it straight out toward the rear. If it sticks, check for hidden screws or clips. Never force it.
Install the new fuser (or replace gears on the old unit):
- If replacing gears: remove the side plate of the old fuser (small Phillips screws). Slide off the old gear, press on Part #1 or Part #2. Ensure the bushing seats fully.
- If replacing whole assembly: slide the new fuser in, align screw holes, tighten mounting screws (do not overtighten – plastic threads strip easily).
Reconnect cables: Plug thermistor and power leads. Verify the connectors click into place.
Reinstall rear cover and toner cartridge. Close all doors.
Test: Power on, wait for warmup. Print a configuration page (usually Go + Cancel).
Common Mistakes & How to Avoid Them
- Overtightening fuser mount screws: The metal brackets have plastic threads. Tighten until snug, then stop. Use a #2 Phillips with a clutch if available.
- Forgetting to ground the fuser: The ground wire (usually a green/yellow ring terminal) must be attached to a metal chassis point. Without it, static buildup can shock you or damage the main board.
- Misrouting the thermistor cable: If the cable gets pinched between the fuser and chassis, it will be crushed by the fuser’s motion. Route it in the original cable channel.
- Using wrong gear orientation: Gear #1 has a specific flat side that must face inward. Compare with the old gear before removal. Take a photo first.
- Not cleaning toner spillage: When removing the old fuser, toner may fall onto the transfer belt. Vacuum or blow it out with canned air to prevent defects on subsequent prints.
After the Repair — Testing & Verification
After Repair – Verification
How to Know the Repair Worked
- Error clears: Power on. The printer finishes its warmup cycle and shows Ready (no error codes).
- No noise: The fuser gears should click softly but not grind or squeal.
- Test print: Print a blank page, then a text and graphics page. The toner must be fused firmly – rub your thumb across a black area. Normal: no smudging. Abnormal: toner comes off on your thumb.
- Jam-free: Run 10–20 pages of a single-sided job. If no jams, the fuser is aligned properly.
What to Watch in the First Few Hours
- Smell: A slight burnt odor is normal for the first few pages (new fuser lubricant burning off). It should disappear within 5 pages. If it persists, you may have left tape on the rollers.
- Uneven printing: Dark streaks down the page indicate an issue with the fuser roller surface. Check that the new roller’s protective sleeve was removed.
- Repeated error: If the same 50.1 error returns after 20–50 pages, the thermistor may have been damaged during installation, or the new fuser is defective. Recheck continuity.
- Ghosting: Faint repeated images (previous page content) mean the fuser film is not releasing properly – may need a cleaning cycle or the film is gouged.
Final tip: After 100 pages, re-tighten the fuser mounting screws if they loosened from thermal expansion. That’s a known issue on HP M402/M404 models.
If all checks pass, your printer is back in action – enjoy the savings!
Parts You’ll Need
Here are the parts that match this repair. Click the link to check the current price on AliExpress.
| Product | Price |
|---|---|
| Upper Fuser Roller Gear with Bushing … | $1.02 |
| JC66-03080A JC61-03755A Upper Fuser R… | $1.13 |
Prices and availability are subject to change on AliExpress.