Your printer displays a cryptic error, leaves smudges on every page, or jams repeatedly. This guide details the exact symptoms of a failing fuser assembly, step-by-step diagnosis using basic tools, the root causes behind common failures, and a cost comparison for DIY vs professional repair. We reference specific part numbers for the most affordable fixes.
What’s Happening — Symptoms in Detail
Typical Symptoms
Error Codes on Screen: Common codes include
Fuser Error,Replace Fuser,Service Call 50.x,Fuser Malfunction, orFuser Life End. On some models, the error appears immediately on startup; on others, it shows after several pages.Smudged or Streaked Output: Toner does not fuse properly. You see vertical or horizontal smudges that wipe off easily. Faint images or ghosting often appear on the back of the page.
Paper Jams: The paper stops inside the fuser unit, crumples, or wraps around the hot roller. A burning smell may accompany the jam.
Unusual Noises: Grinding, squeaking, or clicking sounds from the fuser area. This indicates worn gears or bushings.
Scratches on Paper: If the fuser roller surface is damaged, it leaves physical scratches on the paper.
When Does It Happen?
- On startup during warm-up cycle (thermistor or lamp failure).
- After printing a few pages (overheating or component degradation).
- Intermittently at first, then becomes constant as damage worsens.
Progression
- Some failures happen suddenly, like a blown thermal fuse. Others worsen slowly: first occasional smudge, then permanent smears, then jams, then error code. The user often tries cleaning rollers or different paper before realizing it’s the fuser.
How to Diagnose the Problem Step by Step
Check Error Code
- Most printers show a specific fuser error. Look up that code online for your exact model. For example,
50.1often means fuser lamp failure, while50.2indicates thermistor fault. Write down the code.
- Most printers show a specific fuser error. Look up that code online for your exact model. For example,
Visual Inspection
- Turn off and unplug the printer. Remove the toner cartridge. Locate the fuser unit (usually near the rear).
- Normal: Fuser rollers are clean, no burns, no cracks, gear teeth intact.
- Abnormal: Burnt smell, melted plastic, flaking coating on rollers, broken teeth on the Upper Fuser Roller Gear (part #1).
Manual Rotate Test
- Use a screwdriver to gently rotate the fuser gear. Feel for smooth, even resistance.
- Normal: Rotation is smooth with slight drag.
- Abnormal: Grinding, locked up, or free-spinning (gear stripped).
Electrical Check (Advanced)
- Using a multimeter (set to Ohms), test the fuser lamp. Disconnect the lamp connector; measure between the two terminals. A working lamp reads 1-10 Ohms. Open circuit (infinite) means the lamp is burnt out.
- Test the thermal fuse (usually a small white component on the fuser frame). It should read near 0 Ohms. Open circuit means it blew.
- Test the thermistor (a small glass bead or flat component contacting the roller). Resistance changes with temperature; at room temp expect 100k-200k Ohms. If shorted or open, replace.
Paper Path Check
- Look for tiny bits of paper stuck between the roller and the stripper fingers. Use tweezers to remove them. If you find staples or hard debris, the fuser roller coating may be permanently damaged.
Why This Happens — Root Cause
How the Fuser Assembly Works
The fuser assembly uses a halogen lamp inside the upper fuser roller to generate heat. A thermistor monitors the temperature and sends feedback to the main board. A thermal fuse cuts power if the temperature exceeds safe limits (usually around 180-200°C). The pressure roller (silicone) pushes the paper against the hot roller. Gears and bushings drive the rollers at precise speeds.
Root Causes of Failure
Lamp Burnout: The halogen lamp has a finite life. Frequent on/off cycles or high-duty printing shortens it. When the lamp fails, the fuser never reaches temperature, causing error codes.
Thermistor Failure: The thermistor gets coated with toner dust over time. It reads wrong temperatures, causing the controller to overheat or underheat the fuser. This leads to smudging or a permanent error.
Blown Thermal Fuse: Caused by a real overheat event (e.g., paper jam blocking airflow) or a failing thermistor. Once blown, the fuse must be replaced; it cannot reset.
Striped or Worn Gears: Gears made of plastic (like the Upper Fuser Roller Gear (part #1)) wear down from friction, especially if bushings dry out. Missing teeth cause jams and grinding.
Bushing Wear: Bushings (solid lubricated sleeves) wear over time, creating play in the rollers. This misaligns the nip, causing wrinkles and jams.
Roller Coating Degradation: The Teflon-like coating on the upper roller wears off due to paper abrasion, staples, or aggressive cleaning. Exposed rubber picks up toner, causing smudges.
Accelerating Factors
- High Humidity or Dust speeds up gear wear and electrostatic toner attraction.
- Envelope Printing uses thicker media that stresses the fuser nip.
- Rapid Successive Jobs without cooldown cycles can overheat the assembly.
- Ignoring Paper Jams can bend stripper fingers or damage roller surfaces during removal.
Can You Fix It Yourself?
Difficulty Level: 2-4 out of 5 (depending on printer model).
- Level 2: Simple external fuse or gear replacement on modular designs (HP LaserJet, Brother).
- Level 4: Internal fuser disassembly requiring precise reassembly (some Canon or Xerox models).
Time Required: 30 to 90 minutes.
Skill Level:
- No soldering needed for most repairs (unless replacing lamp wires).
- Basic screwdriver skills: Phillips #2, Torx T10 or T15.
- Ability to use a multimeter for electrical checks.
Risks:
- Electric Shock: The fuser retains high voltage even after unplugging. Wait 30 minutes for capacitors to discharge.
- Breaking Plastic Clips: Fuser housings have fragile clips. Use spudgers or guitar picks to open.
- Misaligning Rollers: If you remove gears, you must realign timing. Mark gear positions with a pen before disassembly.
Tools Required:
- Phillips #2 screwdriver, Torx T10 / T15, needlenose pliers, tweezers, multimeter (for lamp/fuse testing), flashlight, isopropyl alcohol (for cleaning roller surfaces).
Cost Breakdown — DIY vs Professional
DIY Parts Cost (from available inventory):
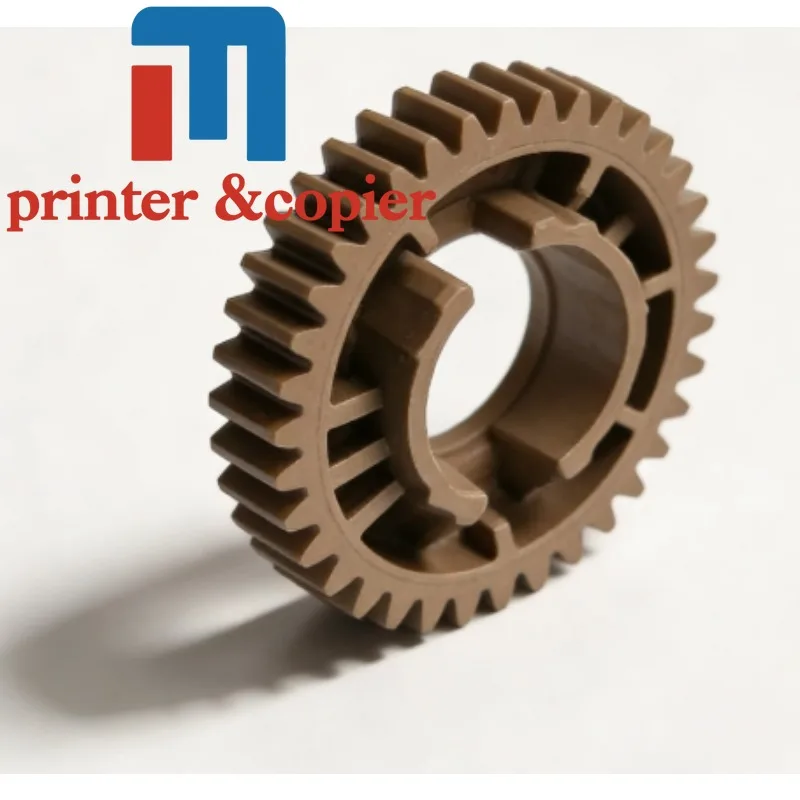
- Upper Fuser Roller Gear with Bushing (part #1): $1.07 – for grinding noises or stripped teeth.
- JC66-03080A / JC61-03755A Upper Fuser Roller Assembly (part #2): $1.13 – includes the gear and roller, for coating damage or severe wear.
- If the lamp or thermistor has failed, you may need a full fuser assembly (typically $20–$50). Check your model on parts websites.
Professional Repair Cost:
- Bench fee: $50–$80 for diagnosis.
- Labor + parts: $80–$150 total for a typical fuser replacement.
- Authorized service center: $120–$200 (includes calibration).
When to Skip DIY:
- If the printer is older than 5 years and retail value under $150, DIY may still be cheaper.
- Skip if you encounter severe melted components or damaged circuit board traces.
- If you lack confidence in reassembly or don’t have a multimeter, professional repair is safer.
Comparison: The gear/roller parts above are extremely cheap, making DIY worthwhile even for minor fuser issues. A full fuser assembly is still under $50 in many cases.
Repair Process Overview
Power Down and Unplug. Wait 30 minutes for internal capacitors to discharge.
Remove Toner Cartridge and Drum Unit.
Extract the Fuser Assembly:
- Release the two locking tabs (usually green) on each side of the fuser.
- Lift the fuser out gently. Note its orientation.
Disassemble the Fuser (if needed):
- Remove the upper cover screws (Torx T10 or Phillips #2).
- Separate the two roller halves. Note the order of gears and bushings.
- Replace the Upper Fuser Roller Gear with Bushing (part #1) if gear teeth are worn or bushing is cracked.
- Replace the Upper Fuser Roller Assembly (part #2) if the roller coating is damaged or if the gear is integrated.
Check and Replace Electrical Components:
- Test the lamp and thermal fuse with a multimeter. Replace if open.
- Test the thermistor. Replace if it shows short or open.
Reassemble:
- Install new gears and bushings; ensure they mesh smoothly.
- Tighten screws to spec (hand-tight only; overtorque cracks plastic).
Install the Fuser Unit back into the printer. Click the locking tabs into place.
Reset the Fuser Counter (if applicable):
- On many HP and Brother printers, access the maintenance menu via the keypad.
- Navigate to ”Special Functions” → “Reset Fuser Counters” and confirm.
Reinstall toner cartridge and close all covers.
After the Repair — Testing & Verification
First Test: Print a single test page. Look for even fusing, no smudges, no jams.
Monitor for 2 Hours: Print 10–20 pages in quick succession. The fuser should stay at consistent temperature.
Watch for These Issues:
- Error Code Reappears: If the same error returns, you may have missed a bad thermistor or failed main board.
- New Noises: A high-pitched whine could indicate a misaligned gear. Stop the printer and recheck.
- Burning Smell: Normal during first few prints (new lubricant). If it persists, check for plastic rubbing against the hot roller.
Final Verification: Print a solid black page (e.g., from a test software). The back should be clean, and the image should not smear when rubbed with a finger.
What to Do If It Fails Again: Double-check all electrical connections. A loose connector can cause intermittent errors. If all else fails, consider professional diagnostic service.
Parts You’ll Need
Here are the parts that match this repair. Click the link to check the current price on AliExpress.
| Product | Price |
|---|---|
| Upper Fuser Roller Gear with Bushing … | $1.07 |
| JC66-03080A JC61-03755A Upper Fuser R… | $1.13 |
Prices and availability are subject to change on AliExpress.