Is your printer displaying a ‘Fuser Error’ or ‘Call Service’ code? This guide explains exactly why fuser assemblies fail (including specific gear breakage, roller wear, and thermistor issues), how to diagnose the problem in minutes, and whether you should replace the entire assembly or just a $1 gear. Includes step-by-step instructions for both DIY and professional repair.
What’s Happening — Symptoms in Detail
Your printer has stopped working with a frustrating error message on the screen. Common codes include ‘Fuser Error 50’ (HP LaserJet), ‘Error 80’ (Brother), ‘E000’ (Canon), or simply ‘Replace Fuser’. The printer may refuse to print altogether, or it might print pages with smudged text, wrinkles, or ghost images that get worse over time.
Some users report a grinding noise when the printer starts up, followed by the error. Others experience paper jams that occur after the paper passes the toner cartridge – the paper gets stuck in the fuser area. You might also see vertical streaks on the page that correspond to the fuser roller’s surface.
When does it happen? – Most failures appear on startup (during the warm-up cycle) or after a paper jam that forced the user to pull out paper roughly. Some fail after a firmware update because the printer re-calibrates and detects a worn component that was previously ignored. The problem often gets worse gradually: first occasional smudges, then frequent jams, then the error code appears.
How does it progress? – In many cases, the fuser roller gear wears down over thousands of pages. The gear teeth become stripped or the bushing cracks, causing the roller to stop turning. This leads to paper not being fed through the fuser, triggering a jam or error. Alternatively, the thermistor (temperature sensor) can fail, causing the printer to overheat and shut down. Sudden failures are rare; usually, there are warning signs like uneven fusing or increased noise.
How to Diagnose the Problem Step by Step
Check the Error Code – Turn the printer off and on. Note the exact code on the display. For HP printers, error 50.x (e.g., 50.1, 50.2) points to fuser failure. For Brother printers, Error 80 or E6 indicates a fuser issue. Look up the specific code online; many manufacturers have detailed breakdowns.
Listen for Sounds – Power on the printer. Normal: a quiet hum as the fuser warms up (about 30 seconds). Abnormal: a clicking, grinding, or squealing noise from the rear of the printer. If you hear a rhythmic click that matches the rotation of the fuser, suspect a broken gear.
Visual Inspection of the Fuser – Open the printer’s rear access door (usually located at the back). Wear gloves if the printer just ran – fuser gets hot. Look for the fuser assembly: two rollers, a heating element, and a metal housing. Normal: rollers are smooth, no cracks, and the pressure mechanism moves freely. Abnormal: the upper roller has worn spots, melted plastic, or the gear on the side is missing teeth.
Manual Rotate Test – Remove the fuser assembly (if possible) or access the gear train. Use a flathead screwdriver to gently rotate the fuser gear. Normal: the gear turns smoothly with even resistance. Abnormal: it spins with jerky motion, makes a clicking sound, or the roller doesn’t move at all when you turn the gear.
Thermistor Check – Locate the thermistor (a small glass bead on a wire, pressed against the fuser roller). Use a multimeter set to resistance (Ω). Normal: room temperature reading around 100k ohms (varies by model). Abnormal: open circuit (infinite) or very low resistance, indicating a failed sensor.
Paper Path Test – Print a test page if the error allows. Feed a single sheet manually. If the paper stops exactly at the fuser entrance, the fuser roller is not turning. If the paper comes out wrinkled, the fuser pressure is uneven or the roller surface is damaged.
Why This Happens — Root Cause
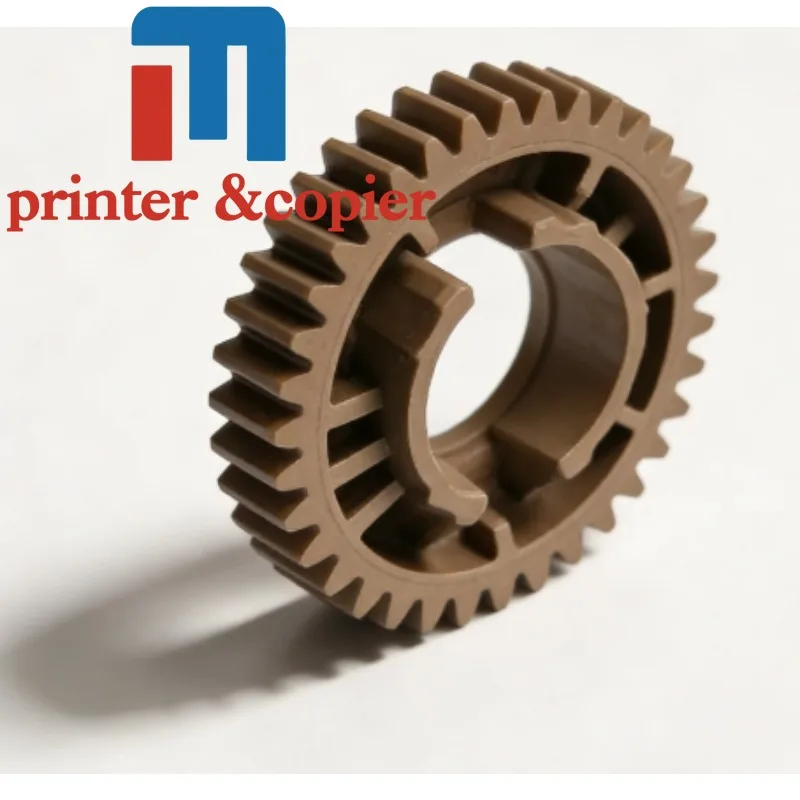
The fuser assembly is a precision component that applies heat and pressure to fuse toner onto paper. The most common failure is gear breakage – specifically the upper fuser roller gear and bushing (part #JC66-03080A or similar). The gear is made of plastic and wears down over time due to friction and heat. When the gear teeth strip, the roller stops turning, leading to jams and error codes.
Why gears fail: The fuser rotates at about 40 RPM under high torque. Plastic gears have a lifespan of 50,000 to 100,000 pages depending on print density. Dust and toner particles act as abrasives, accelerating wear. If the printer experiences a paper jam and the user pulls paper out roughly, the sudden force can snap a gear tooth.
Why thermistors fail: The thermistor is a NTC (negative temperature coefficient) resistor that monitors fuser temperature. Over time, thermal cycling (heating and cooling) can crack the glass bead or break the solder joints. Once the thermistor fails, the printer can’t regulate temperature, and it shuts down to prevent fire.
Why rollers wear: The fuser roller has a Teflon coating or silicone sleeve. Over thousands of pages, the coating wears thin, causing uneven fusing and eventual sticking. Some models (like HP LaserJet P1005 or Brother HL-2270DW) are prone to roller delamination where the outer layer peels off.
Accelerating factors: High room humidity, frequent heavy paper jams, using non-genuine toner (which can melt at different temperatures), and running the printer well beyond its rated duty cycle (pages per month) all shorten fuser life.
Can You Fix It Yourself?
- Difficulty Level: 3 out of 5 – Moderate. This is not a beginner-friendly repair, but anyone comfortable with basic tools can do it. No soldering required.
- Time Required: 45 to 90 minutes for the first repair. More experienced techs can do it in 20 minutes.
- Skill Level Needed: Ability to use a Phillips head screwdriver (#2 size), flathead screwdriver, maybe needle-nose pliers for small clips. Some models require removing the printer’s side panels (up to 15 screws).
- Risks: The fuser gets extremely hot – burn hazard if touched immediately after use. Wait at least 30 minutes after the printer was on. Also, electrostatic discharge (ESD) can damage the printer’s circuit board. Use an anti-static wrist strap or touch a metal part of the printer case before working. If you misalign the fuser gears during reassembly, the printer may jam immediately.
- Tools Required: #2 Phillips screwdriver, flathead screwdriver, multimeter (for thermistor check), tweezers, small pliers, and a soft cloth to clean toner dust.
Cost Breakdown — DIY vs Professional
- DIY Cost – Part Options:
- If the only issue is a broken gear and bushing, you can replace just that component: Part #1: Upper Fuser Roller Gear with Bushing – $1.02. This is a tiny but critical part fit for many HP LaserJet series (e.g., P1102, M201, M202).
- If the upper fuser roller itself is worn (scratched, melted), you can replace the entire upper roller assembly: Part #2: JC66-03080A / JC61-03755A Upper Fuser Roller – $1.13. Note: this is the roller with gear already installed, making it an easier swap.
- DIY Total: $1 to $2 plus shipping. A complete OEM fuser assembly from the manufacturer costs $50–$150, but these cheap parts let you fix the exact failure point.
- Professional Repair: A local printer repair shop will charge $80–$150 for labor plus the cost of a full fuser assembly ($40–$100). Total bill: $120–$250. They will replace the entire fuser, not just the broken gear.
- When to Skip DIY: If you do not have a multimeter, if the printer case is riveted rather than screwed (some cheap models are designed to be disposable), or if the fuser has multiple failures (broken gear + dead thermistor + melted housing). In those cases, buying a new printer (if under $200) may be cheaper than paying for a full fuser assembly plus labor.
Repair Process Overview
- Turn off and unplug the printer. Allow the fuser to cool for at least 30 minutes.
- Remove the rear access door (usually snaps off). Look for the fuser assembly – it is the large metal/plastic module with two rollers visible.
- Locate the fuser release lever or thumbscrews. On many HP models, there are two blue handles that you lift to release the fuser. Slide the fuser out of the printer.
- Disassemble the fuser: Remove the side cover plates (2-4 screws). The gear is on the left side (facing the front of the printer). Use a flathead screwdriver to pry off the old gear and bushing. Note the orientation of the gear teeth – they mesh with a larger drive gear.
- Inspect the gear and bushing: If the gear teeth are worn down to stubs or the bushing is cracked, install the new gear with bushing (Part #1) – press it onto the roller shaft until it clicks. If the roller surface is damaged, replace the whole upper roller assembly (Part #2) – this includes the new gear, so just slide the old roller out and push the new one in.
- Reassemble the fuser: Replace the side plates and tighten screws. Make sure the gear rotates freely by hand.
- Reinstall the fuser into the printer: Align the gear with the printer’s drive gear. Close the rear door.
- Common mistakes: Forgetting to seat the bushing fully, which causes the gear to bind. Also, if you install the gear backwards (teeth facing the wrong way), the printer will jam. Always compare to the old part orientation before discarding it.
- Test the printer: Plug in and power on. The warm-up should be quiet and error-free. Print a test page.
After the Repair — Testing & Verification
- Immediate Check: After printer starts up, listen for the normal warm-up hum. No grinding or clicking. The error code should be gone.
- Test Print: Print a configuration page (usually by pressing the power button multiple times or using the printer menu). Check that text is crisp and not smudged. Try printing a page with dense black (like a graphic) to verify even fusing.
- First 10 Pages: Watch for any paper jams. If a jam occurs, the gear might not be meshing properly. Open the rear door and manually rotate the fuser gear again – it should feel smooth.
- First Hour: Check the fuser temperature by touching the fuser cover after a print job (careful – it will be hot). Normal warmth. If the printer shuts down with a new error (like 50.x again), the thermistor may be bad – confirm with multimeter.
- Long-Term: After 500 pages, inspect the gear area for any debris. If you used the cheap gear (Part #1), it may wear out again sooner than OEM, but at $1 it’s a fair trade-off.
Parts You’ll Need
Here are the parts that match this repair. Click the link to check the current price on AliExpress.
| Product | Price |
|---|---|
| Upper Fuser Roller Gear with Bushing … | $1.02 |
| JC66-03080A JC61-03755A Upper Fuser R… | $1.13 |
Prices and availability are subject to change on AliExpress.