Your printer shows a heating error code, makes grinding noises, or jams paper with wrinkled output? This guide diagnoses the exact failure in your fuser assembly — from thermistor shorts to stripped gears — and walks you through the repair with specific part numbers and cost-saving steps.
What’s Happening — Symptoms in Detail
The fuser assembly is the heart of your printer’s finishing process. When it fails, you get immediate, unmistakable signs.
- Error Codes on Screen: Common codes include
50.1,50.2,50.3(HP/Lexmark),E4(Canon),016-xxx(Fuji/Xerox), orFuser Errorwith a blinking exclamation mark. These appear right at power-up or during the first print attempt. - Sounds: You may hear a loud grinding or rattling when the printer warms up. Some users report a single loud pop followed by silence — that’s the fuser lamp exploding. Others hear a rhythmic click-click-click as a gear skips.
- Visual Symptoms: Paper emerges wrinkled, scorched, or with vertical black lines. Toner smudges that rub off easily indicate the fuser isn’t bonding the toner to the paper. In extreme cases, the paper gets stuck halfway with melted toner on the fuser roller.
- Startup vs. During Print: A thermistor failure usually triggers the error at startup. A gear or roller failure often causes issues mid-print, progressively getting worse over 20–50 pages.
- Progression: Most fuser problems get worse quickly — a tiny gear crack enlarges, a thermistor drifts until the safety trip kicks in, or the fuser film tears and jams the printer solid.
How to Diagnose the Problem Step by Step
Check the Error Code — Write it down exactly. Codes like
50.1mean a fuser lamp failure;50.2means fuser temperature too high;50.3means it never reached temperature. Look up your code in the service manual.Listen at Power-On — Normal: a faint hum as the fuser warms up (10-30 seconds). Abnormal: grinding, scraping, or the printer immediately throws the error without any heat-up sound.
Visual Inspection of Paper — Print a test page (if possible). Normal: smooth, bonded toner. Abnormal: wrinkles, smudges, or the toner flakes off when you rub it.
Smell Test — Normal: slight warm plastic smell. Abnormal: smell of burning rubber or electrical burning (dead thermistor or lamp).
Quick Resistance Test (Advanced) — Power off, unplug, wait 10 minutes. Use a multimeter set to ohms. Locate the two thermistor wires (usually red/white). Normal resistance at room temp: 10k–50k ohms. Abnormal: open circuit (infinite) or short (0 ohms) means a dead thermistor.
Manual Fuser Drum Turn — Remove the fuser (see repair process). Turn the upper roller gear by hand. Normal: smooth rotation with slight drag. Abnormal: clicking, binding, or the gear falls off.
Why This Happens — Root Cause
Why Fuser Assemblies Die — Engineering Breakdown
The fuser assembly consists of a hot roller (or fuser film) and a pressure roller. Inside sits a halogen lamp or ceramic heater, monitored by two thermistors and a thermal fuse. Any of these can fail.
- Worn Fuser Film/Sleeve — In many HP, Canon, and Brother printers, the fuser is a thin film over a ceramic heater. After 50,000–100,000 pages, the film cracks or develops a hole, causing toner to leak and paper jams. This is the #1 cause of
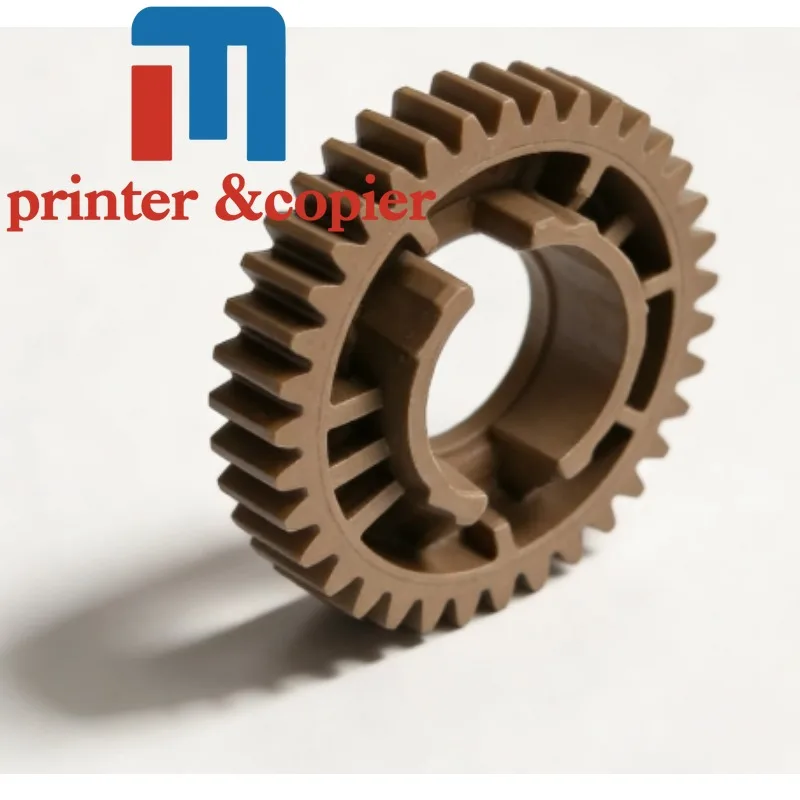
50.1errors on HP LaserJet. - Stripped Upper Fuser Roller Gear — The small plastic gear that drives the fuser roller strips its teeth due to wear or a sudden jam. This causes the grinding noise and the roller stops turning, leading to paper jams with partially fused images.
- Thermistor Fatigue — Thermistors are glass-encased resistors that can short or open after thermal cycling. They are fragile — vacuuming dust from the fuser can break them.
- Pressure Roller Flat Spots — If you frequently print on heavy cardstock or envelopes, the pressure roller develops flat spots that cause periodic vertical lines on prints. Over time, this also damages the fuser film.
- Electrical Spikes — Power surges can blow the ceramic heater element or the thermal fuse, instantly bricking the fuser.
- Accelerators: High page volume (over 50k without maintenance), frequent use of thick media, dusty environments, and power outages all shorten fuser life.
Can You Fix It Yourself?
Difficulty: 3 out of 5 — Doable with basic tools, but requires patience. Some models (HP M600 series, Canon MF730) need partial disassembly of the printer frame.
Time Required: 30–90 minutes, depending on how many screws and clips you need to remove.
Skill Level Needed:
- No soldering required — Most repairs are plug-and-play.
- You must feel comfortable removing the rear access panel and unplugging ribbon cables.
- Basic ability to read a service manual (free on ManualsLib) helps immensely.
Risks:
- Electrical shock if you poke at the high-voltage connections near the fuser lamp — always wait 10 minutes after unplugging.
- Bending the frame — overtightening screws can warp the plastic housing.
- Creasing the fuser film — it’s delicate; don’t pinch or fold it.
- Wrong part replacement — buying the wrong fuser assembly (different voltage or size) will damage the printer.
Tools Required:
- #2 Phillips screwdriver (medium length)
- Flathead screwdriver (to pry clips)
- Tweezers (for small connectors)
- Multimeter (for diagnostic resistance check)
- Alcohol wipes (to clean fuser rollers — do not use abrasives)
Cost Breakdown — DIY vs Professional
DIY Cost Breakdown:
- Part #1: Upper Fuser Roller Gear with Bushing — $1.07 (for replacing just the stripped gear, used on HP M402, M403, M426)
- Part #2: JC66-03080A JC61-03755A Upper Fuser Roller — $1.19 (for Samsung/HP models where the roller itself is worn, not just the gear)
- Full Fuser Assembly — $20–$60 on eBay or Amazon for remanufactured. Check your model before buying.
- Thermistor Kit — $5–$15 (includes thermistor and thermal fuse)
- Labor 0 (your time)
Professional Repair Costs:
- Shop labor rate: $80–$150/hour (typical 1 hour minimum)
- Parts markup: 100%–200% on full fuser assemblies
- Total professional repair: $100–$250
When to Skip DIY:
- If your printer is under warranty (void if opened)
- If you need to desolder and replace a thermistor (rare but requires skill)
- If the entire fuser frame is warped from heat — then buy a used printer instead
- If you have a Xerox VersaLink or Ricoh Pro — these require specialized alignment tools
Repair Process Overview
Power down and unplug the printer. Wait 15 minutes for the fuser to cool — the hot roller can exceed 200°C.
Remove the rear access panel (usually two thumbscrews at the bottom). Some models require you to take out the toner cartridge first.
Disconnect the fuser cables — Note the orientation. There are typically two or three connectors: one for the lamp, one for the thermistor, and one for the pressure roller solenoid. Take a photo.
Remove the fuser assembly — Lift up the release levers (often green) on both sides, then slide the assembly out. If it sticks, check for hidden screws.
Disassemble the fuser on a clean table for parts replacement:
- Unscrew the side plates to access the gears.
- Replace the upper fuser roller gear (Part #1) if the teeth are worn — use a flathead to gently pry off the old gear, press on the new one until it clicks.
- Replace the upper fuser roller (Part #2) if the surface has cuts or toner buildup — slide it off the metal shaft, install the new one, re-insert the bushings.
Reassemble in reverse order. Apply a tiny drop of silicone grease to the new gear shaft (optional, reduces wear).
Reset the error — Many printers clear the fuser error automatically after 3 power cycles. For stubborn codes, enter the service menu (turn printer off, hold ‘Cancel’ + ‘Start’ then power on) and run ‘Clear Fuser’ or ‘Engine Test’.
Common Mistakes:
- Forgetting to remove paper jam inside the fuser — check behind the pressure roller.
- Plugging connectors backward — the lamp connector has two wires, the thermistor has two wires, they may look similar but are keyed differently.
- Tightening screws too much — snaps the plastic frame, causing misalignment.
After the Repair — Testing & Verification
- Run the printer self-test (from the menu: ‘Configuration Report’). Normal: the printer warms up without error, the fuser fan turns on, and the page comes out flat.
- Check for error codes again — If
50.2appears, the thermistor may be installed upside down or the wrong resistance value. - Print 5 single-sided pages with a gradient test image (download online). Watch for wrinkles, smears, or vertical lines on each page.
- Listen for new noises — a squeak or grind after repair means a gear is not seated properly or the fuser is not fully inserted.
- Monitor the first 24 hours — Power cycle the printer 3 times. If the error returns, the root cause might be the mainboard or power supply, not the fuser assembly.
- Run a full calibration (menu > System Setup > Calibration). This adjusts the pressure roller timing so the new fuser matches the printer’s motor speed.
Parts You’ll Need
Here are the parts that match this repair. Click the link to check the current price on AliExpress.
| Product | Price |
|---|---|
| Upper Fuser Roller Gear with Bushing … | $1.07 |
| JC66-03080A JC61-03755A Upper Fuser R… | $1.19 |
Prices and availability are subject to change on AliExpress.