Your printer’s fuser assembly has failed, causing error codes like ‘Fuser Error’, ‘Service Call 50’, or ‘Overheat’, along with smeared prints, paper jams, and burning smells. This guide walks you through diagnosing the exact fault, understanding why it happens, and deciding whether to repair or replace the fuser. We cover specific tests, common part failures, and cost-effective fixes using replacement roller gears and bushings.
What’s Happening — Symptoms in Detail
Symptom #1: Error Codes on Display Your printer shows one of these specific codes: Fuser Error, Service Call 50, Fuser Malfunction, Overheat, or Warm-up Failure. Some models (like HP LaserJet P1102w or Brother HL-L2350DW) display a blinking amber light with the error. The printer won’t print until the code clears.
Symptom #2: Print Quality Issues Printed pages come out with blurry text, smudged toner that rubs off, or vertical streaks. In severe cases, the paper has wrinkles or oil spots (from leaking fuser oil). These symptoms appear after the machine has warmed up.
Symptom #3: Strange Noises & Smells You hear a grinding, screeching, or clicking sound during warm-up or while printing. A burning smell (like hot plastic or ozone) is common when the fuser overheats or the heating element fails. Some users report smoke coming from the rear of the printer.
When It Happens
- On startup: The fuser takes too long to reach temperature, then errors.
- During printing: After 5–20 pages, quality degrades or a paper jam occurs.
- After a crash: A paper jam that forced you to pull out paper may have cracked the fuser film or gears.
- Progression: Often intermittent at first (error clears after power cycle), then becomes permanent as wear worsens.
How to Diagnose the Problem Step by Step
Check the Error Code Reference
- Look up your printer model + error code online. For HP: codes 50.x (fuser failure), 55.x (fuser fan), 59.x (fuser gear). For Brother: Fuser Error or Service Call. Write down the exact code.
Visual Inspection (no tools)
- Open the rear access door (or remove the fuser cover if accessible).
- Normal: The fuser roller surface should be smooth, even, and free of melted toner or wrinkles. The thermistor (small bead or flat sensor touching the roller) should not be cracked or blackened.
- Abnormal: You see cracks in the fuser film, ripped surface, melted toner blobs, or a broken gear (often the upper fuser roller gear).
Manual Rotation Test
- Tool: None (use your fingers).
- Turn the fuser roller by hand (if accessible). Normal: rotates smoothly with slight resistance. Abnormal: rough, squealing, or stuck movement — indicates worn bushings or seized bearings.
Thermistor Resistance Test
- Tool: Digital multimeter set to Ohms (Ω). Discharge printer capacitors first (unplug, press power button).
- Measure resistance across the thermistor leads. Normal: around 100–300 kΩ at room temperature (varies by model). Abnormal: open circuit (OL) or very high or low — thermistor is dead.
Heater Lamp Continuity Test
- Tool: Multimeter on continuity mode.
- Probe the two terminals of the heating element (usually a ceramic lamp inside the roller). Normal: beep (continuity). Abnormal: no beep — heating element is blown.
Gear & Bushing Check
- Remove the fuser assembly (see repair process). Examine the upper fuser roller gear and its bushing.
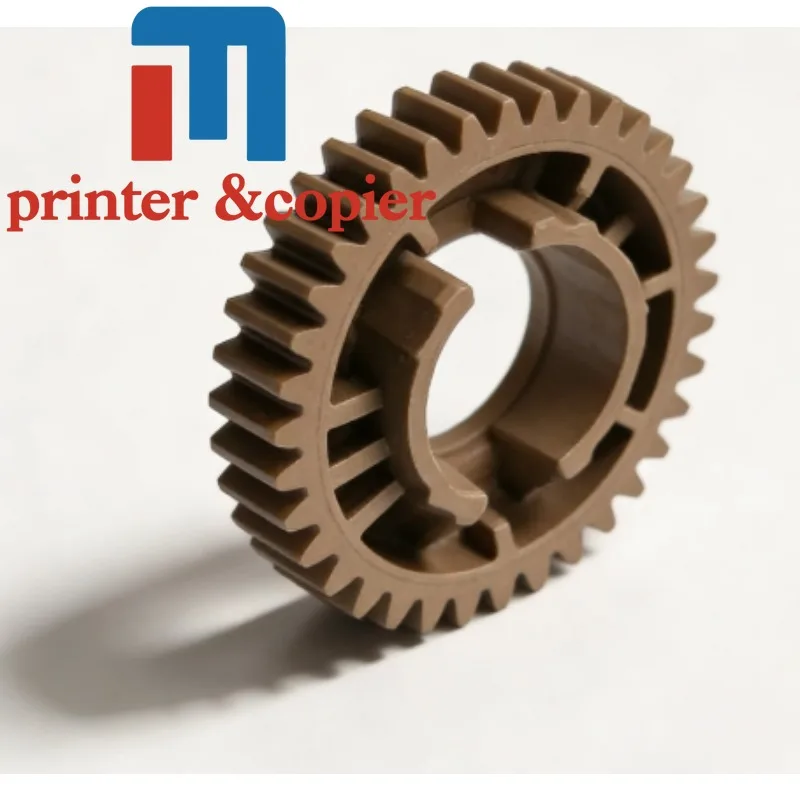
- Normal: Gear teeth intact, bushing snug. Abnormal: gear teeth missing or worn flat; bushing cracked or oval — these parts cost only $1–$1.50 to replace (Part #1 and #2).
Why This Happens — Root Cause
How the Fuser Assembly Works The fuser assembly uses a heated roller (with a halogen lamp inside) and a pressure roller to melt toner into paper. A thermistor monitors temperature, and a thermal fuse cuts power if it overheats. Gears and bushings synchronize rotation.
Failure Modes & Engineering Details
- Worn Roller Gear/Bushing: The upper fuser roller gear (plastic) and its bushing wear out from friction and heat cycles. The bushing loses shape, causing the gear to wobble, strip teeth, and eventually lock up. This produces grinding noises and paper jams. Part #1 (gear with bushing) and Part #2 (upper fuser roller) are the most common replacements.
- Blown Heating Element: The halogen lamp burns out after thousands of hours. The printer shows a ‘warm-up failure’ error because the fuser never reaches 180°C.
- Failed Thermistor: The thermistor (a negative temperature coefficient resistor) cracks or drifts out of spec. The control board misreads temperature, either overheating (smoke) or never heating up (error).
- Cracked Fuser Film: The heat-resistant film deforms after repetitive heat stress, causing toner to stick and wrinkle paper.
What Accelerates Failure
- High print volume: Heavy media (envelopes, cardstock) increases pressure and heat stress.
- Dust and debris: Paper dust clogs bushings and gears.
- Crash force: Yanking jammed paper can crack the fuser housing or gear.
- Age: After 3–5 years (or ~50,000 pages), plastic gears and bushings degrade.
Specific Models Known for Fuser Failures
- HP LaserJet P1102/P1102w: Known to strip the upper fuser roller gear after 20,000 pages.
- Brother HL-L2350DW/L2390DW: Common thermistor failure, error ‘Fuser Error’.
- Samsung SL-M2020/M2070: Fuser lamp burnout after heavy use.
- Canon imageCLASS LBP6030: Fuser film cracks cause smeared prints.
Can You Fix It Yourself?
Difficulty Level: 3 out of 5
- Why 3? Requires disassembly of the fuser unit, handling precision parts, and some risk of electric shock if capacitors aren’t discharged.
Time Required: 30–60 minutes
- First-time repair: 60 minutes. Experienced: 30 minutes.
Skill Level Needed
- No soldering. You only need a screwdriver and possibly a multimeter.
- Comfortable with small parts and following disassembly steps.
Risks & What Could Go Wrong
- Electric shock: Heater lamps run on mains voltage (110/220V). Always unplug and discharge by pressing the power button after unplugging. Wait 5 minutes.
- Brittle plastic clips: The fuser housing can crack if forced. Use gentle pressure.
- Incorrect part: Installing wrong gear size – always match part numbers to your model.
- Strip screws: Use the correct size Phillips #1 or #2 screwdriver.
Tools Required
- Phillips head screwdriver: #1 (small) and #2 (medium)
- Flathead screwdriver: small (for prying clips)
- Digital multimeter: for continuity and resistance tests
- Thermal paste (optional): for reinstalling thermistor
- Tweezers: for handling small springs and bushings
- Safety glasses: if you expect toner dust
Cost Breakdown — DIY vs Professional
DIY Option – Using Replacement Parts
- Part #1: Upper Fuser Roller Gear with Bushing — $1.02
- Part #2: JC66-03080A JC61-03755A Upper Fuser Roller — $1.13
- Full fuser assembly replacement (if multiple parts failed): $25–$50 (generic) or $60–$120 (OEM from Canon/HP)
- Total DIY cost: Usually $2–$100 depending on scope.
Professional Repair
- Diagnostic fee: $30–$60 (some shops waive if you proceed with repair)
- Labor: $50–$100 (1 hour)
- Parts: OEM or aftermarket, similar to DIY costs but marked up 50%–100%
- Total: $100–$250
When to Skip DIY
- If you are uncomfortable disassembling the printer (some models require removal of the entire fuser drive train).
- If the error code indicates a main control board failure (e.g., HP 59.x errors that persist after fuser replacement).
- If you see melted plastic or burnt wires – indicates a short circuit that needs professional diagnosis.
- For printers under warranty – contact manufacturer.
Bottom Line: For a simple gear or bushing failure, DIY with Part #1 at $1.02 is a no-brainer. But if the thermistor or lamp is dead, the full assembly replacement often costs less than $30, making DIY still worthwhile.
Repair Process Overview
Power Down & Discharge
- Unplug the printer. Press and hold the power button for 10 seconds to drain residual voltage. Wait 5 minutes.
Remove the Fuser Assembly
- Open the rear cover or access door. Locate the fuser unit (large metal/plastic block with rollers).
- Disconnect the wire harness (gently wiggle the connector, don’t pull the wires).
- Remove two screws (typically Phillips #2) securing the fuser to the frame. Slide the fuser out.
Disassemble the Fuser
- Place on a flat surface. Remove the metal covers (usually 4–6 small screws). Keep track of their positions.
- Note the arrangement of springs and pressure rollers. Take photos for reference.
Replace the Gear and Bushing (if faulty)
- Locate the upper fuser roller gear. It often sits on the left end of the heated roller.
- Remove the E-clip (using a small flathead) and slide off the gear and bushing.
- Install new Part #1 (gear with bushing) following the same orientation. Ensure teeth align with the drive gear.
Replace the Upper Fuser Roller (if needed)
- If the roller surface is damaged, separate it from the lamp assembly.
- Insert new Part #2 (JC66-03080A / JC61-03755A) onto the lamp unit. Reinstall the bushing and gear.
Reassemble and Test
- Reattach covers, reinstall the fuser into the printer, connect harness, close covers.
- Plug in and power on. Run a test print. The warm-up should take 30–60 seconds without error.
Common Mistakes to Avoid
- Forgetting to discharge: You can get shocked or blow a fuse.
- Mixing up springs: Pressure springs have different forces – note original positions.
- Overtightening screws: Plastic threads strip easily; tighten until snug, then stop.
- Ignoring toner spill: If you spill toner inside, clean with a toner vacuum or damp cloth (no water).
After the Repair — Testing & Verification
Immediate Verification
- No error codes: The printer should warm up and show ‘Ready’ without any flashing lights.
- Test print: Use the printer’s internal test page (hold the cancel button 5 seconds). Print quality should be solid black text, no smudges, and no ghosting.
First Few Hours of Use
- Monitor for burning smell – a faint ’new part’ odor is normal, but strong plastic smell indicates overheating.
- Listen for grinding or clicking – if present, the gear mesh may be off or a bushing is misaligned.
- Check paper jams – the fuser should pull paper through smoothly. If frequent jams happen, the pressure roller may still be faulty.
- Observe error code recurrence: If error returns after 10–50 pages, the thermistor or control board may need replacement.
Long-Term Watch
- After 1000 pages, inspect the fuser gear for wear again. If cheap generic parts were used, they may degrade faster.
- Lubricate bushings with high-temperature grease (if recommended for your model) to extend life.
Parts You’ll Need
Here are the parts that match this repair. Click the link to check the current price on AliExpress.
| Product | Price |
|---|---|
| Upper Fuser Roller Gear with Bushing … | $1.02 |
| JC66-03080A JC61-03755A Upper Fuser R… | $1.13 |
Prices and availability are subject to change on AliExpress.