This guide helps you quickly identify a failing fuser assembly, interpret error codes like ‘Fuser Error’ or ‘Replace Fuser’, and decide whether a DIY fix or professional service is right. With real numbers for both routes, you’ll know exactly what to do when your printer stops fusing toner or starts leaving wrinkles and a burning smell.
What’s Happening — Symptoms in Detail
When the fuser assembly fails, your printer becomes unusable. Here’s exactly what you’ll experience:
Error codes on the display: Common codes include HP 50.3 Fuser Error, Brother “Fuser Error” or “Cannot Print”, Canon “E100”, Samsung “Fuser Error #H1-****”. These appear immediately on startup or after a short warm-up.
Paper jams with wrinkled paper: The paper may stop halfway through, with a crinkled or torn leading edge. When you remove it, the toner might be smeared because it wasn’t heated properly.
Burning smell: A sharp, acrid odor – sometimes accompanied by smoke – indicates overheating or a seized roller. This can happen during a long print job or right after a jam.
Print defects: The toner doesn’t fuse to the paper. You’ll see:
- Toner that rubs off when you touch it (poor fusing).
- Vertical streaks or bands on every page.
- Ghosting or repeating images.
Mechanical noises: A loud grinding, clicking, or whining sound. This often happens after a paper jam that damaged the fuser gears.
How it progresses: In most cases, the problem starts as intermittent – a few pages look fine, then a jam. Within hours or days, the error becomes persistent. Some failures are sudden, like a burst thermofuse (after a power surge), while others worsen as the heat roller surface wears down or the pressure roller flattens.
When does it happen?
- On startup (error before printing).
- During printing (jam, smell).
- After a large job (overheating).
- After a paper jam where you pulled paper out forcibly (damaged roller or gear).
How to Diagnose the Problem Step by Step
Tools needed: multimeter, Phillips screwdriver (#1 or #2), flathead screwdriver, safety glasses, flashlight. Optional: thermal imaging camera or temperature probe.
Safety first: Unplug the printer and wait at least 30 minutes for the fuser to cool down completely. The fuser operates at 180-200°C – you can burn yourself badly.
Read the error code: Look at the printer’s display or blink pattern. Write down the exact code. For example, HP 50.3 means the fuser has failed; 50.1 means a low temperature error; 50.2 means high temperature. Brother printers often show Fuser Error with no number – this usually means the thermistor is open or shorted.
Visual inspection (no disassembly yet): Open the rear access door (if present) or remove the rear cover. Shine a flashlight at the fuser unit. Look for:
- Abnormal: Scorch marks, melted plastic, torn roller surface, visible wear on the fuser roller (shiny or flat spots).
- Normal: Smooth, dark grey or black roller surface, no cracks.
Check the thermistor continuity (advanced): Locate the thermistor – a small glass bead on two wires touching the heat roller. Set your multimeter to ohms (200kΩ range). Touch the probes to the two wires. Normal: at room temperature, reading between 100kΩ and 300kΩ. Abnormal: infinite reading (open) or zero (shorted). This is a common failure.
Check the thermofuse (also called thermal fuse): This is a small white or brown plastic component in-line with the lamp. Set multimeter to continuity (beep mode). Touch probes to both ends. Normal: beep (zero ohms). Abnormal: no beep (blown fuse). A blown thermofuse means the fuser overheated at some point.
Manual roller rotation: While the fuser is removed from the printer, try to turn the large gear on the end of the fuser. Normal: smooth, continuous rotation. Abnormal: grinding, ratcheting, or no movement (seized bearing or broken gear).
Test print (if the error allows): Print a single black page. Immediately after it exits, touch the toner. Normal: toner does not rub off. Abnormal: toner smears or flakes – fusing temperature is too low or pressure roller is flat.
Why This Happens — Root Cause
The fuser assembly uses a halogen lamp (or induction coil) to heat a roller, and a pressure roller to squash the toner into the paper. Failure happens when any component in this chain degrades.
Specific parts and their failure modes:
- Upper fuser roller (heat roller): Coated with Teflon or silicone. Over time, the coating wears, leaving rough patches. Paper wraps around these rough spots, causing jams. The roller can also develop flat spots from prolonged idling in one position.
- Lower pressure roller: A rubber roller that presses against the heat roller. Heat and pressure cause it to harden or flatten. A flattened roller creates uneven pressure – the toner on one side fuses, the other side doesn’t. You’ll see a horizontal band of poor fusing.
- Halogen lamp: The heating element. It can burn out (open circuit) or short. This is rare but happens after power surges or when the fuser gets shocked from a drop.
- Thermistor: A temperature sensor. It shorts or opens. When it fails, the printer either thinks the fuser is too cold (error code, doesn’t print) or too hot (blows the thermofuse).
- Thermofuse: A safety cut-off. If the thermistor fails in a way that lets the fuser overheat, the thermofuse blows permanently. It cannot be reset – you must replace it.
- Gears and bushings: Plastic gears on the drive side can crack or strip their teeth if paper jams cause sudden torque. The bushing (the sleeve the shaft rotates in) wears out, causing wobble and noise.
Conditions that accelerate failure:
- High volume printing (more than 1000 pages/month).
- Low-quality paper (dusty, rough) – the dust acts as an abrasive on rollers.
- Frequent paper jams – pulling paper out can tear the roller surface or strip gears.
- Power fluctuations – surge or brownout can damage the lamp and thermistor.
- Age – even unused fusers degrade because the rubber hardens over 5+ years.
Known model-specific issues:
- HP LaserJet Pro M404/MFP M428: Error 50.3 or 50.4 – often the thermistor fails. Part numbers RM1-9792 (fuser assembly).
- Brother HL-L2390DW or MFC-L2750DW: “Fuser Error” – the thermofuse blows due to low voltage supply. Replace both thermofuse (part JC-66-03080A style) and thermistor.
- Canon imageCLASS LBP6030: Error E100 – the pressure roller’s surface cracks. Full fuser replacement required.
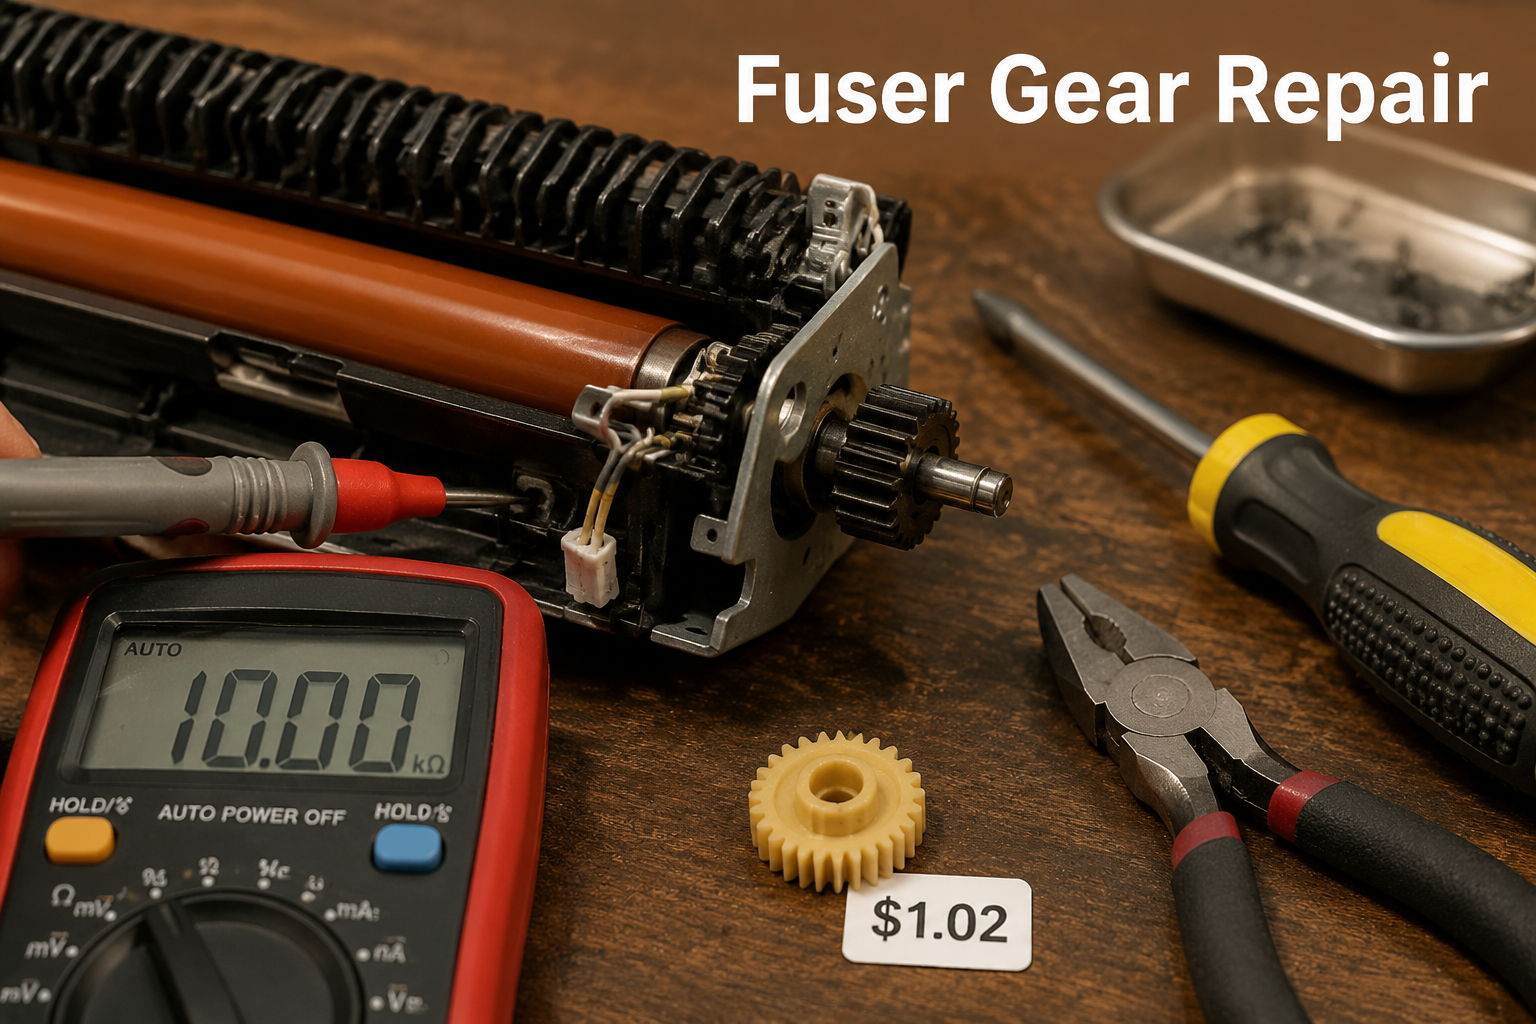
- Samsung CLP-680ND: Error #H1-5310 – fuser gear worn. The upper roller gear with bushing (like part $1.02 mentioned) is the fix.
Can You Fix It Yourself?
- Difficulty: 3 out of 5 (moderate). The printer’s internal layout is tight; you need patience with clips and small connectors.
- Time required: 45 to 90 minutes (first time). Experienced users can do it in 30 minutes.
- Skill level:
- Comfortable using a multimeter for continuity and resistance checks.
- Basic mechanical assembly: screws, clips, plugging in connectors.
- No soldering needed, but you must handle delicate wires.
- Risks:
- Electrical shock from the lamp capacitor (wait 30+ minutes after unplugging).
- Breaking plastic tabs on the fuser frame.
- Damaging the thermistor wires (they are very thin).
- Stripping screw heads if you use the wrong tool.
- Tools required exactly:
- Phillips #1 screwdriver for most screws.
- Flathead screwdriver (small) for prying clips.
- Multimeter with continuity and ohms (200k range).
- Needle-nose pliers for gripping small connectors.
- Thermal paste (if reapplying the sensor).
- Safety glasses (springs can fly off).
When it’s NOT a good DIY: If you cannot locate a replacement part (many older fusers are discontinued), or if the fuser frame itself is cracked. Also, if you don’t have a multimeter or are uncomfortable disassembling the fuser unit further (some have tiny C-clips). In these cases, professional replacement of the entire fuser assembly is safer.
Cost Breakdown — DIY vs Professional
Here are the real costs you’ll face:
DIY cost:
- Full fuser assembly (remanufactured): $25 to $60 (e.g., HP LJ Pro M404).
- Individual parts (like the gear or bushing):
- Upper Fuser Roller Gear with Bushing – $1.02 – for fixing gear wear (e.g., worn plastic teeth on Samsung or Brother).
- JC66-03080A / JC61-03755A Upper Fuser Roller – $1.13 – likely a roller or gear set for Brother/Canon models.
- Other required consumables: thermal paste ($5), maybe a new pressure roller ($8-$15).
- Total DIY cost: $5 to $75 depending on what you replace.
Professional repair shop cost:
- Diagnostic fee: $30-$50 (credited toward repair if you proceed).
- Labor: $60-$100 (30 min to 1 hour).
- Parts: same as above (but they mark up parts by 50%-100%, so a $1.02 gear becomes $10-$15).
- Total professional cost: $90 to $200.
When to skip DIY:
- If your printer is under $150 new – replacement is often cheaper than repair.
- If you don’t have a multimeter (buying one adds $15-$30, still cheaper than repair).
- If the error code returns after replacing parts – you may have a main board issue.
- If the fuser is welded shut or has a cracked frame – you need a whole assembly anyway.
Recommended route: For anyone with basic tools and patience, replacing individual worn parts (especially the gear with bushing for $1.02) is a no-brainer. For complex issues like a blown thermofuse + bad thermistor, buy a full remanufactured fuser – around $40 – and swap it in 30 minutes.
Repair Process Overview
Printer power off, unplugged, cooled 30 min. Put on safety glasses.
Remove the rear cover of the printer. Usually 2–4 screws (Phillips #1) at the bottom. Lift off the cover.
Locate the fuser assembly. It’s the metal block with a large roller visible. There will be two or three connectors plugged into it – note their orientation (take a photo). Disconnect them by pulling the plug, not the wires.
Remove the fuser unit from the printer. It may be held by 2–4 screws on each side, plus a locking tab. Slide it out carefully.
Disassemble the fuser unit (if you’re replacing internal parts). Lay it on a clean towel. Remove side covers (metal shields) – note screw lengths. Inside you’ll see the heat roller, pressure roller, thermistor, thermofuse.
Replace the faulty component:
- If replacing the upper roller gear with bushing: Use a small flathead to pry off the old gear. Snap on the new one ($1.02 part). Ensure the bushing aligns with the frame.
- If replacing the thermistor: Unscrew the metal bracket holding it, unplug the connector, install new one. Apply a tiny dot of thermal paste to its contact point.
- If replacing the thermofuse: Cut the old fuse and crimp (or solder) the new one. The part JC66-03080A may be this fuse. Ensure polarity doesn’t matter (it’s a non-polar device).
- If replacing the heat or pressure roller: Slide off the old roller (may need to remove springs). Install new roller; note the orientation of any keyed shaft.
Reassemble the fuser unit in reverse order. Make sure all springs are hooked back correctly. Gently rotate the drive gear to ensure smooth rotation.
Reinstall the fuser into the printer. Plug all connectors firmly. Replace the rear cover.
Power on the printer. If it displays an error, you may need to enter service mode to clear the fuser error (e.g., press and hold ‘Go’ button while powering on, then press ‘Go’ 3 times). Check your model’s manual for exact steps.
Common mistakes:
- Forgetting to reconnect the thermistor – the printer will error immediately.
- Over-tightening side plate screws – they can crack the plastic.
- Misaligning the gear: test by turning the gear manually before reinstalling.
- Leaving residue from old thermal paste – clean it off first.
After the Repair — Testing & Verification
Verification steps:
- First power on: The printer should warm up (fan runs, fuser heats). No error code on the display. Wait for Ready status.
- Test print: Print a single black page. Inspect the print immediately:
- Toner should be bonded firmly to the paper. Rub your finger across a solid black area – no smudge.
- Check for vertical streaks – if present, the fuser roller might be dirty or scratched.
- Check for horizontal bands of light or dark – pressure roller issue.
- Listen for noise: No grinding, clicking, or rattling. A faint swish is normal.
- Paper path test: Print 5 pages consecutively. No jams. The paper should exit straight, not curled.
- Burn-in check: After the fifth page, sniff for any burning smell. If it returns, the thermistor may still be misreading.
What to watch in the first few hours:
- If you replaced the thermofuse, the printer might blow it again if the old thermistor is still bad. If the error returns, replace the thermistor too.
- A new gear may need a short break-in – slight whirring for the first 20 pages is okay. Loud grinding means the gear is not seated properly.
- Check for toner dust around the fuser – this could indicate a leak from a damaged cartridge, not the fuser.
If everything passes, the repair is successful. You have saved $50–$150 over professional service.
Parts You’ll Need
Here are the parts that match this repair. Click the link to check the current price on AliExpress.
| Product | Price |
|---|---|
| Upper Fuser Roller Gear with Bushing … | $1.02 |
| JC66-03080A JC61-03755A Upper Fuser R… | $1.13 |
Prices and availability are subject to change on AliExpress.