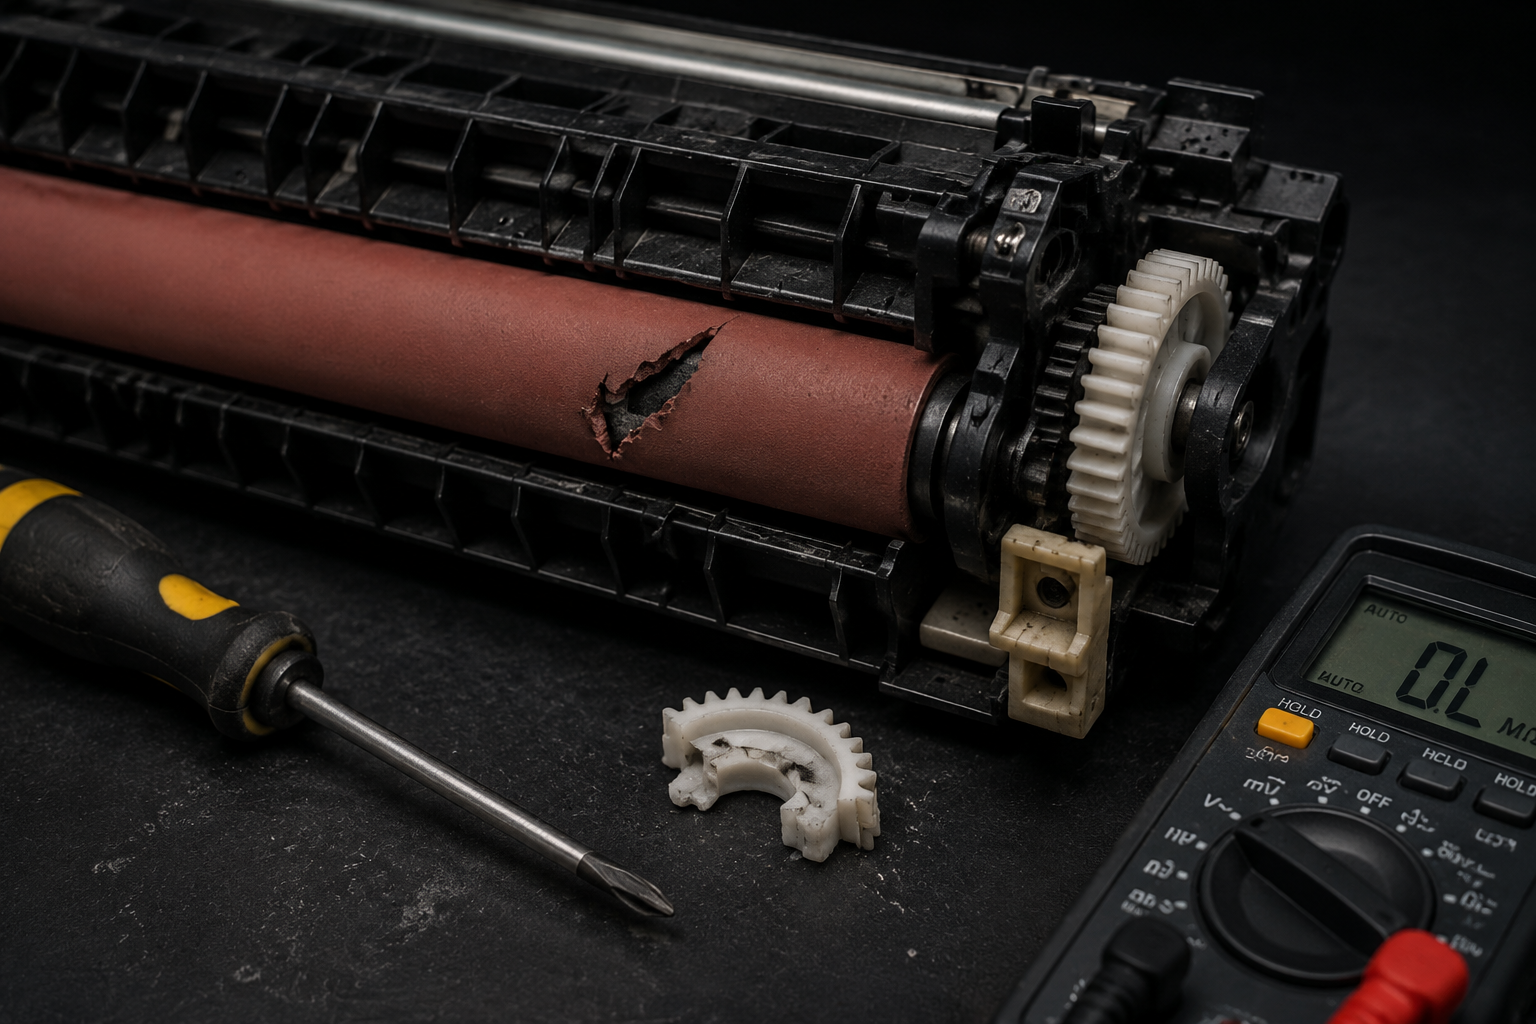
Your printer just stopped mid-print with a cryptic error code or started spewing wrinkled, smudged pages. This guide walks you through diagnosing a failed fuser assembly, finding the exact cause (from a broken gear to a torn fuser film), and deciding whether to replace a $1.02 part yourself or call a professional. No fluff—just the steps to get your printer working again.
What’s Happening — Symptoms in Detail
The most common symptoms you’re likely seeing right now:
Error codes on the screen: HP printers often display
50.1,50.2, or50.3(fuser error). Canon and Brother units showE000,E100, orE250(fuser heater failure). Lexmark printers may flash a red light and show900-01or900-02.Paper jams at the fuser: The paper stops just as it enters the fuser area, often partially wrapped around the hot roller. You may hear a grinding noise or smell burnt toner.
Print quality problems:
- Ghosting: Faint duplicate images appear further down the page because the fuser isn’t melting toner properly.
- Wrinkled paper: The pressure roller is uneven, causing the paper to buckle.
- Vertical streaks or smudges: Toner is not fused evenly, leaving fingerprints on the output.
When does it happen?
- On startup (if a thermistor fails, the printer halts immediately).
- After a paper jam (forcing paper out can snap gears or tear the fuser film).
- Gradually over weeks (ghosting gets worse, then error codes appear).
Progression: If you ignore ghosting or wrinkled paper, the fuser will eventually seize, causing a sudden stop and a permanent error that won’t clear. The broken gear (Part #1 or #2) can shed plastic debris inside the printer, damaging other rollers.
How to Diagnose the Problem Step by Step
Check the error code. Look up the code for your brand (HP 50.x = fuser thermistor/thermostat; Canon E000 = heater lamp circuit). Note the exact code—it tells you which component is faulted.
Visual inspection without opening the printer. Open the rear door or fuser access panel (if your model has one). Shine a flashlight to see the fuser. Normal: a clean, smooth, dark gray roller (if it’s a fuser film) or a shiny metal roller (for heavy duty fusers). Abnormal: tears, scorch marks, or bits of paper stuck to the roller. Look at the pressure roller (the rubber one below). Normal: uniform black surface. Abnormal: gouges, flat spots, or glossy patches.
Power-off test. Unplug the printer and let it cool for 30 minutes. Remove the toner cartridge and any formatter boards if needed to access the fuser. Use a Phillips #2 screwdriver and Torx T10 (common sizes). Pull the fuser assembly out by its handles (if designed for user removal) or undo retaining screws.
Spin the gears by hand. Locate the drive gear on the fuser. Normal: the gear turns smoothly with slight resistance from the rollers. Abnormal: the gear is missing teeth, wobbles, or won’t turn at all. This confirms a broken gear (Part #1 or #2). The bushing may be loose, causing wobble.
Check the thermistor and thermostat. Use a multimeter set to continuity (Ω). Touch probes to the thermistor leads. Normal: resistance changes when you apply heat (use a hairdryer briefly). Abnormal: open circuit (infinite resistance) or shorted (0Ω). Same for the thermostat—it should be closed (near 0Ω). If either is open, the printer will not heat the fuser.
Fuser film rotation. If your fuser uses a film (common in low- to mid-speed printers), gently rotate the film by hand. Normal: it rotates freely with minimal drag. Abnormal: it’s stuck, torn, or has indentations. A torn film will cause jams and poor fusing immediately.
Why This Happens — Root Cause
Why the fuser assembly fails—the engineering behind the frustration:
Broken drive gears (Part #1 and #2): The upper fuser roller gear and its bushing are plastic. After thousands of copies, the constant heat (up to 200°C) and torque from the drive motor cause the gear teeth to shear off or the bushing to crack. Common on HP LaserJet M402, M403, M404 and Canon imageCLASS LBP 6000/6200 series. The failure is sudden—a paper jam forces the motor to pull harder, snapping a tooth.
Fuser film tear: The fuser film is a thin, Teflon-coated sleeve. Over time, a tiny piece of debris (staple, paper clip, sticker) can pierce it. Also, if the pressure roller wears unevenly, the film can be pinched and tear. This causes ghosting and eventually a jam.
Thermistor failure: The thermistor is a temperature sensor mounted near the heat source. Dust, toner debris, or age can cause it to read incorrectly. The printer’s firmware sees an open circuit and immediately shuts down with a
50.1(HP) orE000(Canon) error. No amount of resetting will clear it—the sensor must be replaced.Pressure roller wear: The rubber pressure roller flattens over time, especially if the printer was left in standby with constant pressure. This creates a low spot, causing wrinkled paper and uneven fusing. Older Brother HL-L2300 and Dell 3110 printers are notorious for this after 50,000 pages.
Conditions that accelerate failure:
- High humidity weakens paper and increases friction.
- Constant heavy use (e.g., office printing 10,000 pages/month) without maintenance.
- Using non-genuine toner that contains more wax, causing the fuser to overheat to compensate.
- Previous jam clearing with aggressive force that cracks plastic gears.
Can You Fix It Yourself?
Difficulty: 3 out of 5 (moderate). You need to disassemble the printer to access the fuser, then disassemble the fuser itself to replace small gears or films.
Time required: 45–90 minutes, depending on your experience and the model.
Skill level needed: No soldering. Just a Phillips #2 screwdriver, Torx T10/T8, and needle-nose pliers. If you need to test thermistors, a digital multimeter is required.
Risks:
- Static discharge: Touching the fuser’s electronics (thermistor, lamps) can damage them. Use an anti-static wrist strap or touch the printer’s metal chassis.
- Connector damage: The fuser connects via a ribbon cable that snaps easily—bend it gently.
- Reassembly mistakes: Wrong gear orientation causes the fuser to lock up. Take photos during disassembly.
- Heat danger: Even after cooling, the fuser roller can be hot. Wait 30 minutes before handling.
Tools required:
- Phillips #2 and #1 screwdrivers
- Torx T10 or T8 (check your model)
- Multimeter (for thermistor check)
- Tweezers (to handle small bushings)
- Isopropyl alcohol and cotton swabs (to clean the pressure roller if worn)
Cost Breakdown — DIY vs Professional
DIY cost breakdown:
- Part #1: Upper Fuser Roller Gear with Bushing — $1.02. This replaces the plastic gear on the drive side. Good if the gear is missing teeth but the rest of the fuser is healthy.
- Part #2: JC66-03080A JC61-03755A Upper Fuser R… — $1.13. This is the same or similar gear assembly; might include a slightly different bushing. Verify compatibility with your printer model.
- Complete fuser assembly (if both film and gear are shot): $30–$60 for a compatible unit, $80–$150 for OEM.
- Thermistor (if that’s the failure): $3–$10.
- Pressure roller (if flat): $15–$30.
Total DIY: $1.02 to $150 depending on what’s broken. The cheap parts (#1, #2) are only useful if the fuser is otherwise intact—don’t expect them to fix a torn film.
Professional repair shop rates:
- Labor: $80–$150 (one hour minimum, often $120).
- Part markup: 30–100% above retail. A $30 compatible fuser becomes $60–$90.
- Total: $110–$240.
When to skip DIY:
- If the printer is more than 5 years old and the total DIY cost exceeds $50–$70 (half the price of a new entry-level printer).
- If you find multiple broken parts (gear, film, thermistor, pressure roller)—replacing the whole fuser is easier than part swapping.
- If you’re uncomfortable with high-voltage components (the fuser lamp runs at mains voltage).
- If the error code involves the heater lamp (e.g., open circuit in the lamp itself)—those are hard to source and dangerous to replace.
Repair Process Overview
Major steps to replace the fuser assembly or its internal parts:
Unplug the printer and let it cool completely (30 minutes). Remove the toner cartridge, paper tray, and any covers (rear door, side panels).
Disconnect the fuser ribbon cable from the main board. Note the orientation — some connectors latch, others slide out. Take a photo.
Remove the fuser assembly. Usually it’s held by 2–4 screws (Phillips #2) and slides out. Some models require removing the formatter board first (HP models).
If replacing a gear only:
- Place the fuser on a clean work surface.
- Remove the end cover (small Phillips screws).
- Use pliers to pull off the old gear from the roller shaft.
- Press the new gear (Part #1 or #2) onto the shaft—align the flat side or notch.
- Reinstall the end cover.
If replacing the entire fuser assembly:
- Compare the new unit with the old one. Transfer any springs or connectors if needed.
- Slide the new fuser into the printer, reinstall screws, reconnect the ribbon cable.
Reassemble all removed panels and the toner cartridge. Plug in the printer and turn it on. The error code should clear automatically; you may need to run a cold reset (consult your manual—often holding a button while powering on).
Common mistakes:
- Forgetting to remove all shipping packaging from a new fuser (foam or tape).
- Snapping the ribbon cable—handle it carefully; if torn, the printer won’t detect the fuser.
- Overtightening screws can crack plastic housings.
- Installing the gear upside-down (the bushing side must face outward).
After the Repair — Testing & Verification
How to verify the repair worked:
Print a test page. Use a built-in test function (hold the ‘Go’ button for 5 seconds while ready on Brother, or press the ‘X’ button and choose ‘Print Configuration’ on HP).
Check for error codes. If the same code returns immediately, you may have a different faulty part (e.g., thermistor wasn’t replaced) or a connector is loose.
Smudge test. On a printed page, rub a dark area with your finger. Normal: toner stays solid. Abnormal: toner smears (fuser temperature too low) or flakes off (temperature too high). This indicates the new gear didn’t solve the heating issue—check the thermistor.
Inspect the first few pages. Look for:
- Wrinkles: if present, the pressure roller might still be worn.
- Ghosting: if present, the fuser film may be damaged or the gear timing is off.
- Jams: listen for grinding—the new gear might be misaligned.
Run 10–20 pages in rapid succession. The fuser will heat up fully. If the error code appears after thermal cycling, the thermistor or thermistor connection is faulty.
Monitor for odd smells: A burning smell could mean the new gear is rubbing against plastic due to wrong size.
If everything passes, your printer is back in action. The cheap gear (Part #1 or #2) can give thousands more pages if the rest of the fuser is healthy.
Parts You’ll Need
Here are the parts that match this repair. Click the link to check the current price on AliExpress.
| Product | Price |
|---|---|
| Upper Fuser Roller Gear with Bushing … | $1.02 |
| JC66-03080A JC61-03755A Upper Fuser R… | $1.13 |
Prices and availability are subject to change on AliExpress.