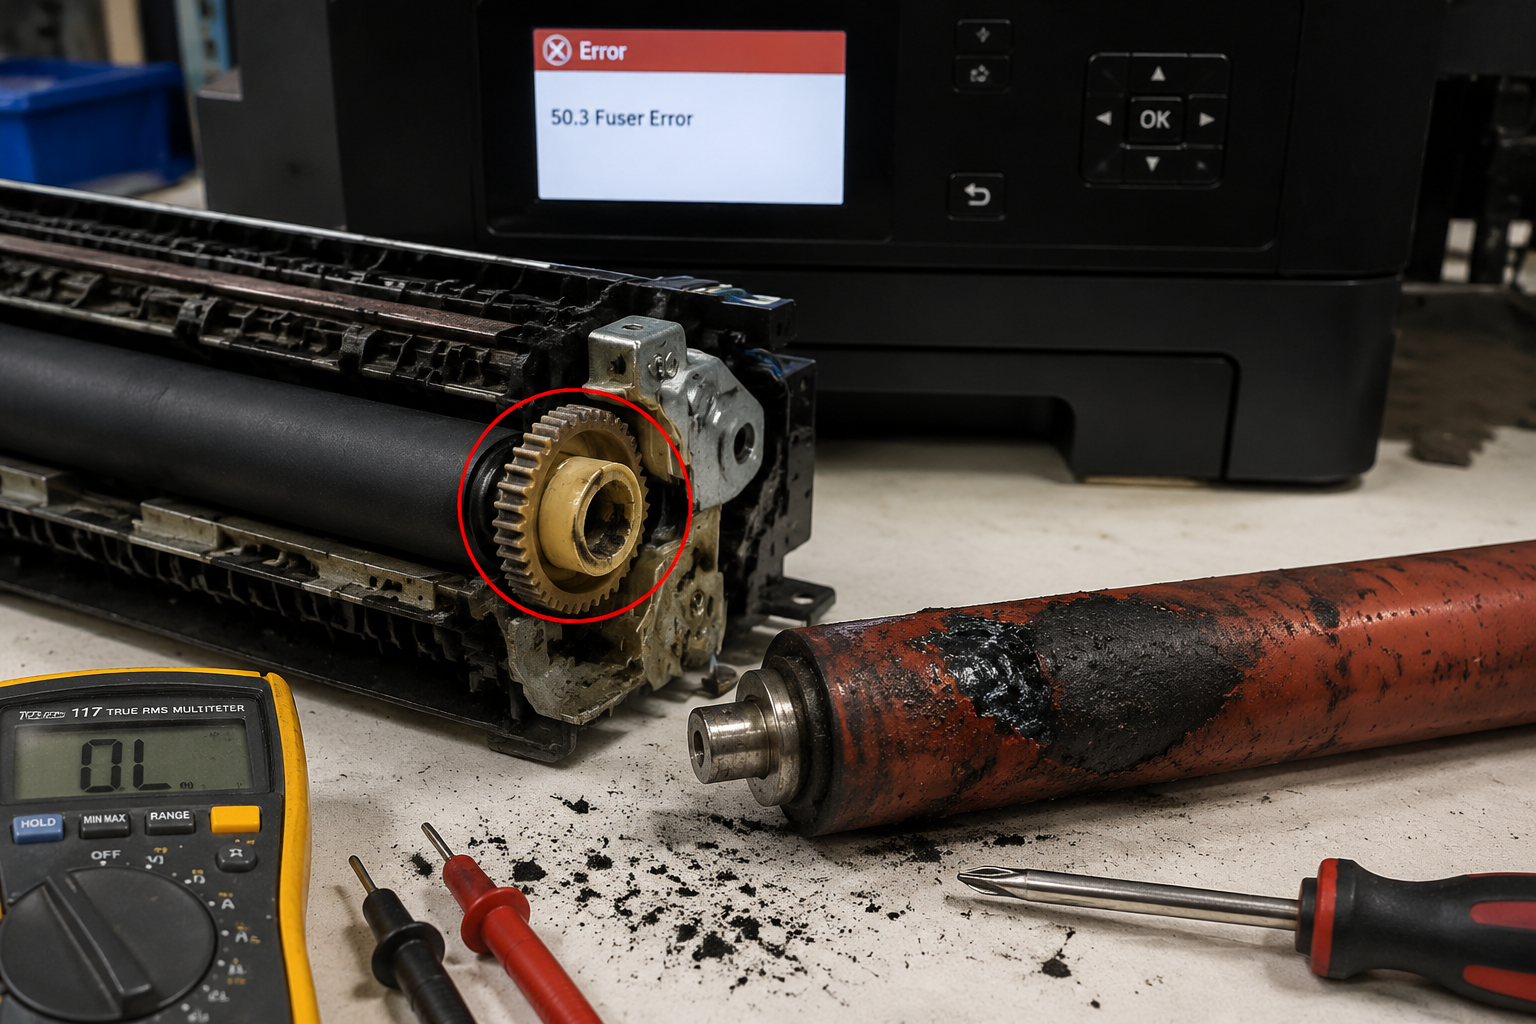
Your printer is producing smudged pages, ghost images, or showing error codes like ‘Fuser Error’ or ‘Service Call’. This guide explains exactly what went wrong in your fuser assembly, how to diagnose the specific failure, and whether you can fix it yourself for under $10 or need professional service.
What’s Happening — Symptoms in Detail
Your printer suddenly started ruining prints. The most common symptom is horizontal smudging or ghost images – faint copies of text or images that appear an inch or two after the original. Some users report vertical black streaks running down the page, especially near the edges. Others see crumpled paper or paper jams that occur halfway through the fusing process.
Specific error codes vary by brand:
- HP/Lexmark:
49.4C02or50.xfuser errors - Brother:
Fuser ErrororError 54 - Canon:
E000followed by a number (e.g., E000-0001) - Samsung/Xerox:
Fuser ErrororService Call 80-1 - Kyocera:
C4100orFuser Malfunction
When does it happen? Most failures appear mid-print – suddenly the page comes out with streaks. Some users first notice a burning smell (overheated fuser) then error codes. Others experience gradual worsening: pages get progressively dirtier over a week. A sudden total failure usually involves a loud grinding noise followed by a jam.
How does it progress? If ignored, a failing fuser can melt the toner onto the pressure roller, creating hard lumps that physically damage other parts. Over time, the fuser roller wears flat in one spot, creating a repeating defect every time that spot contacts the paper.
How to Diagnose the Problem Step by Step
Visual Inspection – Open the rear access door (or pull out the fuser if accessible). Look at the upper fuser roller (the shiny, hot one) and lower pressure roller (rubbery). Normal: roller surface is smooth, even color, no scratches. Abnormal: you see dents, scratches, melted toner blobs, or flat spots.
Error Code Check – Write down the exact error code displayed. Use Google with your model + error code (e.g., ‘HP LaserJet M404 50.3 fuser’). Many codes point to specific fuser components (e.g., thermistor failure vs. thermofuse blow).
Paper Path Test – Print a single blank page (or use a Page Setup test in driver). After the sheet exits, examine it for glossy stripes (fuser too hot) or loose toner that smears (fuser too cold). Rub your finger on the printed text – if it smudges, the fuser isn’t bonding toner properly.
Resistance Check (advanced) – Unplug printer. Remove fuser. Use a multimeter set to ohms to measure the thermistor (usually a glass bead with two wires). Normal resistance at room temp: 1-10 kΩ. Abnormal: open circuit (infinite) or short circuit (0 Ω). Check thermofuse (a small cylinder) – should be near 0 Ω (continuity). If either is open, the fuser won’t heat.
Gear Check – Rotate the upper fuser roller gear by hand. Normal: smooth rotation with slight resistance. Abnormal: grinding, catching, or the gear is wobbling (bushings worn). If you see a broken tooth or the gear spins freely without moving the roller, the fuser drive gear is stripped.
Why This Happens — Root Cause
The fuser assembly uses high heat (typically 180-220°C) and pressure to bond toner onto paper. Over time, several parts fail:
Thermistor failure: The thermistor is a temperature-sensing resistor. Constant heat cycling causes it to crack or lose accuracy. When it fails, the printer either overheats (melts rollers) or never reaches fusing temperature – both cause smudging.
Thermofuse blow: A safety thermal fuse that permanently opens if the temperature exceeds ~240°C. Common after a paper jam that blocked the fuser, preventing proper heat dissipation. Once blown, the printer refuses to heat the fuser.
Upper fuser roller wear: The Teflon coating on the roller gradually wears off after thousands of pages. Once the underlying rubber is exposed, toner sticks to the roller and transfers to the next page as ghost images.
Pressure roller flat spots: The rubber pressure roller develops a permanent flat area if the printer is left idle for weeks with the rollers in contact (common in rarely-used home printers). This causes a repeating vertical band of poor fusing.
Fuser drive gear with bushing wear: The Upper Fuser Roller Gear with Bushing (the plastic gear that drives the roller) wears out from friction. The bushing inside the gear gets enlarged, causing the gear to slip or wobble. This results in inconsistent rotation speed, creating horizontal bands of light/dark printing. Part #1 in our cost section is exactly this.
Upper Fuser Roller (JC66-03080A / JC61-03755A): The Teflon-coated heat roller itself. After 50,000-100,000 pages (typical), the coating flakes off or the roller becomes pitted. Once damaged, it must be replaced entirely. Part #2 addresses this.
Can You Fix It Yourself?
Difficulty Level: 2-4 out of 5 (depends on printer model – some fuser assemblies slide out easily, others require disassembling half the printer).
Time Required: 15-60 minutes. Simple fuser swap: 15 minutes. Full disassembly and gear replacement: up to 1 hour.
Skill Level Needed: No soldering required. Basic tools: Phillips #1 and #2 screwdrivers, needle-nose pliers, tweezers. For part #1 (gear with bushing), you need to remove the old gear from the shaft – may require a small flathead screwdriver to pry.
Risks:
- Getting shocked by high-voltage (internal fuser power supply) if you touch exposed terminals while printer plugged in. Always unplug and wait 10 minutes for capacitors to discharge.
- Breaking plastic clips or tabs when removing the fuser. Many printers have fragile locking mechanisms.
- Installing the new roller gear backwards – the bushing side must face the printer frame.
- If you replace only the gear but the roller shaft is worn, the new gear will also fail quickly.
Tools Required:
- Phillips #1 screwdriver (for most screws)
- Small flathead screwdriver (for prying clips)
- Multimeter (for thermistor/thermofuse check)
- Thermal paste (optional, for thermistor re-seating)
- Work gloves (the old fuser may have sharp metal edges)
Cost Breakdown — DIY vs Professional
DIY Part Costs:
- Part #1: Upper Fuser Roller Gear with Bushing – $1.07 (replaces the worn drive gear and its bushing)
- Part #2: JC66-03080A / JC61-03755A Upper Fuser Roller – $1.19 (replaces the heat roller itself, typically needed if the coating is flaking)
- Combined cost for both parts: $2.26 (plus shipping ~$5). This is the cheapest fix path.
- Full fuser assembly (pre-assembled): $20-60 on eBay or Amazon.
Professional Repair Costs:
- Authorized service center: $120-$200 labor + parts. Usually they replace the entire fuser assembly (not individual components).
- Local repair shop: $50-$100 labor + parts. Some will install your supplied parts for a fee.
- If the printer is a cheap model ($150-200), professional repair often costs more than a new printer.
When to Skip DIY:
- If your printer has less than 500 pages of expected life (e.g., a $80 home printer).
- If you see smoke or burn marks – internal wiring may be damaged.
- If the error code indicates a mainboard communication fault (not just fuser hardware).
- If you are uncomfortable working with high-voltage electronics.
Recommendation: For most users, replacing just the gear ($1.07) is a cheap first step. If the roller is visibly damaged, add the upper roller ($1.19). Total under $3 – it’s worth attempting the DIY repair even if you’re a beginner.
Repair Process Overview
Power Down & Unplug – Wait 30 minutes for the fuser to cool. The fuser can stay hot enough to burn skin for 15 minutes after printing.
Remove the Fuser Assembly – Locate the fuser (usually behind the rear door or inside a removable panel). Release any locking clips or screws. Slide the fuser out carefully. Note the orientation – take a photo.
Disassemble the Fuser – Remove the side covers of the fuser unit (usually 4-6 Phillips screws). Separate the upper and lower roller halves. The gears are on the left or right side of the upper roller.
Replace the Upper Fuser Roller Gear (Part #1) – Pry off the old gear from the roller shaft using a flathead screwdriver. It may be tight – apply gentle force. Clean the shaft with isopropyl alcohol. Press the new Upper Fuser Roller Gear with Bushing onto the shaft until it seats flush. Make sure the bushing side faces outward.
Replace the Upper Fuser Roller (Part #2) – If you are also replacing the roller, slide the old roller off its metal core (it may be friction-fit). Install the new JC66-03080A / JC61-03755A Upper Fuser Roller onto the core, aligning any notches. Reinstall the spring clips that hold it in place.
Reassemble the Fuser – Put the two rollers back together. Check that all gears engage smoothly – turn the main gear by hand; both rollers should rotate without binding. Reinstall the fuser covers.
Reinstall the Fuser – Slide the fuser back into the printer, ensuring it locks into place. Reconnect any electrical connectors. Close the rear door.
Reset the Error – Some printers require a cold reset to clear the fuser error. Unplug for 30 seconds, then plug in and power on. If the error persists, the printer may have logged a service code that needs a manual reset (check your model’s procedure).
After the Repair — Testing & Verification
Print a test page – Use the printer’s internal test page (usually by pressing and holding the Cancel button for 5 seconds). Look for uniform solid black areas – no ghosting or streaks.
Sheets side-by-side – Compare the test page to one printed before the failure. The print quality should be identical (or better if the old roller was worn).
Monitor the first 50 pages – Run a 10-page continuous print job. Afterward, inspect the fuser for any new error codes. If you see fuser error re-appear, the thermistor or thermofuse may still be bad (needs full fuser replacement).
Check for abnormal sounds – Listen for squeaking or grinding. If you hear gear chatter, the new gear may not be fully seated – re-open and check the bushing alignment.
Perform a paper path test – Use a bright light to examine the fuser roll surface after the first print. There should be no melted toner residue. If you see toner stuck to the roller, the fuser temperature may be off (defective thermistor).
Parts You’ll Need
Here are the parts that match this repair. Click the link to check the current price on AliExpress.
| Product | Price |
|---|---|
| Upper Fuser Roller Gear with Bushing … | $1.07 |
| JC66-03080A JC61-03755A Upper Fuser R… | $1.19 |
Prices and availability are subject to change on AliExpress.