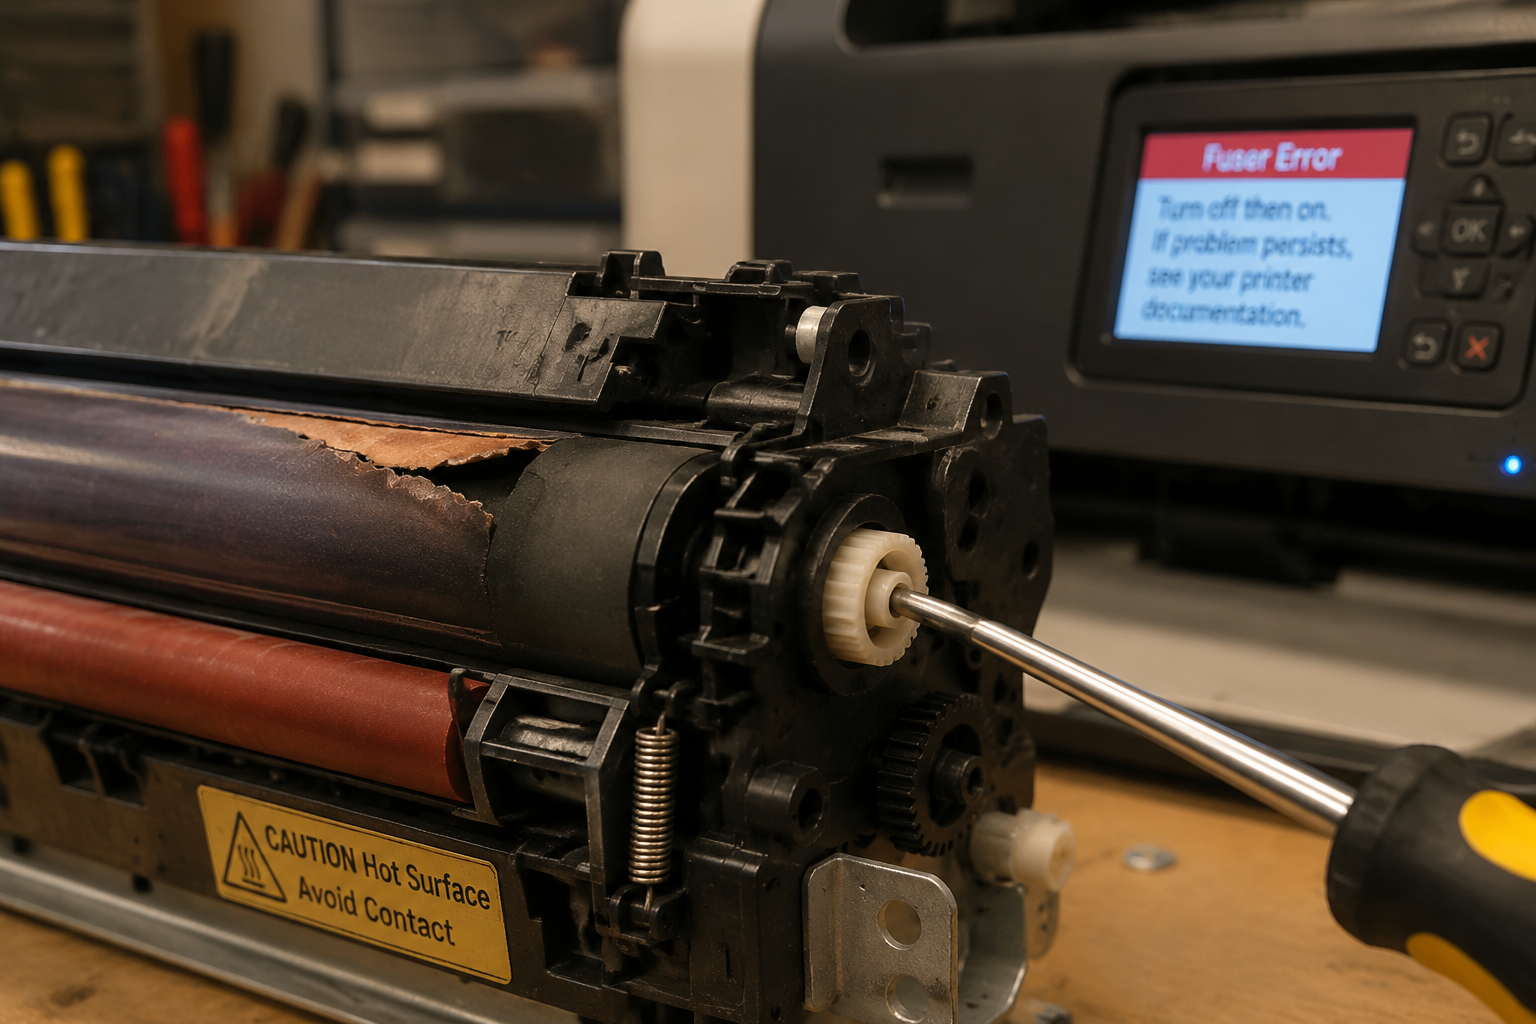
Your printer displays error codes like Service 50 or Fuser Error, or leaves smudged, wrinkled paper with a burning smell. This guide walks you through exactly what went wrong, how to diagnose the faulty component inside the fuser assembly, and whether you can fix it yourself using inexpensive replacement parts.
What’s Happening — Symptoms in Detail
Your printer suddenly stops mid-print – the display shows “Fuser Error” or “Service 50” and the paper is half-ejected, wrinkled, or covered in black smudges.
Some users report a burning smell and see smoke rising from the rear of the printer. Others hear a grinding or clicking noise right after the paper passes through the fuser.
The problem typically appears during a print job (not on startup). It may start as occasional smudging or curling, then escalate to full jams or error codes within a few prints.
On HP/LaserJet models you might see Error 50.x Fuser Error (e.g., 50.1, 50.3). Brother printers display “Fuser Error” or “Self-Diagnostic” lights. Canon imageCLASS units often show E000 or E100.
If the fuser assembly is failing gradually, you may first notice toner smudges that rub off on your fingers or paper edges that feel wavy.
Abrupt failure (error code + halt) usually means a thermal fuse blow, thermistor short, or fuser film tear – the printer detects an unsafe condition and stops protecting itself.
How to Diagnose the Problem Step by Step
Check the Error Code – Look at the LCD or blink pattern. Write it down. Common codes: 50.1 (low heat), 50.3 (overheat), E000 (thermistor failure), Fuser Error on Brother. This tells you the general fault type.
Inspect the Paper Path – Open the rear door or fuser access tray. Use a flashlight to look for torn pieces of paper stuck between rollers. Normal: no debris. Abnormal: shredded paper, melted plastic, or a black, glossy residue on the fuser roller surface.
Visual Roller Check – Gently rotate the upper fuser roller (the shiny metal or rubber one) by hand. Normal: smooth, even surface, no flat spots. Abnormal: tears in the fuser film, dents, or black buildup that feels sticky to the touch.
Pressure Roller Check – The lower roller (usually rubber). Turn it. Normal: uniform, slightly tacky feel. Abnormal: hardened, shiny glaze or deep grooves that match the paper edges. Glazed rollers cause uneven heat transfer.
Thermal Fuse Test (Advanced) – Use a multimeter set to continuity. Locate the thermal fuse (white ceramic with two wires, near the heater lamp). Touch probes to both terminals. Normal: beeps (continuity). Abnormal: no beep – fuse is blown, often due to overheating or age.
Thermistor Test (Advanced) – Check the thermistor (small bead or ceramic disc on a wire) for resistance. Compare to specs (e.g., 100kΩ at 25°C). Abnormal: open circuit or shorted (0Ω or OL). Replace the thermistor or the entire assembly.
Quick Beginner Check: Only steps 1-3. If you see torn film or stuck paper, you already found the culprit. If no obvious debris, do step 4 (glazing).
Why This Happens — Root Cause
Wear and Tear – The fuser assembly operates at 180–220°C every time you print. Over years, the fuser film (a thin, Teflon-coated sleeve) develops microscopic cracks that grow into tears. The pressure roller rubber hardens and loses grip, causing paper to slip and jam.
Paper Debris – Small paper fragments or staples stub the fuser film, ripping it on the next rotation. This is the #1 cause of sudden fuser failure on office printers.
Overheating – If the thermistor loses contact with the fuser roller, the heater lamp keeps running, blowing the thermal fuse. This is common after a crash where the printer is dropped or moved roughly.
Age & Duty Cycle – A printer printing 10,000+ pages per month will wear out a fuser assembly faster (every 80k–100k pages). Budget models use cheaper films that fail sooner.
Specific Model Issues:
- HP LaserJet Pro M402/M404: Known for fuser film tearing at low page counts (20k–50k). Part #JC66-03080A fits these.
- Brother HL-L2370DW: Pressure roller glazing is common due to toner residue accumulation.
- Canon imageCLASS LBP6030w: Thermal fuse blows because the thermistor shifts out of place during shipping.
Can You Fix It Yourself?
- Difficulty Level: 3 out of 5 (moderate). This is not a beginner repair, but with careful steps you can do it.
- Time Required: 30–60 minutes for a first-time repair (experienced techs: 15–25 minutes).
- Skill Level: You need to handle small screws, use a multimeter (optional), and reassemble an assembly with springs.
- Tools Required:
- Phillips #1 and #2 screwdrivers
- Flat screwdriver for prying clips
- Multimeter (for thermal fuse test)
- Tweezers for small springs
- Flashlight
- Risks:
- Burning fingers – The fuser is hot immediately after use. Wait 30 minutes before touching.
- Breaking plastic clips – The fuser housing is brittle. Go slow.
- Misaligning gears – The upper fuser roller gear with bushing (Part #1, $1.07) must be seated perfectly or the printer won’t feed paper.
- Destroying the fuser – Over-tightening screws can crack the heater lamp mount.
- When to Replace Instead of Repair: If the heater lamp is burned out or the main board controls failed, often cheaper to buy a complete new fuser assembly ($30–$60).
Cost Breakdown — DIY vs Professional
DIY Parts (exact matching):
- Upper Fuser Roller Gear with Bushing – Part #1: $1.07 (replaces broken gear teeth that cause grinding)
- Upper Fuser Roller Assembly – Part #2 (JC66-03080A / JC61-03755A): $1.19 (includes roller and film – if torn)
- Other needed parts: thermal fuse ($0.50–$1), thermistor ($2–$4) – not in your list but available separately
- Total DIY cost: $1–$3 for small issues; if you need a complete assembly, budget $20–$35 from third-party sellers.
Professional Repair:
- Bench fee (diagnostic): $50–$80
- Labor to replace fuser: $75–$150
- Parts: $30–$100 depending on OEM vs compatible
- Total professional: $125–$330
When to Skip DIY:
- If the error code persists after replacing the film/gear (PCB issue)
- If you see burned wires or a cracked plastic frame – replacement costs less than the repair time
- If the printer is over 5 years old and a new printer costs under $150
Price Comparison Example: For a Brother HL-L2370DW, DIY: buy a compatible fuser assembly for $35 (half-hour job). Pro repair: $120 labor + $60 part = $180. You save $145 by doing it yourself.
Repair Process Overview
Power Down & Cooldown – Unplug the printer. Wait at least 30 minutes for the fuser to cool. Touching a hot fuser causes serious burns.
Remove the Fuser Assembly – Open the rear door. Locate the two blue/green lock levers. Flip them up to release the fuser. Slide the assembly out backward. On some models you need to remove a metal bracket first.
Disassemble the Fuser – Lay the assembly on a clean surface. Remove all visible screws (Phillips #1 or #2). Carefully separate the two halves – note the spring positions. Take photos at each step.
Replace the Worn Part – If the film is torn: remove the old film with its gear (Part #1 or #2). Clean the heater lamp rod with isopropyl alcohol. Lubricate the new film sleeve lightly with fuser grease (silicone grease). Slide the new film/gear onto the lamp rod.
Reassemble the Fuser – Align the pressure roller and springs as before. Squeeze the halves together and replace screws. Ensure the fuser roller rotates freely by hand.
Reinstall – Slide the fuser back into the printer. Lock the levers. Plug in and turn on.
Common Mistakes:
- Forgetting to grease – causes new film to melt within 10 prints.
- Mixing up left/right springs – one is stronger; wrong side causes uneven pressure.
- Not resetting error code – some models need a button sequence (e.g., press Resume twice) even after repair.
After the Repair — Testing & Verification
First Power On – The printer may run a warm-up cycle (2–5 minutes). Listen for unusual noises. Normal: quiet hum; abnormal: grinding or chirping.
Print a Test Page – Use the printer’s built-in test page (hold the Go button for 5 seconds). Look for:
- No smudges on the page
- No wrinkles at the bottom of the paper
- Toner fuses properly (does not rub off easily)
Watch the First 10 Prints – Smudges or jams that appear after 5–10 pages indicate the thermistor is not making good contact or the new part is misaligned. If you get a fresh error code (e.g., 50.3), immediately turn off the printer – the thermal fuse may have blown again.
Check for Overheating – After 20 pages, feel the top cover near the fuser. If it’s too hot to touch for more than 2 seconds (above 70°C), the thermistor is faulty.
Reset the Maintenance Counter (if required) – Some HP and Canon models store a fuser page count that must be reset via a button sequence or software. Check your manual – otherwise the error may return even though the repair is good.
Parts You’ll Need
Here are the parts that match this repair. Click the link to check the current price on AliExpress.
| Product | Price |
|---|---|
| Upper Fuser Roller Gear with Bushing … | $1.07 |
| JC66-03080A JC61-03755A Upper Fuser R… | $1.19 |
Prices and availability are subject to change on AliExpress.