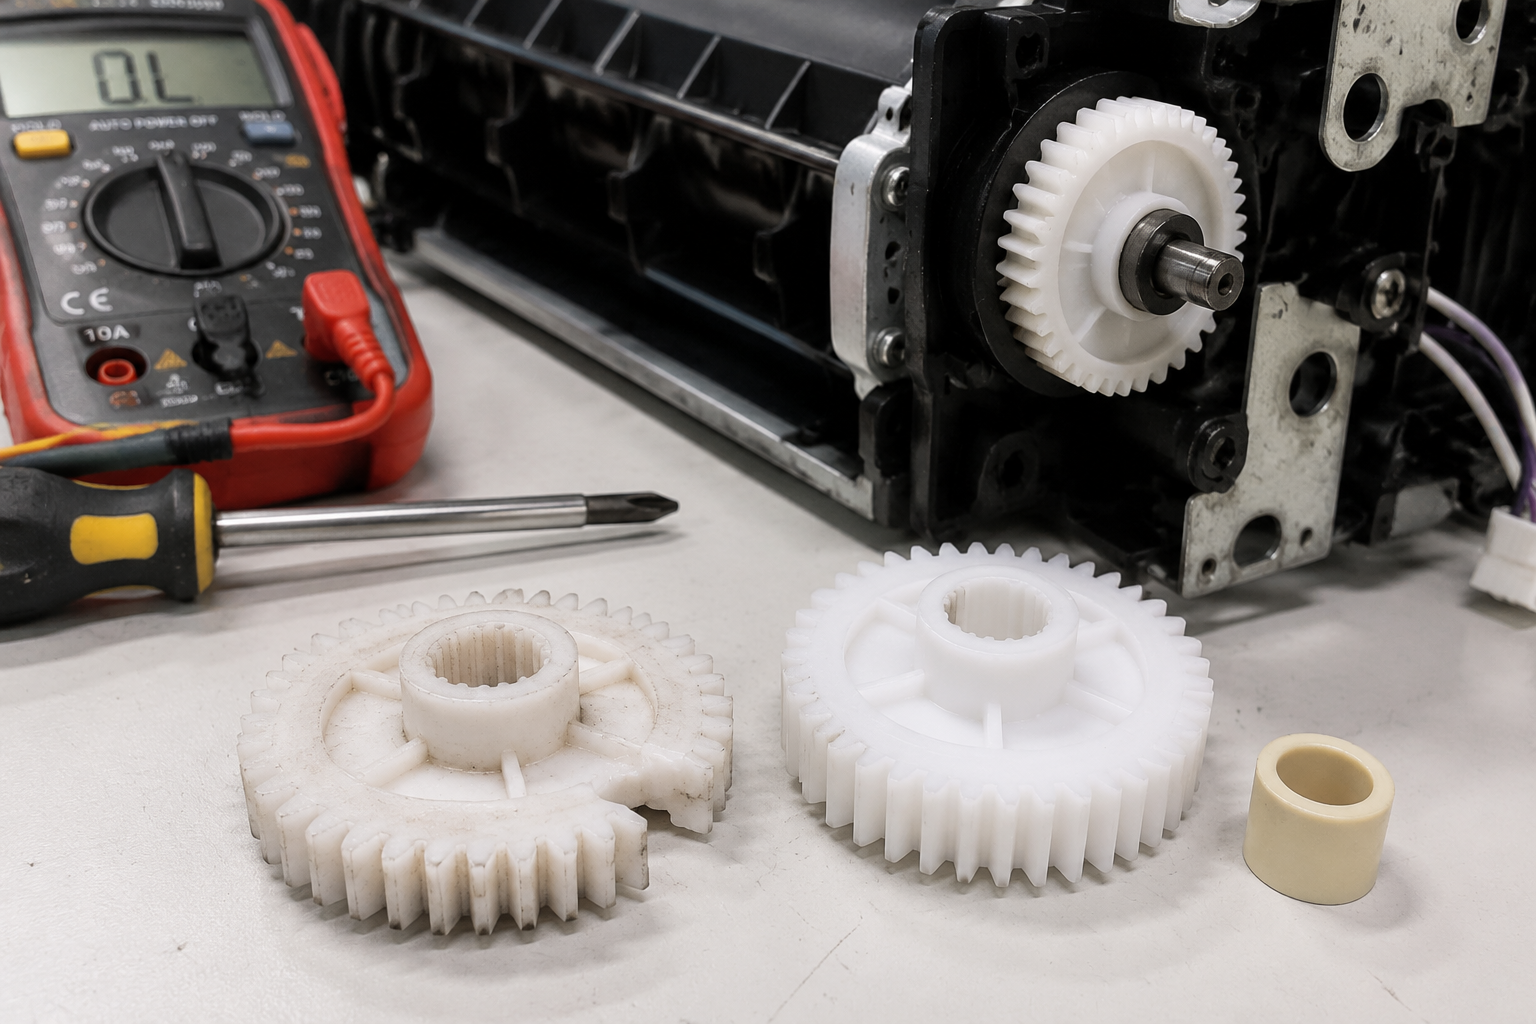
Your printer displays ‘Fuser Error 50’ or leaves smudged, wrinkled pages. This guide explains exactly what the fuser assembly does, how to diagnose it with a multimeter and visual inspection, and whether you can fix it yourself for under $2 (if the problem is just a gear) or need a $150 OEM replacement. Step-by-step diagnosis from error code to part failure.
What’s Happening — Symptoms in Detail
Your printer suddenly stopped mid-print. The LCD shows an error code like “Fuser Error 50”, “Service Call 50”, or “Fuser Malfunction” on models such as HP LaserJet P1102w, Brother HL-L2350DW, or Canon imageCLASS MF743Cdw. Some machines display “Replace Fuser” or “Paper Jam” even though no paper is stuck.
What you actually experience:
- Smudged or wavy prints – The toner isn’t fused into the paper, leaving fingerprints when touched.
- Loud grinding or clicking – A broken gear inside the fuser assembly is scraping against plastic or metal.
- Burning smell – The fuser roller is overheating due to a failed thermistor or jammed roller.
- Complete shutdown – The printer refuses to print at all, and the error code reappears after power cycling.
When does it happen?
- On startup – The printer runs a self-test, detects an open thermistor circuit, and immediately errors.
- During a print job – Especially on high‑coverage pages or after a long idle period.
- After a paper jam – A torn piece of paper caught in the fuser roller can damage the roller coating.
How it progresses?
- Gradual failure – Prints become progressively more smudged or wavy over weeks.
- Sudden failure – One day the printer just errors out with a grinding noise and never completes another page.
- Intermittent – The error appears randomly, often after the printer has warmed up for a few minutes.
How to Diagnose the Problem Step by Step
Power Cycle Reset – Turn off the printer, unplug it for 30 seconds, then plug back in and turn on. If the error clears temporarily, the fuser is failing but not completely dead. If it returns immediately, proceed to step 2.
Check Error Code on Screen – Write down the exact code. Common ones:
- 50.x Fuser Error – Usually a heater failure (open thermistor or lamp).
- 52.x Scanner Error – Rarely related; check other guides.
- Paper Jam 13.2.x – Often a piece of paper stuck inside the fuser exit path.
Visual Inspection Without Tools – Open the rear access panel (or fuser cover). Use a flashlight to look at the fuser rollers.
- Normal: The rollers are smooth, black/dark gray, and rotate freely when you turn the green release levers (if present).
- Abnormal: You see chunks missing from the roller surface, a burn mark, a metal spring hanging loose, or a broken white plastic gear (often the upper fuser roller gear).
Manual Rotation Test – With the printer off, reach inside and try to rotate the fuser rollers using a flathead screwdriver or your fingers (wear gloves if hot).
- Normal: The rollers turn with smooth, even resistance.
- Abnormal: They don’t turn at all (seized bearings) or click/grind (broken gear teeth).
Thermistor Resistance Test (Advanced) – Requires a multimeter set to ohms (Ω).
- Locate the thermistor – a small glass bead with two wires, pressed against the fuser sleeve or roller.
- Normal: At room temperature, resistance should be between 200kΩ and 500kΩ. It decreases as the fuser heats up.
- Abnormal: Reading is infinite (OL) – the thermistor is open, causing the error. Also check the main fuser lamp (ceramic heater on many laser printers) – should read 5–10Ω at room temperature. An open lamp reading means the heater is dead.
Check Gear Engagement – Remove the fuser assembly from the printer (refer to manual). Inspect the drive gear that connects to the printer’s main motor.
- Normal: Teeth are intact, no chipping.
- Abnormal: Several teeth are broken off, or the gear is spinning freely on its shaft (bushing worn out).
Why This Happens — Root Cause
The fuser assembly is a consumable part designed to apply heat and pressure to fuse toner onto paper. Two main subsystems fail:
1. Heater Failure (Thermistor / Thermistor Circuit Breaker)
- The thermistor (negative temperature coefficient NTC resistor) tells the main board the temperature. If it cracks or its wire breaks, the printer sees an infinite resistance and triggers Fuser Error 50.
- Thermal fuse (non‑resettable) blows if the fuser overheats – often due to a failed thermistor or stuck pressure roller. On many HP models, this thermal fuse is soldered onto the fuser film sleeve.
- Heaters can also open circuit from age or manufacturing defects. The typical life is 100,000 pages for OEM fusers, but heavy use (high coverage, continuous printing) accelerates wear.
2. Mechanical Failure (Gears, Rollers, Bushings)
- The upper fuser roller gear (part #1, $1.07) is a common weak point. It is a small white plastic gear that transfers drive from the printer motor to the roller. Its bushing wears out, causing the gear to wobble and eventually strip teeth.
- Pressure roller bearings seize due to paper dust and toner contamination. When they seize, the roller stops spinning, causing the drive gear to strip.
- Fuser sleeve (film) can tear if a paper jam is forcibly pulled out. A torn sleeve leaves melted toner stripes on prints.
- Separation pawls (small plastic fingers that peel paper off the roller) break off, leading to paper jams at the fuser exit.
Conditions that accelerate failure:
- High‑volume printing (office environment) – the fuser runs hot for long periods.
- Low‑quality paper – leaves debris that contaminates bearings.
- Frequent paper jams – pulling jammed paper can rip the sleeve or break pawls.
- Power surges – can damage the heater control circuit on the main board.
Known issues by model:
- Brother HL‑L2350DW: The upper fuser roller gear breaks at the bushing almost predictably after 30,000 pages. Reseat with the $1.07 gear and bushing fix.
- HP LaserJet M402: Thermal fuses often blow due to weak thermistor connections. Replace both the thermistor and thermal fuse as a pair.
- Canon MF743: The pressure roller bearings produce a grinding sound before eventual seizure. Lubrication delays the failure, but replacing the roller assembly is the permanent fix.
Can You Fix It Yourself?
Difficulty Level: 2 out of 5 – Requires basic mechanical skills and careful handling of electrical wires. No soldering is needed for the gear replacement, but the thermistor/thermal fuse fix may require desoldering if the wires are not connector‑based.
Time Required:
- Gear replacement: 20–30 minutes
- Thermistor replacement: 30–45 minutes
- Full fuser assembly replacement: 10–15 minutes (plug‑and‑play)
Skill Level:
- None for full assembly swap (follow YouTube video).
- Intermediate for part‑level repairs – you must disassemble the fuser unit, which contains high‑voltage components and springs.
Risks:
- Electrocution hazard – The fuser heater operates at 110–240V AC. Always unplug the printer and wait 5 minutes for capacitors to discharge.
- Burning – Fuser gets extremely hot. Let it cool for 20 minutes after printing before touching.
- Breaking plastic tabs – Fuser housing is held by brittle plastic catches. Use plastic spudgers, not screwdrivers.
- Incorrect reassembly – If gears are not aligned, the new part will strip again within a few pages.
Tools Required:
- Phillips #1 and #2 screwdrivers (magnetic tip helpful)
- Flathead screwdriver small (for prying clips)
- Multimeter (for thermistor/heater testing – set to Ω mode)
- Needle‑nose pliers (to release wire connectors)
- Isopropyl alcohol and cotton swabs (to clean roller surfaces)
- Replacement part (gear or thermistor module, or full fuser assembly)
What could go wrong?
- Installing the wrong gear orientation (clockwise vs counter‑clockwise drive) – mark with a sharpie before removing.
- Overtightening screws on the heater bracket – can crack the ceramic heater.
- Forgetting to disconnect the fuser from the printer main board before testing – can short the DC logic voltage.
Cost Breakdown — DIY vs Professional
DIY Cost Options (from our available parts):
- Upper Fuser Roller Gear with Bushing – $1.07 – This single part (white plastic gear with built‑in bushing) is the most common fix for grinding/clicking symptoms. Fits many Brother, Dell, and Samsung laser printers that use a similar drive train.
- JC66‑03080A / JC61‑03755A Upper Fuser Roller Assembly – $1.19 – A near‑identical replacement gear and bushing set. Often this includes the bushing already pressed into the gear, saving you the trouble of swapping the bushing alone.
- Total DIY part cost: $1.07 to $1.19 plus $5 shipping if ordering online. No other parts needed for the gear fix.
If the thermistor or thermal fuse is bad:
- Entire thermistor module (or NTC thermistor alone) is about $3–$10 from electronics distributors.
- But many printer shops sell a “fuser repair kit” including thermistor, thermal fuse, and bushing for $15–$25.
- Full OEM fuser assembly (new roller, heaters, gears) costs $80–$150 depending on brand.
Professional Repair Shop Rates:
- Diagnostic fee: $40–$70 (often waived if you proceed with repair).
- Labor for gear replacement: $60–$100 (30‑minute job).
- Full fuser assembly replacement: $120–$200 (parts + labor).
- Total you save by DIY gear fix: At least $100–$150 – because you pay $1.07 instead of $150+.
When to skip DIY:
- If the fuser heater lamp is open (check with multimeter) – the ceramic heater is often custom‑shaped and hard to source individually. A full assembly is safer.
- If the main board is also damaged (e.g., blew a fuse on the board due to shorted heater) – that repair requires soldering and troubleshooting beyond this guide.
- You lack a multimeter and cannot accurately test resistance – guessing the part wrong can waste money.
- The printer is very old (over 7 years) – cost of a used printer may be lower than OEM fuser assembly.
Repair Process Overview
Safety First – Unplug the printer and let it cool for 20 minutes. Remove the toner cartridge and set it aside in a dark bag.
Remove the Fuser Assembly – Open the rear (or front) access door. Release any green locking levers that hold the fuser in place. Gently pull the fuser out by its handle. On some Brother models, you must also remove the back cover first (4 Philips screws).
Disassemble the Fuser Housing – Place the fuser on a clean work surface. Remove all screws securing the two metal/plastic halves. Use a plastic spudger to gently separate the cover – watch for small springs that can fly out. Take a photo of the interior before touching anything.
Locate the Faulty Part – If you heard grinding, look at the upper fuser roller gear (white plastic, about 1 inch diameter). Rotate it by hand – if it spins freely instead of turning the roller, the bushing is worn out. If the gear has missing teeth, that’s the problem.
Replace the Upper Fuser Roller Gear – Use a flathead screwdriver to gently pry off the old gear from the roller shaft. Slide the new gear (e.g., $1.07 Upper Fuser Roller Gear with Bushing) onto the shaft until it clicks or sits flush. Make sure the D‑shaped hole aligns with the flat side of the shaft. Spin it manually to confirm the roller turns.
Inspect and Replace Other Parts (if needed) – If the thermistor was open, unscrew the bracket holding it, pull out the old thermistor, and insert the new one. Reconnect the two‑pin connector (usually red and white wires). If the thermal fuse is blown (infinite resistance reading), replace it with an identical rating fuse (often 130°C, 240V).
Reassemble the Fuser Housing – Align all springs and clips. Tighten screws in a criss‑cross pattern to avoid warping the housing. Do not overtighten. Reinstall the fuser assembly into the printer.
Common Mistakes to Avoid:
- Forgetting to reconnect the thermistor wire – If you leave it unplugged, the printer will show the same error.
- Installing the gear backwards – The gear teeth should mesh with the printer’s drive gear. Double‑check orientation by comparing with the opposite side.
- Leaving loose screws inside – They can short circuit the heater and blow the main board fuse.
- Not cleaning excess toner dust – Use compressed air or a soft brush to remove toner from the fuser interior before reassembly.
After the Repair — Testing & Verification
- Test Print – Load a plain sheet of paper. Send a clean print job (e.g., a text document). If the fuser error no longer appears, the repair is successful.
- First 10 Pages – Watch for any unusual sounds (grinding, ticking). Listen closely to the fuser area. A few clicking noises during warm‑up are normal as gears engage.
- Check Print Quality – Look for smudges, wavy lines, or uneven fusing. If you see a repeating defect every 3.14 inches (roller circumference), the roller surface was damaged during repair – you’ll need to replace the roller sleeve.
- Monitor After 1 Hour – Run 20 more pages (or the printer’s warm‑up cycle). If the fuser error returns, you likely have an electrical issue (main board or heater) not the gear.
- Final Verification – Print a test page that covers the entire sheet (e.g., a solid black page). If the print is consistent and the fuser doesn’t emit a burning smell, the repair is fully successful.
- Keep the Old Parts – In case you need to compare gear orientation or thermistor type for future repairs, store them in a bag.
Parts You’ll Need
Here are the parts that match this repair. Click the link to check the current price on AliExpress.
| Product | Price |
|---|---|
| Upper Fuser Roller Gear with Bushing … | $1.07 |
| JC66-03080A JC61-03755A Upper Fuser R… | $1.19 |
Prices and availability are subject to change on AliExpress.