Is your printer leaving wrinkled paper, smudged toner, or showing error codes like 50.1 Fuser Error? This guide diagnoses the exact fuser assembly failure, explains why it happens, and gives you a step-by-step repair path. We cover specific symptoms, root causes, and whether you should fix it yourself or call a pro.
What’s Happening — Symptoms in Detail
What You’re Experiencing
Your printer is acting up, and it’s likely the fuser assembly. Here’s exactly what you’ll see and hear:
Error Codes on Screen: Common codes include 50.1 Fuser Error, 50.2 Fuser Error, 50.3 Fuser Error, or Error 50.4 Fuser Error. Some models show ‘Replace Fuser’ or ‘Fuser Malfunction’. On HP printers, you might see ‘79 Service Error’.
Paper Jams: The paper stops halfway out, often with a burnt smell. The jam is usually near the fuser, not the input tray. Some users report the paper is stuck and won’t release.
Wrinkled Paper: Pages come out with deep creases or wave-like wrinkles. This happens because the fuser rollers aren’t applying even pressure.
Smudged Toner: Toner rubs off when you touch the page. This is because the fuser isn’t heating properly to melt the toner into the paper.
Strange Noises: A grinding, clicking, or squealing sound when the printer tries to feed paper through the fuser. The gears or bushings are worn.
When It Happens: The problem usually appears during a print job, especially on thick paper or envelopes. It may start as occasional wrinkles and worsen over days. Some failures are sudden—one page prints fine, the next causes a jam.
Progression: In most cases, the issue gets worse over time. A slight wrinkle becomes a full jam. Error codes may appear intermittently at first, then become constant.
How to Diagnose the Problem Step by Step
Step-by-Step Diagnosis
You can diagnose this with basic tools. Follow these steps in order.
Quick Check (5 minutes)
Check Error Code: Look at the printer’s display. Write down the exact code (e.g., 50.1). This tells you if it’s a fuser error or something else.
Listen for Noises: Run a test print. Listen for grinding or clicking from the rear of the printer. Normal: a smooth whirring sound. Abnormal: any metallic scraping or repetitive clicking.
Inspect the Output: Look at the paper as it exits. Normal: flat, crisp print. Abnormal: wrinkles, toner smudges, or burn marks.
Detailed Check (15 minutes, requires screwdriver)
Remove the Fuser Assembly: Unplug the printer. Open the rear access door. Locate the fuser (usually a metal box with two rollers). Press the release levers and slide it out.
Spin the Upper Roller by Hand: Use your fingers to spin the upper fuser roller. Normal: smooth, even resistance. Abnormal: rough spots, sticking, or no rotation at all. If it doesn’t spin freely, the Upper Fuser Roller Gear with Bushing is likely seized.
Check the Roller Surface: Look at the upper fuser roller surface. Normal: smooth, slightly tacky, no damage. Abnormal: cracks, blisters, chunks missing, or glazed spots (shiny, hard areas).
Inspect the Lower Roller (Pressure Roller): Look at the lower roller. Normal: firm rubber, no flat spots. Abnormal: flat spots, cuts, or debris embedded.
Check the Thermistor: Find the small sensor touching the roller (a round component with two wires). Normal: clean, no cracks. Abnormal: broken wire, cracked sensor, or toner buildup on it.
Test the Fuser Lamp (Advanced): Use a multimeter set to ohms. Disconnect the fuser lamp connector. Measure resistance across the lamp pins. Normal: between 10 and 100 ohms (varies by model). Abnormal: infinite resistance (open circuit) means the lamp is burnt out.
Why This Happens — Root Cause
Why the Fuser Assembly Fails
Mechanical Wear
The upper fuser roller has a gear and bushing at one end. Over time, the bushing wears down from heat and friction. This causes the roller to wobble or seize. The gear teeth can strip, especially on HP LaserJet models like the M402, M404, MFP M227, and Samsung models like the ML-3310, SCX-5639.
Heat Degradation
The fuser operates at 180–220°C (356–428°F). This heat dries out the roller’s rubber coating, causing cracks and blisters. The pressure roller develops flat spots from sitting idle under pressure. This is common on printers left on for days.
Toner Contamination
If the printer uses non-genuine toner, it may have a lower melting point. The excess toner can stick to the fuser roller, creating hot spots that cause uneven heating and paper jams.
Electrical Failure
The fuser lamp (or halogen lamp) can burn out. This is a sudden failure—one print works, the next doesn’t. The thermistor can crack, causing the printer to overheat or not heat at all. This triggers 50.x fuser errors.
Conditions That Accelerate Failure
- Heavy printing (500+ pages per day)
- Thick paper or envelopes (more stress on the rollers)
- Dusty environments (particles get into bushings)
- Non-genuine toner (low melt point, more residue)
- Power surges (damage the fuser lamp or control board)
Can You Fix It Yourself?
Can You Fix It? Honest Assessment
- Difficulty: 3 out of 5 (requires careful disassembly and handling of hot components)
- Time Required: 30–60 minutes (first time), 15–30 minutes (experienced)
- Skill Level: Intermediate — you need to use a screwdriver and possibly a multimeter. No soldering required for most repairs.
- Risks:
- Burns: The fuser can stay hot for 15 minutes after use. Wait for it to cool.
- Electrical Shock: If you probe the lamp while plugged in (don’t!). Always unplug first.
- Broken Plastic Clips: Fuser housings have fragile tabs. Use a plastic pry tool to avoid snapping them.
- Mistaking the Problem: You might replace the fuser, but the issue could be the main board. Diagnosis step 9 (multimeter) is critical.
- Tools Required:
- Phillips head screwdriver (#1 and #2 sizes)
- Flathead screwdriver (small, for prying)
- Multimeter (for lamp test)
- Plastic pry tool (recommended)
- Tweezers (for small connectors)
- Thermal paste (if replacing thermistor)
Cost Breakdown — DIY vs Professional
DIY vs Professional: Real Cost Comparison
DIY Parts
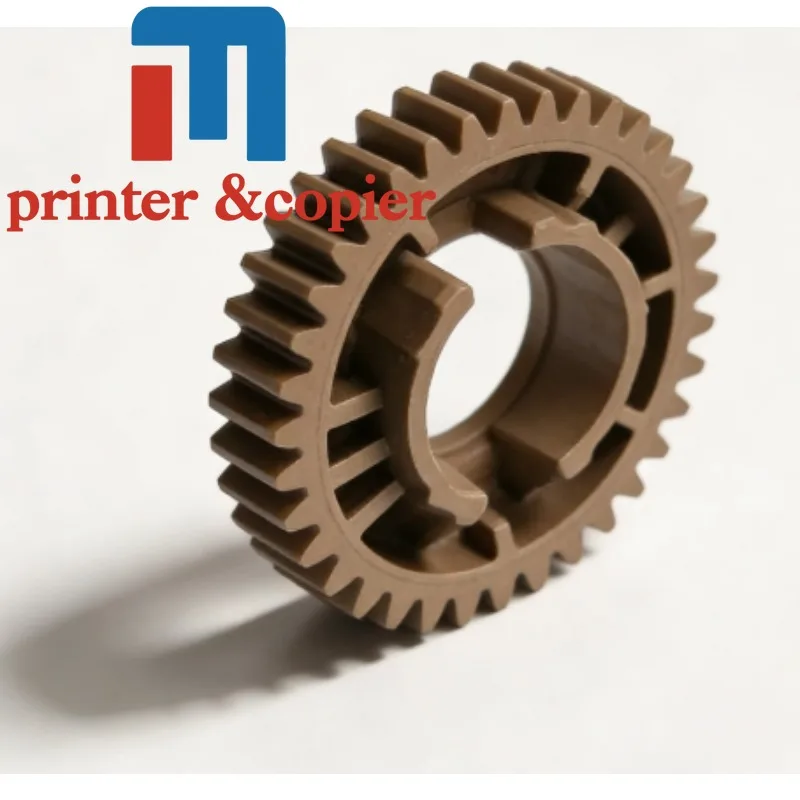
- Upper Fuser Roller Gear with Bushing — $0.97 (Part #1). This is the gear and bushing that often seizes. Replaces the worn part on the roller.
- JC66-03080A JC61-03755A Upper Fuser Roller — $1.08 (Part #2). This is the complete upper roller assembly with gear and bushing. A better option if the roller surface is also damaged.
- Total DIY Cost: $0.97 to $1.08 for the most common failure point.
- Additional Parts (if needed):
- Fuser lamp: $5–$15
- Thermistor: $3–$8
- Complete fuser assembly: $20–$60 (aftermarket) or $80–$150 (OEM)
Professional Repair
- Diagnostic Fee: $30–$50 (often waived if you proceed with repair)
- Labor: $80–$150 per hour (1 hour minimum)
- Parts Markup: 50–100% over retail
- Total Professional Cost: $100–$250 for a simple gear/bushing replacement, $150–$350 for a full fuser assembly replacement.
When to Skip DIY
- If you get error code 50.2 or 50.3 (fuser lamp or thermistor failure), and you don’t own a multimeter or are uncomfortable with electrical testing.
- If the fuser housing is cracked or has melted plastic (requires full assembly replacement).
- If your printer is under warranty (DIY voids it).
- If you’ve already replaced the fuser once and it failed again — the main board may be at fault.
Repair Process Overview
Repair Process Overview
Major Steps
- Unplug the printer and wait 15 minutes for the fuser to cool.
- Remove the fuser assembly from the printer (see diagnosis step 4).
- Disassemble the fuser: Remove the side covers (usually held by 2-4 screws). Note the spring tension on the pressure roller — take a photo before removing.
- Replace the Upper Fuser Roller Gear with Bushing:
- Remove the old gear by pulling it off the roller shaft. It may be pressed on.
- Clean the shaft with isopropyl alcohol.
- Apply a drop of silicone grease to the new bushing.
- Press the new gear onto the shaft until it’s flush.
- Replace the Upper Fuser Roller (if using Part #2):
- Remove the old roller by sliding it off the metal core.
- Slide the new roller on, aligning the gear with the drive mechanism.
- Check the thermistor: Clean it with a dry cotton swab. If cracked, replace it.
- Reassemble the fuser: Reverse the disassembly steps. Ensure all springs are correctly positioned.
- Reinstall the fuser into the printer.
- Run a test print.
Common Mistakes and How to Avoid Them
- Mistake: Forgetting to reconnect the thermistor wire. Avoid: Double-check all connectors before closing.
- Mistake: Overtightening screws on plastic covers. Avoid: Use hand-tight only.
- Mistake: Installing the gear on the wrong side. Avoid: The gear should align with the printer’s drive gear — look for wear marks on the old part.
- Mistake: Using WD-40 on bushings. Avoid: Use only silicone grease or high-temp lithium grease.
After the Repair — Testing & Verification
After Repair — Verification
- Test Print: Run a single-page test print first. Look for:
- Flat paper with no wrinkles
- Crisp toner that doesn’t smudge when rubbed
- No error codes on the display
- Listen for Noises: The fuser should operate silently. Any grinding or clicking means a gear is misaligned.
- Check Temperature: After the test print, carefully touch the fuser cover (not the rollers). It should be warm, not scorching hot. If it’s cold, the lamp isn’t working.
- First Few Hours:
- Print 10–20 pages of normal text to break in a new roller.
- Watch for toner dust on the output — this means the roller isn’t fully seating.
- If you see error code 50.1 again, the thermistor may be faulty or the main board needs replacement.
- Long-Term Check: After 100 pages, inspect the fuser rollers for uneven wear. A properly repaired fuser should last 50,000–100,000 pages before needing service again.
Parts You’ll Need
Here are the parts that match this repair. Click the link to check the current price on AliExpress.
| Product | Price |
|---|---|
| Upper Fuser Roller Gear with Bushing … | $0.97 |
| JC66-03080A JC61-03755A Upper Fuser R… | $1.08 |
Prices and availability are subject to change on AliExpress.